Thursday, December 23, 2010

Project Restart: Not exactly sugarplums


At some point during the post-fire chaos, the cleaners dumped my worm towers (!), so now that's all [mostly] resolved, I've been trying to rebuild my herd. Or is it a horde? Whatever, Verne (red) and Cousin Clem (blue) were scattered from their containment some time during the past month, and I want them back!

Didn't have any cured bokashi--the cleaners again--but dried leaves a-plenty had fallen, so I filled a planter with those and poured in a bit of molasses water. Which is just what it sounds like, a teaspoon of blackstrap in a quart of tap. And having observed Verne's preferences for a while now -G-, I stuck that planter where the worm towers had been, with another planter full of rescued soil on top to hold in moisture and keep out possums and coons.

When I checked a few days later, there were worms in the planter. Not as many as had populated the towers, but enough to start again even if I hadn't had other colonies on other sites. My worm-ID'ing skills aren't all that well honed, and I did not take this chance to practice, so no real idea whether Verne or Clem showed up to the party first. Thinnish, reddish, photophobic and where I can reach him--whichever he is, I'm glad to see him.

I'll be plantering the usual mix of dried leaves and cured bokashi as soon as I have some bokashi cured, and maybe a few other tests--diluted kombucha with and without molasses; EM-1 ditto; maybe some soaked EM bokashi bran--but I think all those extra microbes might be necessary only where the carbon source isn't already so rich in diversity as fall sweepings. [Someone remind me to grab a bag of shredded paper from work!] But for now, I have a "recipe" that works for me, and it's a whole lot less labor than the apricot shortbread my family makes for Christmas.

Or gingerbread. Though if you were making that, you'd have the molasses right there...

Happy worming, and happy holidays,

DSF


[image from International Molasses.com.]

Sunday, December 12, 2010

Fail a bucket in ten easy steps


Now and then, I put together a starter kit for folks interested in trying bokashi; nothing elaborate, just a nested-bucket set with spigot, a bag of EM bokashi bran, a potato masher, and really simple instructions. (Usually one of my Tidy Cat bucket-sets, as I think the press-to-seal lids are a decent compromise between ease and security, but really, it's whatever I have on hand.)

I try not to ask after those buckets too often, but when my friend in the multi-generation-household offered to return their buckets to me, I had to know! Turns out one of the older members of the family found a new way to fail a bucket.

#11 Hide the thing! Immediately after adding a large quantity of fresh waste, including “heavy” items (meats, dairies, oils) but before the addition of any bokashi bran. And hide it so well that the reservoir cannot be tapped, so the less-than-optimal leachate backs up into the fermentation chamber.

In a word, blecch.

Suppose I ought to provide a few numbers to go with that one, yeah? Let's see...

#1. Skipping the drain.

Commercial bokashi buckets have a false floor, mesh sieve, or grate above a reservoir--but when folks decide to try DIY, too many decide not to bother with that bit. Yes, it is possible to ferment dryish kitchen waste without a reservoir, but it's not as simple as all that.

#2. Inadequate seal.

The microbes in EM bokashi, and in most of the homebrew/silo bucket models, are selected to work in the absence of fresh air. By contrast, the random microbes already present in and on food wastes do just fine in an oxygen-rich environment. Bokashi works on a dominance principle--the microbes we want need to out-grow the others, so we need to provide them the right conditions for that. Lids matter! As does the fit between your nested buckets, if you're using them, and the spigot. Not to mention, an improperly seated spigot will lead to bokashi juice escaping, a scenario to be avoided at all costs.

#3. Not enough bran.

I haven't heard of anyone completely forgetting bran in a bucket, but many neglect to add it at least daily, or with every inch* of food waste added, or the extra “scoop for luck” I think is advisable with heavy or strongly odorous items. My rule of thumb: if it smells bad, add more bran! And see #5 below.

#4. Forgetting to tap.

As with the reservoir issue above, this is one of those steps people don't always understand is required, or believe is as frequently necessary as it can be, until it's too late. As in, when their neighbors are complaining about the stench. Bokashi juice, or whatever you care to call bucket leachate, should never be allowed to back up into the fermentation chamber, and really ought to be drained twice a week or so regardless of volume (though, depending on your bucket contents, you might have almost none, or have one so rich with microbes it will keep fermenting until your bucket is ready for the next stage, with no ill effects from sitting. It's just...how do you tell, and do you want to risk it? Simpler to drain!)

#5. Unmashed bucket-stuffs.

I include a potato masher with my bokashi starter kits. It's not that they work any better than some other tool, but they're easy to acquire, cheap, and washable. Mashing serves three purposes: it excludes air, expresses excess moisture, and increases contact between the inoculant (bran or liquid) and the foodstuffs.

My local bokashi retailer, on the other hand, recommends stirring the top layer of food wastes to ensure appropriate contact between the microbial inoculant and foodstuffs, so I assume their kits include some sort of spoon. Not sure where they stand on moisture and pressure, but I do know there have been some issues with folks mashing their foodstuffs a bit too hard, and damaging the grates... Well, let's call this “unmixed” for them.

The next few ways to fail could, I suppose, all be lumped into one point: adding things you're not supposed to. But I thought they each deserved their own numbers. There aren't too many things you can't add to your bokashi bucket, but once you've gotten used to diverting all your kitchen waste to one spot, it can be hard to remember what doesn't go there! Generally, however, quick ways to fail your bucket will include:

#6. Adding synthetics/chemicals.

No synthetics ever belong in the bokashi bucket. No plastic**, no styrofoam, no silicone, no odd chemicals. And if you've used a paper towel to mop up the cleaning compound from your stove, that paper towel is now ineligible for the bokashi. (The usual retailer recommendation is to not put any paper in the bucket, but in small pieces it won't hurt, it just takes up space so your buckets fill up faster. Don't add it if that's a concern so long as you have some other landfill-diversion tactic for the stuff.)


#7. Drowning the bokashi: adding liquids

Our major microbial triad and all its fellows have a preferred habitat, and it's not in a bucket at 100% humidity! (Can't blame the things. -G-) Pour liquids down the drain or dilute and add to a compost pile, or dilute still further and use to water plants, depending on what those liquids might be, but as a rule, if it's pourable it's not for bokashi-ing.

Of course, if you have a stew or some split pea soup past edibility, those are close enough to solid that they're getting bucketed, no question. Add extra of whatever microbial inoculant you're using, mash or mix is up well, and tap the reservoir an extra time or two. But the leftover turkey broth? That gets fed to your drain if you have no better options.

#8. The opposing faction: molds/spoiled materials.

A really healthy bucket can overcome a small quantity of mold, but not much. If it's slimy or turning colors--any colors other than simple aging-past-edibility yellow or exposed-to-air brown--it's not for the bokashi bucket.

#9. Bugs!

If you're tossing that bag of fruit because it's got fruitflies, it does NOT go in your bokashi bucket. The things will spawn in there, and it's nasty. Uber-recyclers might freeze the material first, to kill the bugs, and then ferment it; I'm likely to toss it into the bamboo thicket for nature's clean-up crew, or into the apartment's outdoor compost bin, with several inches of dried leaves for topping.

#10. Abandoning the bucket.

Bokashi is relatively stable, but not eternally pickled. At some point, it does have to be extracted from the bucket, or items must be added to it, or it will rot. And you don't want to know what that's like. Really. Don't believe me? Ask Bentley.

And a bonus, unnumbered because it's not really under your control:

#X. Bad bran/inoculant.

These things happen. The EM-1 might have frozen during storage or shipping; the bran might have been contaminated; the bags, bottles, or boxes in which your preferred retail packages things might have picked up some microbes transferred from an inadequately cleaned container formerly used to transport garbage. Who knows?

EM bokashi bran should smell like one or more of its source materials and near relatives: Bran, molasses, yeast, vinegar. A hint of alcohol is possible, particularly in liquid inoculant, not ideal but okay. Any EM product should look like its source materials, too--liquid EM is brown, typically darker than cider vinegar but lighter than molasses; EM bokashi bran is visibly identifiable as bran or a mixture of bran and hulls or whatever, and either dry or damp-looking, in which latter case it may have some white acetobacter growth. If your bran is any other color, it should not be used! Blue, red, green, and black are not acceptable.

So, okay, the post-title's a bit misleading. I don't suppose you'd need to work your way through all ten-plus to fail a bucket--but I'd love to see--from a distance—the results if someone were to try!


For the rest of us, let's call this ten-plus things to avoid lest our buckets fail.

Happy bucketing,

DSF


[image from my files, sorry, no credit noted. If you know, please tell me!]

Tuesday, December 7, 2010

Is that anything like a Tupperware party?


Local bokashi-and-more company Microbial Earth is hosting a Bokashi Party this evening. I'm still working on the apartment, but decided I could take the time off to attend this--hey, what sort of bokashi blogger would miss it?

Just need to rememember that I'm a BROKE bokashi blogger, lest I end up carrying away two of everything they're trying to sell...

Edited to update:

Less Tupperware and more "round table"; though there were products available (I bought a bag of their latest bran, about which more later if I remember), the focus seemed to be on learning what customers and prospects most wanted to know. And based on that information, they've started offering small classes on various subjects. At which, presumably, there shall be products available. -G- Hey, guys--if you schedule one about worms and bokashi, I'll be there wallet in hand! You folks have those African ones, IIRC, and I don't. Yet.

Sunday, December 5, 2010

Home Grown Tomato


(photo by a Cabinet Gardener)

One of the things I love about gardening: the plants keep growing even while you're dealing with other things. A while back, I posted about the Cabinet Garden, a low-cost, low-tech, low-maintenance assembly I set up some miles away from my main site. This tomato was picked today--December Fifth!--from that garden. It isn't the prettiest tomato ever, and there are only a few still on the vines, but this is my first year trying for a separate fall crop for tomatoes, and I have to say I'm hooked!

Nearly a month ago, at the year's first frost-warning, I cut some fruit-heavy vines to invert and hang, an old salvage technique that's supposed to result in better flavor than picking the tomatoes and force-ripening with sunlight or in a bag with an apple. But the harvest-window for those is apparently quite short, the fruit going quickly from ripe to only-usable-for-seeds. Or maybe in place of sun-dried? Today's tomato and its pink-cheeked still-ripening brethren are the tomatoes I left in place, as they weren't large enough to salvage. But I covered the plants, that night and again during our recent freezes, and the plants have not yet succumbed.

Tomatoes in December. Without supplemental lighting, heat, hand-pollination, grafting, or any of the rest of the interventions.

Two words:

Wow.

And,

Yum!

Thursday, November 25, 2010

Starting Over


There was a fire at the apartment, and between the fire, fire fighters, and presumably helpful cleaners afterwards...well, let's call it a fresh start.

Sigh.

Tuesday, November 9, 2010

From teh Interwebs: A Repulsive Idea


An experiment I wouldn't have done, but a question I get asked fairly frequently--now I can just tell folks to go read about Heather's Repulsive BSF Adventure.

Blecch.

Sunday, October 31, 2010

After the bucket: Good bug, bag bug?


Even on Hallowe'en, I'm not inclined to frighten anyone too badly, so no appropriate insect photo today. Besides, I like Dr. Seuss!

This fall season, I’ve been busy with non-gardening things—hence the dearth of posts—but the garden’s been ticking along with minimal care, as it’s designed to do. Bokashi is still the right solution for my situation, in large part because it, too, needs only occasional attention: If you’re not adding new organics, the household bucket can stay closed up and ignored for a couple of weeks (always assuming a deep enough reservoir or sufficient absorbent material). And as an added benefit, forgetting to take out the trash before you leave on a business trip no longer results in a stinky welcome home. -G-


Likewise, my post-bucket techniques are fairly hands-off, except for the small-batch hot compost, and that will simply convert to a slower process if you forget the hands-on part. But this week, I had a ton of garden work to do, to get ready for the advent of relatively cold weather. So I checked on some of my post-bucket setups--


--and wasn’t really surprised, though I was disappointed, to discover that only the one with the critters in it was ready. My tolerance for outdoor macro-digesters just isn’t all that high, though it’s far greater than for the indoor [zero] level. Some things, I cannot abide at all. Others I can reluctantly allow to live so long as they don’t directly bother me. Still others have me crying for the Flit!


Verne the composting worm is always welcome. (Hey, I shelled out good money for him. Several generations ago.) His cousin Clem, better known as the Indian Blue worm, is also welcome whenever he chooses to appear, though if he wanders off again, that’s okay, too; I know he’ll be back when there’s food to tempt him. George the earthworm is ever a surprise, but hardly an unwelcome one; I’ve read that earthworms don’t do well in compost bins, but apparently he’s as illiterate the rest, happily breeding in the mismatched yard waste compost cans and hatching out wherever that compost is applied.


It’s the other detritus-clearers that I have issues with. Sowbugs and so on may eat seeds and sometimes sprouts, so if they’re in the compost, I have to solarize or dry it before use. [This may not be as much of a concern for non-container gardeners, but that does me no good!] BSFL eat large quantities of the organic matter, which results in lesser volumes of finished compost for me to use. And piles of woody matter, even contained piles, attract insects the typical urban dweller really doesn’t want to see:


Cockroaches.

Also ants, mites, springtails, etc. But, really, compared to those skittering things, do the rest seem so bad? Even Repulsive might be less disturbing than roaches…


Nah.


My untowered vermidirt experiment worked just about like I’d expected it to: though I added no worms to my material, worms were present, as were BSFL, sowbugs, woodlice, and geckos with their spots stretched out from weight gain -G-. The very top layer beneath the weight was still visibly uncomposted; beneath that, an upper layer finished enough to use as mulch, and some eggshells and twigs remaining even in the lower, completed layer. Also a couple of snails clinging to the side next to the weight (not a waterproof cover, just something to keep the possums and coons out), two or three earwigs, and as many of those nasty six-legged things it pains me even to think about or type.


Oddly, one of the outdoor roach species doesn’t disturb me at all--I’ve only ever seen it outdoors, it doesn’t look much like the disgusting indoor ones, it’s extremely photophobic, and it’s common where old wood’s undisturbed, so I see it mostly running away from me when I’m cleaning up future garden space. By far the preferred view, but not welcome in a planter! Particularly considering that "away" means either deeper into the material or into another planter nearby (space constraints mean that many of my planters touch).

The other one is worse, so undeniably a cockroach that I’m likely to run screaming, or at least go find something else to do.


But the ten gallon planter with all that disgustingly thriving life held eight gallons of finished compost plus a bit of nutritive mulch, at a time when my plants need compost and mulching. This method can be used in any container and takes advantage of whatever species may be present. All it needs is a layer of soil and a weight on top, a container with solid sides and bottom drainage, and a place to rest out of the way. It can be stacked, but need not be. Placement is equally flexible: sun or shade, on soil or grass or even concrete so long as it’s within a foot or so of life. It’s a slow-compost process with hot-compost speeds, thanks to bokashi. Not as fast as managed hot compost with bokashi, but comparable to the usual figures for hot compost. Less than three months for this split harvest.


Imagine the ad pitch: Any size, any volume, any container, anywhere (outside). Slow-compost ease, hot-compost speed. Sounds great! But the fine print on this one might be too great a barrier for me. Roaches and grubs and earwigs, oh my!?


If it makes the plants happy...maybe. But I think I’m happier with my towers, even if they do take more infrastructure.


DSF

Monday, October 4, 2010

What makes a good bokashi bran?


Some posts just fall through the cracks—I don't have a good image, there's something else I'd rather do, I'm missing a bit of information I'd like to include, whatever. But just sent me a message reminding me that there's a whole small set of posts I've neglected to publish!

Oops.

I'd intended to put up a few reviews of various retail EM bokashi brans. Still mean to, I guess, though I'm not currently within reach of those files. Haven't tried all the available options yet, but the handful I've been through have been different enough to make comparisons worthwhile.

Beginning with the cost. The fact that EM bokashi costs anything is a not inconsiderable barrier to adoption. Expensive designer buckets and how-much-plus-shipping? bags of magic dust don't always seem like a reasonable alternative to current practice. So cheaper-per-unit bags get my vote over more expensive ones, of which there are a surprising number.

So do local products, assuming there's no or only very little difference in total price. (I'll pay a bit extra for the instant gratification factor, but not very much.) Not being vigilant enough to police manufacturers for sustainable practices, I'll skip the whole carbon-footprint bit for now.

As yet, I haven't chosen not to buy an inoculated bran because of its base, but I wouldn't elect to buy one with sawdust in its ingredients. Personal preference. I'm a gardener and just don't want to see sawdust clinging to my sweet potatoes at harvest. Bran composts quickly.

Speaking of preference, I'm much more inclined to purchase from a retailer who lists the ingredients—including the specific microbes in the culture together with that culture's source.

Assuming all other variables were equal, I'd buy the one packaged in a compostable container. The pictured rice-bran ones comes in a corn plastic shell that will decompose in the bokashi bucket! But, again, that's not too high on my list.

So what's up at the top, just beneath the all-important cost?

1. Moisture: Packaged bokashi bran is described as dry and shelf-stable, but it isn't always nor equally so. If I'm springing for the pre-made stuff, I want it dry! Dry enough to store some in my hiking kit, or to keep in a starter-bucket in my car for a week or two. Dry enough that it won't grow acetobacters in the bag to startle the poor unsuspecting victims new bucketers to whom I'm delivering those welcome-to-bokashi gifts. And, it goes without saying, dry enough that it won't spoil before I get a chance to use it.

2. Scent: Bokashi bran from Hawaii doesn't smell the same as bokashi bran from Texas, even if the ingredient lists are identical. Nor does bokashi from every retailer in a region smell the same. I found one retail bran unacceptably acrid, though it worked perfectly well and the less-vinegary character might make it a better choice for some. As well, there's a difference in scent between wheat bran and rice bran, though I don't much care which is used. Not sure how to quantify that, but it's worth mentioning, if only so other people know the variance exists.

3. Speed to success: Fresh bokashi bran starts to work faster than dried, but that's a matter of hours, not days. Bokashi that's been improperly stored (frozen or exposed to air, I guess) takes much longer to work, and may require more inoculant as well. The retail bran that I wasn't sure was working until the second day isn't one I'll be buying again even though it did successfully ferment a bucket. Quick evidence of success seems like a good thing--though not at the expense of shelf-life. Of course, lasting evidence of success is kind of necessary, too; I rate all the EM items on how well they can handle small volumes of things the retailers tell you not to add; how long it takes the deodorizing microbes to conquer strong aromas; etc.

4. Directions: now and then I'll buy a bag of bran for someone else, not always for a bokashi bucket. Folks with cats willing to use compostable litters can mix EM bokashi bran into the box, and it's useful in the dog-yard as well. I don't insist that the packaging say that, but it really should say something about use, considering how unfamiliar most people are with the product. EM bokashi bran is not a term that can stand without definition, not yet. Ideally, the package lists how much kitchen waste it can be used to process, in gallons. And the fact that something has to be done to that processed/pickled waste afterward.

5. Add-ins: I haven't decided how I feel about these. Some of the EM bokashi retailers have extended their brands, so they have different brans for different situations. Minerals in which a region is known to be deficient; seaweed for agricultural use; etc. At the moment, I don't buy them, so can't rate them, but they, too, belong on the list of criteria to consider. For later, since I don't seem to be ending this project any time soon. -G- At some point, I'll probably try the EM mix with extra rhodobacters. I would not buy a bokashi bran with added salt (not even sea salt), refined sugar, synthetics or animal products--but I haven't yet seen any of those anyway.

My perfect packaged EM bokashi bran? Made locally, and widely available on store shelves as well as online; comes packaged dry in a waterproof compostable container; contains only EM-1 (or the extra-rhodobacters one), with molasses, rain-, spring- or well-water, bran, and maybe a responsibly sourced mineral or two; costs no more than $5/bucket-worth in today's dollars; has clear instructions including the fact that bokashi is not a complete composting solution!

This isn't a tall order. Several of the various retailer products I've tried have come close. They all fail on that disclaimer; only two have been really dry so far (plus one retailer where the first bag was dry but the second wasn't); and few are as forthcoming about ingredients as I would like, though the retailers are generally pretty willing to answer questions.

It's still a relatively new industry, so I figure one of these days someone'll score perfectly. At which point, I may reconsider my usual practice of making my own EM and IMO bokashi brans, though probably not. But I will certainly celebrate by buying a few bags to keep on hand!

DSF

Thursday, September 23, 2010

Beyond Molasses


image from The Nourished Kitchen. The Internet is an amazing place...

Molasses is used as a “carbohydrate booster” in hydroponics, and dry molasses is sold as a “nutrient-rich soil booster” at one of my local feed stores*. It's more desirable than simple sugars for use in gardening because of its relatively high concentration of minerals, and particularly because of its mineral-chelation effect—skipping the science, that means molasses can provide micronutrients to plants with no danger of toxic overload of those nutrients, and dramatically improve plants' ability to use other nutrients already present, thus lowering the need for fertilizers.

Yikes. I've been spending too much time around eggheads lately. -G- Where was I? Molasses, alternatives to, right.

Don't get me wrong, I love molasses. In the kitchen and the garden both (ginger snaps and AEM/AIM come immediately to mind). But judging by the number of plaintive queries I've seen, non-US gardeners, especially, may not be able to find molasses. And, too, I'm fundamentally opposed to buying anything when I have something already that will do as well, so...I started playing.

Refined sugar? No!

When growing microbes, refined sugar promotes different populations than the more complex molasses; seeing as EM was designed around molasses, I wanted something similar.

Honey? Nope.

Honey, if not contaminated, will not spoil. Anti-biotic, anti-microbial, not at all what EM needs.

Maple syrup? Way too expensive to use for this, so I didn't even try.

Stevia? Aspartame? Xylitol? No, no, no.

Stevia is a sweetener, but not a sugar. Artificial whatevers I'll leave in the lab, not my garden. Xylitol, and sugar alcohols generally, seem to be harder for microbes to process than the ultra-refined simple sugars, but not complex enough to sustain sufficient microbe-generations for my needs. (Nor for kombucha, according to a site I cannot now find to link. Ah, well.)

Molasses is a waste product derived, generally, from processing sugar cane. The cane is harvested and stripped of leaves, then pressed/smashed for juice. That juice is boiled and processed to extract sugars; molasses is what's left over after the sugar production. Different grades and categories of molasses indicate the processing methods undergone. Blackstrap molasses, which is what I use, has the best nutritional profile for humans and animals; my microbes and plants seem to like it, too.

Jaggery? Palm sugar? Piloncillo? Yes.

Jaggery, as I know the term, can mean the solid sugar cane remnants after the crushing, or a sugar made by evaporating the juice of date palm sap, or any unrefined, largely unprocessed sugar. Piloncillo is more a reference to the cone-shape than the make-up, which is simply unrefined sugar, typically made of evaporated cane juice. So, yeah, any of the above makes a decent substitute for molasses in AIM. Their nutritional profiles may not be the same, but they're all complex enough to grow vigorous effective-microbe colonies. Still too early to see how well it compares to blackstrap molasses in the garden, but so far, no difference has been observed.

Sorghum molasses?

I find it hard to imagine an area that has sorghum molasses but no blackstrap. Perhaps a household, though, so I looked it up. Turns out, this is more properly labeled a “syrup,” lower nutrient concentrations than real molasses, perhaps not quite so refined as table sugar. I wouldn't use it in my AIM, but I'd be curious as to other folks' results.

And a bonus item:

Dried molasses? Sadly, not for AEM/AIM. Turns out, the stuff at the feed store is actually molasses sprayed on “grain waste.” So, maybe for EM/IMO bokashi bran!

Until the next ferment,

DSF


*Yes, Austin really is in Texas. Sometimes that's hard to remember. Then you realize that you live within easy riding distance of three different feed stores, two of which are chains.

Thursday, September 16, 2010

What's worse than vacation pictures?


How about bad compost-ana shots? No, I don't mean failed compost--just bad photos. Since it seems I can't keep even a really good camera alive for more than two years, nor take a single good photo in that time, I went with the cheapest little keyfob camera I could find.

Hey, if I can't see Repulsive through the tiny little coke-glass viewfinder, maybe I won't wince. As much.


This is what my tower-made vermicompost typically looks like. Unfiltered, not wet, solid enough to cake but not heavy. No worms, as they've moved up to the next planter, but though I never see any cocoons, they must be there, since baby worms hatch in the bags if I package this stuff up.


This is vermi-mud. Those folks who water their wormeries are probably familiar with this; in my case, it's the result of heavy fall rains backing up a reservoir and then some. It's been drained and drying for nearly a week now...


This is what the BSFL folks have started to call "grub pudding." I tried to get a picture that shows the little craters and all the tiny grubs still sluggishly moving, but if I didn't succeed, I don't think I'll mourn long. That blur in the lower left corner is a grub squirming toward me! Yecch. (-G-)

Grub pudding may look a lot like soggy vermicompost, but they are not the same.

The pictured pudding is finished--the grubs still present will die if I don't do anything, as there isn't sufficient nourishment remaining for them to mature, and it's too warm and too wet in that container for them to go dormant. The grubs can't process this material any further. But that isn't to say this is a finished compost.

A general-purpose dictionary might; but in a gardener's lexicon, compost is safe to use in nearly all situations and beneficial ditto. Oh, there are exceptions, plants that need to be starved and so on, but say compost to the average gardener and the matching concept is of a homogeneous, stable, variably textured but typically humus-like material rich in plant-accessible nutrients, that can be applied as top- or side-dressing, used as mulch or mixed into the soil, with no safety concerns and few contraindications.

Grub pudding is not stable; adding it to plantings will usually result in nutrient sequestration, seldom (if ever!) a desired outcome. Nor is it likely to improve soil tilth, another of compost's benefits. Grub poo is too fine to hold air, though water it can do. Then there's the nourishment concern; ignoring the sequestration issue, there are some plant-accessible nutrients, but how many and of what sort can be difficult to determine. In large part, it depends on what you fed the grubs; also, on what non-food techniques you employ. And as if that's not discouraging enough, there may be undesirable bacteria in finished grub pudding, also depending on what you fed the grubs, and how large the colony*.


Speaking of feeding. This is worm-food waiting to be fed. UCG from a coffeeshop, dried leaves from a chem-free neighbor, and AIM. Poor photo even in context, I know, but the leaves are pale thanks to mycelial bloom, beginning to break down.


This is a bokashi bag that should have been planted about a month ago. Don't know how much you can tell from this picture, but the bag is still identifiably a bag, while the materials within are well on their way to homogeneous etc. And, unlike grub pudding, nutrient sequestration doesn't seem to be an issue--I'm guessing the bokashi juice supplies nourishment to the plant for that first span.


And finally, a recipe I'm going to have to try again: one part each bokashi, dried leaves, and coco coir, fed to worms. This isn't a finished vermicast product, but a lightweight potting mix with a lively microbial profile and incredible results in my just-barely-started seedling mix tests. Not quite ready to use, as there are still identifiable bits, but that's my determining factor. Takes about a month, comparable to hot-composting, but with at least some of the benefits of vermicompost, and not so rich it can't be used straight (which finished vermicompost cannot be, as a seeding medium). This batch looks about a week away from harvest-time.

And I just couldn't resist the image with one Verne-bit too stubborn to leave. Sun had largely set, anyway, so not much light to bother him, and I don't think worms are photo-phobic in the other sense.

There really was a reason for this post, but I forget. Maybe I need a vacation...

DSF


*I don't worry about undesirable microbes, since Repulsive receives generous doses of EM. Nor is that additional processing a problem. These days, my grubbery is the top of a tower, with a wormery planter just beneath; all I have to do is harvest now and then. It's not perfect--fewer adult BSF find the unit than are necessary for a really vigorous population. if the goal is just to dispose of food, it works, but I have an experiment I've been planning for winter, and I may resort to bait bags once before the weather turns, to ensure a large enough colony.

Thursday, September 9, 2010

Bokashi gel?


I don’t much have houseplants (tiny apartment and all that), but I do have office plants. Full-spectrum light on a timer keeps them photosynthesizing, but that’s only part of the equation; they need to be fed, too.


I’d rather fertilize them once a year and have done with it, but that’s really difficult in a desktop container. Once a season I could maybe manage with compost, but compost made outdoors is likely to have… shall we say, inhabitants that aren’t really suited for the workplace. You can freeze-dry or pasteurize compost, which will kill any macro-digesters, but also the microbes, and after all the time I spend encouraging those micro-critters to grow, I think I’d feel too guilty. Or maybe I’m just lazy. (I don’t even sterilize compost for seedlings.) More likely, it’s the memory of the stench the one time I tried drying compost in a low oven.


Blecch!


Whatever the reason, I’m not likely to be using my freezer for CompostCubes™ any time soon. I do sometimes solar-cook a thin layer of finished compost for use in containers, but my indoor potting mixes tend to be pretty light on the slow-release nutrients.


So I water the potted plants with diluted bokashi juice when I remember to bring some in. (My day job is highly resistant to composting/recycling and very oriented toward anti-microbials; bokashi doesn’t have a chance on-site.) Bokashi juice has no shelf-life--none!--but must be diluted and used immediately upon collecting. Diluted, in a tightly capped bottle, it’s okay overnight, but that’s about the limit. Refrigerated? I’ve never had the courage to find out! Which means that I have to refrain from watering the office plants when I notice they need watering, so that I can go home and mix up the plant food.


Not always feasible. If the plants need watering on a Friday, they’re getting watered.


Haven’t found a way around that yet. But I may have found a way to get bokashi juice into the office plants at repotting or even between pottings, that should make subsequent bokashi-juice applications less frequently required and more effective. Maybe. Not free, local, recycled/repurposed, nor completely natural, so not my perfect ideal, but it might mean the difference between stressed work plants and happy ones:


Polyacrylamide.


Sold under a host of brand names, this polymer is designed to “Absorb And Release Water In Soil” according to the packaging of the Soil Moist I picked up at the garden center this weekend. So it should absorb and release the dilute bokashi juice. Hardly an original idea—there's a product sold to nurseries called Incredagel that's pre-mixed polymer with plant food and water, and the brand extensions for the one I bought include a range of N-P-K options--but if it works, it’s a welcome addition to the lazy gardener’s repertory.


Of course, none of my plants are thirsty right this moment—it’s been raining—but they will be. And I’ll be ready. –G-


DSF

Sunday, September 5, 2010

Backyard porch science: DSF's FAIM-ous Brew?


image from 2funadguyz, who will happily sell you a full-size poster. Probably best to put in your home rather than your wormery--just in case Verne really can read. (Though I'm pretty sure he can't!)

Call this shortcut recipe FAIM, for False--or Faux, if you're in that sort of mood--AIM. There's nothing scientific about it, though I'm hoping others will be a bit more rigorous in their testing [yes, that's a hint]. Short version: kombucha + vermicast + molasses and water as if making AEM, let ferment to completion once, then again to ideal pH, then used.

Longer, rambling version follows. You have been warned.


--Ahem--


If anyone wanted to issue me a white coat, it'd be the sort with the extra-long sleeves that fasten in back. I am no sort of scientist—among other things, I never could hack the math—but now and then I do try to dignify the stranger of my behaviors by calling them experiments.

This one isn't finished, but it's nearly as far as I can take it, and I can't be sure my success to date means that this process will work for anyone else. So I thought I'd write it up, see if any other mad fermenters might be interested in giving it a try. (Also, I'm none too confident the folks with the big butterfly nets will let me bring all my buckets along. -G-)

Should probably start with a screen and a half of disclaimers, but I don't feel like it. This is not EM, nor should it be treated the same way. I don't yet know if it's as effective—again, I don't know if it'll work at all for anyone with a different situation than mine—but I am certain it's not shelf-stable, and as I'm not working under lab conditions or anything close, I don't really know what microbes beyond those I'm after might be in here, so it's not recommended where you're really concerned about pathogens. It's just something to play with, okay?

Indigenous Micro-Organisms (IMO), also known as Beneficial Indigenous Microbes (BIM) can be cultured from forest, field, and pond or even your backyard, assuming you have more than just manicured lawn. I have done this, using the process described at AgNet, and re-cultured the result for use in a bucket, too; but this is not that.

This is the easiest recipe I could concoct that might possibly stand in for retail EM-1 in my buckets.

I sometimes run a kombucha jar; other times, I buy a locally made kombucha by the glass or bottle. Kombucha, for those of you who don't know, is a fermented tea drink that tastes rather like someone made soda using cider vinegar and sweetener (better than that sounds, and quite refreshing). But the important part for this post is that kombucha is made by feeding tea and sugar to a SCOBY, a Symbiotic Culture Of Bacteria and Yeast. For bacteria, read lactobacilli.

As in, two thirds of the triad that makes up EM: yeasts, lactobacilli, and PNSB (rhodobacters).

I have tried using lacto-only or lacto/yeast inoculants in my bokashi bucket, and while other people have reported success with those, it doesn't work for me except in strictly vegan buckets, and my buckets cannot be vegan, since I'm not.

So I needed a source for those PNSB. The rhodobacters I'm after propogate where soil, water, and sunlight meet. Pond mud of certain depths. Rained-on dried leaves left to lie on fertile soil. Bromeliad cups. Some garden soils. Trouble is, it's really hard to tell if you've got them without doing the whole jar thing, unless you luck onto some purple mud.

They are, of course, in retail EM. Perhaps they're in vermicompost made from EM bokashi? Seemed likely enough to be worth a try.

I mixed two tablespoons of fresh kombucha, one tablespoon of molasses, and one tablespoon of finished vermicast (not -compost, but the worms-have-moved-on, absolutely finished stuff). Filled the liter bottle with water, and left it, tightly capped, in direct sunlight.

Bled off the gases when the bottle bulged, but otherwise left it alone for about two weeks. When the smell had gone from molasses to nearly pure alcohol and the bulging stage was done, I did it again, using one tablespoon of the new brew and one of molasses in a fresh bottle of water. There was much less alcohol scent this time, and the final result smelled like EM-1, so I treated it that way, mixing it with molasses and water yet again to use in a bucket (and in my leaf-and-UCG worm food), and to make a baby batch of non-EM bokashi bran.

First bucket test is finished, and successful—but it might almost have been rigged to succeed, since that bucket was fed tea bags (kombucha microbes are used to tea!), pineapple skins and apple cores (yeast and lactobacilli with fruit sugars, nearly guaranteed to ferment), and no meat or dairy (I didn't cook much that week). Second bucket underway, non-vegetarian this time, and it seems to be doing well so far. But 1) it's early yet, and 2) I don't know if vermicast or compost from a region not dosed with retail EM for more than a year would do as well.

So I'm just putting this out there, hoping there are some similarly curious folks who'll give it a try. Bokashi experience not necessarily required, though a bucket or reasonable facsimile would seem to be necessary...

DSF

Monday, August 30, 2010

Eye of Newt?


image from Cartoonstock, and I want it on a T-shirt!

Been re-testing my IMO recipes lately—that's Indigenous Mico-Organisms, also known as Beneficial Indigenous Microbes or BIM, and searched for most often on this blog by folks searching for a wholly non-retail solution.

In other words, EM you don't have to buy every so often. Or ever.

Not all IMO is EM, but by definition, all EM is IMO; the formulation of retail EM differs by region or country. If you live in an area with glorious, gorgeous, healthy “plant a seed and stand back” soil, you probably have all the IMO you need for everyday purposes. Maybe a little extra dose of rhodobacter(s) if you wanted to process manures, or for indoor fermentation, but otherwise, at least for outdoor composting & gardening, you're set.

I do not live in such an area, and even if my part of Austin were as lush as virgin, unpolluted rainforest, my soil comes in bags from the store and spends its useful life in plastic planters, aka buckets, wholly divorced from the soilweb. So I need microbes. EM bokashi bran suits my situation well, and buying a bottle of EM-1 every year, plus molasses and wheat bran (and scrounging/buying assorted other possible carriers) is still cheaper than buying decent quality bagged compost from the garden center. I've even been known to spring for the packaged EM bokashi bran*, though it really doesn't take much longer to mix a baby batch of bran than to log on to an e-tailer site and place an order.

So if I'm happy with the retail model, why do I play with IMO? The same reason I'm still playing with this blog-project—there aren't enough answers out there yet! Bokashi is still relatively new, and it's the retailers who are driving such limited education as exists. Some of those retailers...well.

I've had several very positive interactions with bokashi-product-related retailers. I've also run across some who would have kept me from ever trying bokashi had I been unlucky enough to encounter them first. (Naming no names, I shall say only that “if you don't have a house, bokashi is not for you” is not a helpful message, and “composting equals polluting” isn't exactly the right approach, either.)

But worse than retailer-roulette is the idea of no retailers at all. My local Whole Foods used to carry EM-1 in the floral department; no longer. Austin has a local bokashi producer now, but the company's summer hiatus can be a problem—and what about all those places without a local source? Also, yes, okay, there's the fact that I could buy more seeds or starts with that EM $$.

So sometimes I play with IMO recipes. [I promise, those posts are coming.] Checking on one my tests at some impossibly early hour of the morning when the sun wasn't even up yet, I caught myself muttering to remind myself of what I was doing, and even to my ears it sounded a whole lot like some fairy tale witch's shopping list.

Piloncillo, kombucha, vermicompost, coir, lactobacillus serum, acetobacter, SCOBY and PNSB--these aren't words normal people toss around before the first cup of coffee!

But it's years too late to worry about what that longago president used to refer to as normalcy. I'll be happy with verdant--and yummy. And a short-term foliar application of my AIM** just successfully resurrected a drought-crisped potted herb, so verdant and yummy is very much the order of the day.

Happy brewing!

DSF

*someone remind me to buy a second bag of the bran that got recalled, so I can finally post those results. Kthnx

**light mist, all over the plant's crisy-toasty leaves (hey, to all appearances they were dead anyhow), let sit about fifteen minutes and followed with a slightly heavier mist of water. And a camera wouldn't have helped this time, since it would never have occurred to me to take a picture of a dead herb, but I might have to stage a recreation, just for the before-and-after WOW!

Thursday, August 26, 2010

Eat Your Words?


Friend of mine sent me a link to this great piece on Treehugger.

And now I'm thinking about green art installations again. My new job involves lots of paper, and a more anti-recycling place you'd be hard pressed to imagine (I'm working on it!)...perhaps a wall of old meeting minutes growing woodears? Hardly a Garden of Knowledge, but perhaps a learning opportunity.

Also, mushrooms are yummy. -G-

Tuesday, August 24, 2010

Leaping Lizards!


Okay, so the Mediterranean House Gecko didn't jump--but I did. Opened the temporarily rampless grubbery and found one of these guys clinging to the side and chowing down, presumably on the baby grubs as I don't think his mouth is large enough for big ones. I was braced for the sight of disgustingly squirming banded grubs, but not in a starring role as breakfast! Yecch.

Note to self: duct tape. Since apparently plugs are not sufficient protection against intruders, though they do keep the grubs from wandering. (Of course, I could just go install that ramp, but where's the fun in that? -G-)

Queasily,
DSF


[image and species ID linked from California Herps.com
]

Thursday, August 19, 2010

Tales from the Bucket: Rip Van Bokashi


Some days, the less I have to deal with bucket-contents, the better; other days, it's no big deal. Must not have been feeling squeamish that particular Saturday afternoon—I decided to try mini-bags of bokashi with different dry matters to see if they all worked. My favorite dried leaves were my control here, but what about shredded paper with a sprinkling of vermicompost? Or those wood shavings sold as small-animal bedding?

Went with a half and half ratio, mostly for convenience with the tiny little bags I was using (so that I can put them in more places!). But space is always a concern, as are the raccoons and all their ilk, so I ended up stacking all fifteen of my filled-and-tied #2 bags into the same lidded bucket. This is not good scientific practice, but I'm not a scientist. -G- I did put the leafy bags at the bottom, so that gravity couldn't help move their microbes into the other bags, but otherwise, I figured that the test for success would come after planting anyway.

Which rather requires my removing the bags from their bucket...

What can I say? It wasn't really planting season. Sowed few seeds by way of prep for the fall madness, sprouted the odd microgreen, did a bit of rooting from cuttings, but otherwise, I'm more into side-dressing and watering with food than the whole sub-surface slow-release thing right now. So I've got composting planters going for my immediate use, plus soil-topped trenchless buckets for later, plus Verne in his towers and bunking below Repulsive, and I just forgot about the bags awhile.

Until now, when it's time to start planning those fall beds.

The bucket wasn't rocking, nor were there any toothmarks or litters of BSFL casings. Positive signs all! Within: a bunch of white-haired Rip van Winkle bags, sagging with age and bearded with acetobacter growth. The bundles on top are intact enough to move, the middle row and below more disintegrated, and I haven't gotten all the way down yet, but I expect they're in slightly soggy pieces that might need to be half-scooped as much as lifted by their strings. But no worry; there's no off-odors, no insects, no bucket-strain, and they're completely viable—half-composted and half-finished, there's still enough carbon to create a hot-composting reaction, but little enough that it won't even stress transplants assuming the requisite inch or two of soil between. Enough plant-accessible nutrients that starved bean leaves turn green again (one of my favorite low-tech tests!). Enough microbes to replenish the soil web, or to stand in for one, and enough undigested nutrients to sustain the microbes and the plants awhile.

All of which can be had simply by planter-finishing the bokashi, without bothering about the bags. But the bags allow me to use carbon materials that planter-finishing doesn't, for those times I'd rather not bother with composting—or for those settings in which even small-batch composting might not be possible. Plantable bags can reduce the total volume of soil needed in a container or bed, which helps when you have to buy your soil, and they can be used, with some care, in a soil-free container mix, where planter-finishing may not be possible*. And bags are portable! While I suppose I could take a bucket of ferment off-site, I really don't like the idea. Bokashi is unaesthetic at best. Small bokashi bags can be tucked discreetly into each deeper-than-usual planting hole, and they require no special handling.

Nor, apparently, much in the way of special storage. Moisture-conserving and pest-proof seems about it. A versatile, scalable, at least short-term-storable solution that can be made and kept in the same small container. Am I dreaming?

...coffee cup's empty, so I guess not. But I'm still thrilled.

Happy bucketing,

DSF


*Generally not recommended, anyway. Soil-free mixes are too light, but you can add a weight for that; the other issue is lack of complementary microbes, but mature compost or other sources are available.

Monday, August 9, 2010

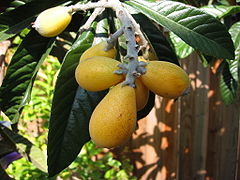
Loquats!


Loquats
!

One afternoon during loquat season, I sat out back with my prep scenario: decent music, cat for company, bag of just-picked loquats I'd hit with the hose by way of washing, big bowl of acidulated water, knife, and an empty planter for the culls and pith and stems and seeds. When I was finished, that planter was nearly full, mostly of seeds but with the odd bit of more easily compostable matter. Seemed kind of silly to carry the planter out to the apartment compost bin, and it would have overflowed a worm-tower tray, so I tossed some worms into the planter instead. Added an inch or so of soil to keep out bugs, and stuck it on top of the current pre-composting worm-food unit.

A few months later, I had a young thicket of loquats outgrowing their birthplace. A coworker mentioned a need for some saplings, so I harvested a handful for her, then more for another woman who saw me delivering the first set. That didn't go nearly enough toward thinning the planter, so I sat down the other day with a bunch of homemade container mix and seedling pots. An embarassment of riches—I ended up with three dozen individually potted loquat saplings, plus several clumps too intertwined to separate into singletons. Keeping them watered is something of a challenge! They take up much more room this way, and I don't have a single place suitable to put them all even temporarily. Some friends with land have offered to take many of them off my hands, as they don't like their privacy fence and would be happier with plants to obscure it. I just have to figure out how to keep them watered in situ. Lots of organic matter would help, but I'm running short again. Suppose I could buy some compost from the local organic garden center, but I was really trying not to do that. Of course, I didn't have three dozen trees in mind when I was figuring how much I'd need this year.

Note to self: the answer to that question is always "more." 'Nuff said.

Saturday, August 7, 2010

The Cabinet Garden


Garden cabinet image from Luxury Housing Trends, which has managed to put ideas into my head though not (yet) any new holes in my wallet

Some friends offered me a bit of space in which to garden, with very clear guidelines: their space, but my project; do not ask them to do anything with it; tomatoes. I started small, using a repurposed old wooden kitchen cabinet with the doors off to frame a side-by-side-by-side test where failure would be nothing worse than dead plants--no off-odors, no insects, nothing weird. Used mostly scrounged materials, plus bokashi and composts made in Bucketville (not enough of those, as I was trying for equal volumes and ran short of one). And because their place isn't exactly next door, I set it up to require no more than weekly attention.

Which to me means raised bed with slow-release nutrients mixed in + olla pots + covers. One quart olla per tomato plant seems to be the practical minimum, and when the days are routinely 100+, twice a week watering is a really good idea, but until the triple-digits hit I'd been averaging ten days between waterings and the plants were still producing fruits. Not, mind, as many as I'd have liked, but I've never yet had enough tomatoes, and considering the cheap soil base and inadequate organics volumes, I'd call it promising enough to be worth extending the test.

As, apparently, do my friends, who have given me permission to put in a few other plants. Including some fall tomatoes, naturally, with which I shall be planting bokashi bags made for the purpose, with ratios of 4:1 and 8:1. The 8:1 test produced earlier and more tomatoes than the compost or vermicompost with or without worms, you see; I'd like to know how much wiggle-room there is in that recipe, and whether different ratios produce results different enough to be worth noting, but mostly, I just want more tomatoes, so this time, every plant gets an olla and a bag.

...now if only I had a few more cabinets...

Grubbing Around


Image from Hooks & Lattice, with which company I have no affiliation--but there's an anniversary coming up... (hint, hint)


Weird week here in Bucketville. Among other things, I had multiple requests for BSFL! Not all this week's requests were for grubberies, some folks just wanted grubs: To try out as feed for a particularly fussy pet reptile, for a fishing trip, and to replenish an industrial-sized retail unit from which I'm guessing there's been some over-enthusiastic harvesting, plus a pet waste disposal unit and a bird-feed "farm" (that's two separate things, at different locations, even).

So I spent Saturday morning playing chauffer to Repulsive's offspring, after a session of harvesting the disgusting things. Seemed like a good time to retire the various and sundry experiments, since 1) I've settled on a permanent design, and 2) it's a lot easier to secure a single unit against raccoon and possum incursions. Since the standard adapted bokashi-bucket design works, though it's no longer my preferred model, I just handed that one over to the folks who wanted a bird-feeder hatchery. The coir-liner test works very well, too, but I used scrounged materials for the first model, and the result was far too large for my space or needs. Rather than deal with the nightmare of separating hatchlings and feeding grubs from the exploded coir mat, I passed that on, plus such harvested grubs as I had left once all the other requests were filled, to the folks with the Bio-Pod. Hey, they asked for grubs, they didn't specify mode of delivery!

But I liked the results of the coir so much that I actually went out and (gasp!) spent money buying a smaller coir basket liner for the grubbery's permanent installation. Not just a mat to go on the bottom, a natural alternative to the synthetic mesh I've seen in Bio-Pods, but a large enough single piece of matting to cover the bottom and sides, all the way up to the single row of small holes I've had to admit are necessary for practicality.

Apparently, laziness beats squeamishness in the end--I used to set out bait bags for the layers because I couldn't handle the thought of grubs using air- or laying-holes to escape a feeding unit; but bait bags have to be emptied and refilled, not to mention protected from the cursed four-foots, and I got tired of it. Other grubbery models have pipes to let layers into the bucket, but that was way too much for me. So I watched the adults awhile, to see where they preferred to lay. Which seems to be into tiny holes with free space behind them and damp protected space just below, plus the food source, naturally. Explains why I never had much luck with cardboard laying disks: I left them too accessible. Sigh.

The only problem with the coir liner--unless one has a sudden need to harvest immature grubs in significant quantity--is that the material expands more than you might expect, reducing the bucket's effective volume. But I'd rather have a slightly larger container with no escapees than a smaller one that requires warning labels. And this is about as close to hands-free as I'm likely to get; the necessary maintenance during a working season has been reduced to feeding the grubbery, and exchanging a full catchment bottle for an empty one and hanging the birdfeeder. No draining reservoirs, no grubbing about with eggs or feeding populations, no need to remediate for moisture or carbon levels. Assuming the occasional addition of EM in some form, there's no off-odors. And almost no chance of grubs on the lid when you open it, though I can't say no risk ever of seeing the things. (Drat! And it was so close to perfect. -G-)

Probably ought to buy a new camera so I can post pictures of things. Ah, well. Repulsive's permanent home consists of:

1) A small lidded bucket with holes in the bottom and around the bottom inch of the sides, plus a single row of small holes beneath the rim.
2) A coir bucket liner reaching up to the row of holes.
3) A collection ramp, in this case half-inch tubing and threading to fasten into a soda bottle, with the part of the tube inside the bucket cut in half to create a U shaped ramp the maturing grubs can climb.
4) A largish planter filled with cheap dirt or soil-based potting mix (at least as much soil as the bucket would hold, though in a large enough planter you could mix some carbon after that requirement is met), into which the bucket is set at least three inches deep and as far down as desired so long as there's no chance of the upper row of holes being buried or completely blocked.
5) Optional but recommended, a two-inch layer of good potting mix and some plants. It looks better, but more importantly, it helps keep the predators away. Between the grubs and the worms that will move in even if you don't add any, it's a protein-rich feast--and birds, raccoons, possums, toads, and lizards have all found Repulsive in some of his less-protected iterations.

Considering what I choose to feed Repulsive, I'm going with decoratives rather than edible plants around his tower. It's not my usual preference, but I do have a few, gifts or volunteers or flowers to keep the landfolks happy, and some of those should be tolerant enough of salts and acidity to work here. (Salts from the foods; acidity more from the EM I add than anything.) If I were less squeamish, I suppose some edibles might be possible. Red orache springs to mind, but it's certainly not the only likely crop. Guess maybe I could try it. There's no requirement that I actually eat what I grow, right? Well, maybe.

And maybe there's another experiment to try: coir liner on the sides but not the bottom of the bucket. Which would allow the worms greater access to what the soldier fly folks have taken to calling "grub pudding," while still giving the mama layers their preferred egg-despoting space.

Just what I needed, more grubbing around. They do sell coir by the roll...

DSF

Monday, July 26, 2010

Tales From the Bucket: Hands Off That Worm(ery)


(image from IMDB, came up in a search for "worm dude". Don't ask.)


The bucket wormery was harvested mid-November or thereabouts, at which point I refilled the bucket half and half with cured bokashi and porch sweepings (that's “dried leaves” to most folks, though sweeping off a deck picks up different stuff than raking a lawn). It occurred to me just after adding the bokashi that there were almost certainly still a few small or stubborn worms clinging to the sides and seams of the bucket—I'd overturned it to collect the vermicompost, but hadn't bothered to rinse it out or anything.

Oh, well. Seeing as I hadn't killed any worms in a while, I tossed another dozen into the mix and decided to call it a test. Small population, lots of food guaranteed to heat but a good mix for wormfood aside from that, no modifications.

None.

This bucket is the basic homebrew jr. wormery, nested kitty litter buckets with a spigot for drainage and holes in the upper rim and lid. But I have no tolerance for fruitflies, so my jr. got a cotton pillowcase snood fairly early on in its career, and I've never seen any reason to reclaim it. Once the bucket was full, I scrunched the pillowcase on, making sure it covered all the vent-holes, then shoved the whole thing underneath my outdoor seedling table. Where it remained. No insulation even during our hard freeze, no added water, no stirring, no dusting of eggshells, and no peeking.

Until spring. Around the time the BSFL were waking from hibernation, I decided to check on that bucket. Looked really pretty, lots of dark brown threaded with wriggling red, but I wasn't prepared to harvest that day, so I just tossed them some UCG and a few crushed eggshells to tide them over and went on my way.

Took another two months for me to get around to that harvest, so I'm glad I gave them that snack, but I think they might have been all right anyway. I pulled a respectable few cups of worms out during the harvest, along with eight beautiful liters of pure vermicompost all rich and dark and so very different from the less mature, soil-amended stuff I harvest more regularly (or at least more frequently) from the tower wormeries.

Not the most controlled experiment ever, but definitely worth doing again! For large planters, I prefer the soil-amended vermicompost, but for seedling mixes and soil-free applications having pure vermicompost is pretty much required. Also, it's a whole lot better suited to making compost tea*.

The planter towers are more immediately useful—I grow things in the tops—but there's something to be said for the no-tend model. No BSFL, no squash bug larvae, no fruitflies, no ants. Told myself that next time I'd be kinder to the worms, mix the leaves and bokashi in a worm-free unit to let it cook, but I didn't. Just as soon as I'd finished chortling over the total harvest, I tossed some leaves into the still-unrinsed bucket. And then some bokashi. And a dozen worms.

Hey, why mess with what works?

In a few generations, I might think about mixing some worms in from another colony. Other than that, I think this is part of the rotation. To a lot of vermicomposters, of course, this is heresy—planning to neglect the worms!—but I'm still working on the two-touch container garden (plant and harvest with no tending between). Always assuming I don't manage to cook this set before they produced some cocoons, I think this one's ready for cloning to my satellite locations.

Good thing my friends all know I'm obsessed. "Hi! How'd you like to foster a wormery? Junior's no trouble at all, just leave him tucked up in his blankie. I'll be back in a few months."


DSF

*or AIM, but that's a whole post on its own!

Monday, July 19, 2010

Don’t Try This At Home


—no, wait, I’m not your mother! Do whatever you like. But this may present a slight hazard in some situations…

Some little while ago, I tried a reclaimed bit of peat-based potting mix as an absorbent material in the bottom of a mini bokashi bucket, yet another version of the no-drain model some folks seem to prefer. Worked very well with drier materials, though it was pretty easy to overwhelm and correcting moisture levels isn’t nearly as simple without a drain. But the bokashi it produced was a dense, spongy mass held together with thick mats of mycelia, and it broke down into a usable potting medium remarkably quickly, so I had to try it again. Full-sized bucket this time, with three inches of new coir in place of the soil-less mix I didn’t have. (The stuff that comes in bricks for worm bedding, not the long-fibered kind from which planter baskets are made.)

At first, I thought it was my imagination, but it wasn’t: the coir plus EM bokashi bran plus a pot’s fresh UCG started a thermophilic composting reaction in my kitchen bucket. That first heating passed, presumably through lack of oxygen, but it restarted with each new addition of food (and air). Without a recording thermometer, I can’t be certain, but I’d guess it never went above 160 and didn’t sustain that much heat for more than a couple of hours at a time. Not much visible breaking down, but signs of fermentation are present, so I guess the heat isn’t hurting anything. And it’s even a food-grade bucket this time, so I won’t worry too much about plastic off-gassing or melting. It’s not like I store my working buckets on top of oily rags or anything. Still…

After all the years I tried hot-composting in spaces too small for the ideal three-bin set-up, with barely enough success to keep me from giving up entirely, it’s a tad bit unnerving to have things heating where I don’t really want them to.

On the other hand, this might actually be an all-in-one indoor compost--with no draining, no bugs, no worms, no off-odors, and no need to empty anything until it’s done. What’s a little fire risk compared to that?

...she asks, suddenly hoping the landfolks aren’t reading this. -G-


DSF

[no image credit, because I've lost the link. Sigh. File says "international pictogram no flame-bucket]


UPDATE:

Harvested that bucket a bit after posting this. Next time, if there is a next time, I'll have to add a thick coir layer at about the halfway point, since the material in the middle of this bucket was too wet and trending toward failure, though not quite there. But the stuff at the top was bokashi leaning toward self-composting, and the stuff at the bottom was compost with a slightly higher than normal pH. I layered it with dried leaves, giggling at the speed of heating, and then...well, this is me. I forgot to turn it! But Verne neared warp-speed in his haste to move in, and it's largely degraded past identifying contents already.

Tuesday, July 6, 2010

A hole above the ground


Necessity is the mother of…Repulsive 2010 beta.


My usual spigots can’t handle grubbery leachate; it's pretty nearly sludge, thinner if the filter hasn't been dislodged yet but always muddy and with fine-silt particles that clog the tap. I can’t lift a full inner bucket right now to get at the lower one to empty it (wrist injury’s healing, but not yet fixed). And letting the reservoir back up into the unit is not an option. So I set the inner bucket on top of a soil-filled planter that had once been fitted out as a wormery--which means that it had ventilation holes on the sides and bottom, plus a drip-tray beneath. Also, since Verne has no concept of personal space or respect for ancestral colony gravebins, some worms.

This largish unit has about the same volume of soil beneath as potential food-and-grub volume above, and I’m not sure I’d try much less than that; eight inches of soil minimum, if my admittedly sketchy math is correct.

So far, it’s working quite well. A few grubs have no doubt squirmed into the soil, but most of them stay near the top, that being where food comes in. (I decided not to worry about it unless or until I saw a grub using the wormery part to escape; so far, no grubs have been sighted emerging from the soil layer or hatching in the soil-packed vent holes, and the mamas don't tend to bother probing them.) It's quite possible there are worms in the grubbery's inner bucket, but that's not a problem either, and the holes are there should any aggregate bit decide to move. Leachate seeps out of the grubbery into the soil, where it serves to keep the worms fed and moistened, and since soil regulates temperature and pH, there’s no need to worry about Verne no matter what the grubbery gets up to. Too, between the weight of the soil and the nesting of base and rim, plus the inevitable-here-in-Bucketville weight on top, the grubbery’s as nearly secure as I can make it. No human-perceptible odor escapes except when it's very wet--as in, after our recent storm-cycle--and then it smells like fertile wet soil, no trouble at all. Judging by the adults flying around, happy-BSFL pheromones are being produced and food-scent is perceptible to them, since despite crawl-off there's no population shortage on the horizon, but so long as my neighbors and I can't smell it, it's a success.

I'm kind of excited: a moisture-regulating grubbery means one less chore, and one less chance I might accidentally spot one of the aggregate bits that earned Repulsive his name. Well worth the temporary reallocation of a bucket of cheap dirt! Have to say, I’m not sure how well it’d work without worms in the soil layer and/or EM in the foodstuffs. Or, ideally, both. But since I do have both, this is a workable model for me.

At some point, of course, I’ll have to do something with the unit, but with any luck at all, that won't be until fall. Lure the last layers to an alternate location, let the grubs in the unit mature and crawl off or go dormant, let the worms work the bucket over the winter, and in spring and harvest a bucket or so of rich vermidirt and worms. From stuff I wasn't willing to feed my bokashi buckets.

The obvious next step is to test this as an urban pet waste disposal; I've had some success with temporary in-ground units, but that only works where you have a hole in the ground away and downslope from your garden! Too, that was to get rid of the leavings from the neighbors' dogs. The household feline's box is a very different matter. EM, obviously, but what then? I'd thought about BSFL before, but they don't like clay, and there remained the question of what to do about the remains in the bucket once they'd done their part.

Worms were also a possibility, of course, but they can't handle fresh liquid wastes. Grubs + worms seemed reasonable, except for everyone saying how difficult it is to maintain them together.

We shall, as ever, see.


Glad to be back,
DSF


Photo courtesy of USDA Natural Resources Conservation Service , where some very odd photo categories can be found!

Saturday, May 29, 2010

It's an image thing


Lolcats are cute. Repulsive...lives up to his name. But Grubbery 2010's directions aren't too different from this. You know, except for the part where you actually look!

Happy grubbing,

DSF

Thursday, May 27, 2010

Tales from the Bucket: The Full Circle Bucket


Having figured out how to compost, vermicompost, and soil-finish bokashi appropriately for my setting, why am I still playing around with different techniques? Well, I’m curious, but more than that—this may not always be my setting! And there’s never a guarantee any living-space will conform to retailers expectations. So I’m trying to find methods that will work for other non-standard situations.

This particular bucket test is an unqualified success, but I wouldn’t use it unless my situation required it: by my current standards, it's slow. Three to six months depending on materials and conditions, much slower than my preferred techniques. On the positive side, it’s contained enough that it could be done in a garage as well as the balcony I’ve envisioned, or even indoors given some care with material selection.

What is it? A hybrid composting/finishing done in the bokashi bucket. I have, from time to time, a (temporary!) sufficiency of buckets, and in one of my more squeamish moments, decided to dump some dried leaves into a curing bucket instead of decanting the ferment. Turns out, that wasn’t such a bad idea, though not a complete technique—the bokashi fermentation can take over the leaves, which is great if you wanted acidified leaf matter but doesn’t turn the mixed garbage pickle into any sort of soil analogue.

Poking holes into the pickle-mass and tipping in a bit of finished vermicompost improves the chances of harvesting humus. So does mixing the leaves with the bokashi—in which case, you can probably save the vermicompost for something else. Putting a weight on top of that mixed leaf-and-bokashi makes success almost inevitable, and if you use soil as all or part of that weight, the end result is a familiar, no-explanations-needed bucket of potting medium. The reservoir does need to be emptied a few times early on in the process, after which the tap can remain open and the bucket ignored awhile. Stirring will speed time to completion, but so long as sufficient microbes were added, it’s not actually necessary.

Can’t speak to minimums here; my tests have used one part compost or living soil to four parts bokashi and four parts dried leaves/shredded paper.

What if you don’t have dried leaves? Use some other dry material and a microbe source. I’ve been using shredded phone book pages for the second-stage tests, since they degrade faster than newspaper (and besides, what else do you do with them?), and the same one-to-one ratio seems to work, though the end product is a little heavier. For microbes, use finished compost, vermicompost, or good garden soil.

And if you have unfinished vermicompost that still has worms in it, you can add that about a week after the leaves and bokashi get mixed together, which will greatly speed the time to completion, and get you a healthy new crop of worms as well, so long as the bucket’s kept out of direct sunlight and there’s some actual soil in there—preferably an inch-thick layer on top, above and beyond whatever may be in the vermicompost.

I can’t imagine many people having enough bokashi buckets to make this their primary post-ferment technique, but the closed-container process may be helpful for some settings. Like, say, folks who have no outdoor space!

Theoretically (which is to say, I haven't tried this), you could design your SIP in such fashion as to do the ferment, curing, finishing, and planting all in the same container, just by mixing in various items (EM bokashi bran, then leaves and perhaps soil, then a bunch of coir). All in the same bucket. Grow food crops, and after harvest...

Yeah, okay, you get it. Excuse me, I must have some gardening to do!

DSF