Thursday, May 27, 2010

I really hope Verne can’t count


Firefly
Year’s first firefly sighting on the porch Tuesday night. Not so happy the following morning, as that night was also the year’s first major possum raid. I’d harvested a bucket early Tuesday [next post], about three and a half gallons of dark, moist compost-rich soil—or maybe soil-rich compost, considering the starting ratios. Whatever you care to call it, it was still too damp to pot with, so I set the filled planters of the stuff out to air awhile.

I didn’t mix in any vermicompost or scatter cocoons or anything, but Verne’s pretty much claimed the porch for his own, so I wasn’t at all surprised to find a respectable mini-wriggle in the planter I checked for readiness in the evening. What I should have done then was to stack and weight those planters until the weekend, when I can sheet-dry the compost. What I did was shrug and move on. Smiling at the firefly.

Sigh. Still, not like Verne’s been decimated, or that the possum wouldn't have found me sooner or later anyway.

DSF

Friday, May 21, 2010

The Return of Repulsive


Soldier Fly

What I learned this year: don't let him freeze. If you're willing to have a grubbery, it may as well be a year-round one. Also, way too much work to get it started up again! Though I imagine part of the problem is my refusal to let the things roam free...

Six or seven weeks ago, the early-waking grubs wandered out of their winter beds and went wherever maturing grubs go to sprout wings. (Not toward the space I occupy, fortunately!) Putting together a starter-pack for someone around March 28, I discovered that I had only a couple of dozen dormant ones left, plus the last few just waking. Didn't seem worth the effort to set up a hatchery--obviously, they'd done just fine in the leaf-filled berry punnets I'd used for winter quarters--so I left the stragglers alone to do their thing.

And in the meantime, I cleaned out the frozen grubbery, to my relief much less disgusting than had it been active, and soaked it in a strong dilution of AEM as a sort of compromise between the impulse to scour and the desire to retain some happy-grub pheromone. While I was mucking about, I converted the grubbery full of finished proto-compost to a wormery [which sounds much more involved than it was: I dumped a cup of unfiltered half-finished vermicompost in there], then confirmed that all the dormant ones had crawled away and set up bait bags to await the egg-layers.

March 30 or so. First recorded sighting of an adult: April 24th. Checked the bait-bags that day, but nothing.

And more nothing. And still more. I used bait bags all last summer and fall, to replenish grubbery populations since my unit does not provide free access for egg-layers (any hole an adult can use to get in, a larva can use to get out, and I can't handle that). Simple design: mylar coffee bag about half-full of UCG, closed, with one or more holes above but near the level of the organics. Propped up next to or behind the grubbery to take advantage of that fabled happy-grub scent. It worked very, very well all last year. But this spring? Nope.

What if I left the bag open at the top? Well, then I got flies--just not the right sort. The only thing worse than a bait-bag full of BSFL is one full of ...things... that are not BSFL. Yecch! Tried different sorts of foods with pretty much the same results, though I did achieve small populations of BSFL with cured bokashi. No idea whether predation or selective egg-laying was the cause of that less-than-boom, but a quart of cured bokashi netted me only about an ounce of BSFL. And this early in the year, those new-hatched bits of Repulsive showed no inclination to hurry up and mature so they could breed more.

Not that they should need to. The adults were flying around, they just weren't laying in the bait-bags. Or in the proto-compost wormery, though I left it open for a few days to see if they would. Apparently, there's no happy-grub pheremone if they finish their meal. Call that lesson #2. And for #3: nor is their happy-grub pheromone if the grubs die in the grubbery!

But Repulsive is endemic in my area, which is how I ended up with him in the first place. Additional pheromone signatures shouldn't have been necessary. Why wasn't he (well, his female members)laying where I wanted him????

Lesson #4. Finally got the right conditions, but it had nothing to do with me: It rained. Rain got into the various baits, and all of them sprouted BSFL as if by magic. (Black magic, that'd be. -G-) Grubs in all their disgusting multitudes, so numerous and so voracious that they went through the baits in no time. Writhing, squirming, smelly mud, just what every gardener needs! But, hey, I set out food for them, guess I really did want the things. (Why, again?) No need to tolerate the muck, now they're hatched; they're getting dumped into the grubbery, along with a whole bunch of EM bokashi bran.

And I'm going back to spritzing AEM into bagged UCG. It hadn't occurred to me that lack of moisture might be the deterrent, as UCG tends to be fairly damp, but the last set of bait bags were all filled from the same batch of collected UCG, and it was much drier than I'm used to seeing. My other baits all seemed wet enough to start with, but Austin's doing its usual summer-preview thing, with strings of 90+ and sunny days. Enough to dry out anything!

Had I put the bait(s) in a standard-model grubbery, with the access holes for egg-layers, it'd have stayed damp enough to be inviting. But, all in all, I think I'm sticking with the no-escape grubbery. Other folks have good results with barriers, but I'm just too squeamish to try it again. Ramp into bird feeder bottle for the pre-adults; bait bags for the mamas to lay. And no grubs roaming free!

He's Repulsive enough when I know where he'll be.

Happy grubbing!

DSF

Tuesday, May 18, 2010

After the Bucket: Brown Bag Bokashi #2


--image from PaperMart.com, in case anyone should need to buy a gross of the things--

This year, some friends have loaned me garden space. Still don't have any holes in the ground, but I do have some lovely raised beds! Experiments therein must be relatively likely to succeed, and absolutely guaranteed not to fail spectacularly: dead plants would be a regrettable but an acceptable outcome; dumpster-stench and insect incursions, on the other hand...

So brown bag bokashi #2 was born. Unlike #1, there's no dirt placed in the bag; also unlike the first, this method uses a moisture-retaining cover. The cover speeds the process a great deal; didn't notice any heating, but I rather suspect that's observational failure (don't have a recording thermometer, what can I say). This is nowhere near sufficiently vetted to risk prized roses or rare herbs, but for basic garden veg, it's being rolled out to bucketville's satellites as fast as I can manage. So far, it looks like each package of lightweight, nourishing rooting medium/plant food/soil amendment can take the place of an equal volume of potting mix, so long as there's at least two inches of soil for the start to root into, plus an inch of something--cheap dirt, fill, shredded newspaper, bark mixed with gravel--at the bottom. And it's a whole lot cheaper than even cheap dirt for me! Friends, freecycle, and my local grocery get me the bags; my dollar-store roll of twine will last a year; and the bokashi I have already.


Ingredients: Eight parts random sweepings (the first one was mostly oak pollen, given my area, with the usual bits of dirt and dried leaves I count on to add all those extra microbes) + one part cured bokashi, in a paper grocery bag.

Preparation: Dump the damp bokashi and dry sweepings into the paper grocery bag, roll the top down, and tie it up with hemp or some other natural-material (compostable/decomposable) twine. Stick the assembled package into a plastic grocery bag, the handles tied to make a moisture-conserving, mostly protective casing that is not wholly airtight.

Rest: about a week. (If you're feeling nervous, run a quick pH test on the wettest part of the bag.)

Use: Dump the paper package, now soggy and faintly scented of vinegar, into a planter prepared with drainage and about an inch of really cheap dirt. Fill in the remaining space with a decent container mix, including at least two inches for the plant to root into, and plant olla pots and starts as desired.

Verdict: success! The squash start I used for my first test didn't curl up and die, drop its leaves, develop spots or off-colors, or show any of the other signs of stress. It's a touch smaller than the optimized control but not at all stunted, and began to blossom a few days before its larger cousin, though not so soon as to cause concern. Altogether a compact, healthy specimen. Repeat tests have not been underway for all that long, but early results are comparable.

As with all my paper and cardboard techniques, this may not be the greenest of all possible options, but it's suitable for some situations. In this case, it allows a scalable, portable, soil-free harnessing of bokashi for those folks who, like me, may have no recourse but to purchase soil, or who simply prefer to garden without it. Assuming the bokashi is thoroughly cured before bagging, there's no reason at all one couldn't use a coir-based potting mix around the bag instead of soil, even in an indoor planting.


DSF

Someone please remind me to update this after the growing season, so I can report on long-term results!

Wednesday, May 12, 2010

Is there such a thing as too sucessful?

Verniponics #2* is initially relatively labor-intensive, doesn't use nearly enough bokashi for most small-space gardeners--who may end up with surpluses rather sooner than later--and, judging by my first test, promises incredible results.

Just one small problem: my test plants were starts left over from the spring planting, but the verniponics ones matured faster. So fast they haven't any pollinating partners, so they can't yet fruit!

Poor things. I'm tempted to harvest the squash blossoms so they won't go to waste, but haven't wanted to disturb my test. Besides, they're kind of cheerful, all yellow against the green leaves.

*the technique is "vermiponics" but since I call all the entowered and free-ranging composting worms Verne...

Detailed post about the tests coming soon. Ish.

Monday, May 3, 2010

Tower Test: The Which Way is Up? Wormery


Can Verne Read a Compass?*

Success or failure? Depends on your needs, I guess. Can you add bokashi directly to a smaller worm unit, without pre-composting, using this technique? Seems so, though more testing’s probably a good idea. Will your worms die or run away? Not based on current evidence, though perhaps Verne is special. Will you get vermicompost out of it? Yes, in time. Am I planning on adding it to my rotation? Not on your gamma seal! Though I may try something midway between this and my usual worm-feeding practice, one of these days…

I’m recovering from a bokashi shortage, so when the debatable item I decided to add anyway turned out to be unsuited for a household bucket, I just tossed in an extra scoop of EM bokashi bran and set the container aside to cure a little longer than standard. When I opened the bucket, there was evidence of fermentation (vinegar scent and visible acetobacters), but not nearly enough to make me happy. I really should have added more EM bokashi bran and stuck it back in its corner awhile, but I’m impatient as well as lazy, and having found the ambition to empty that bucket, I didn’t want to waste it. The ambition, I mean. Or the bokashi, come to think of it. –G–

How lazy am I? I’m so lazy that the idea of mixing cured bokashi and dried leaves in a one to one ratio and setting the mix aside, covered, sometimes sounds like too much work. Why should I have to play personal chef for Verne? Other people get fine results adding food directly to a wormery; in larger outdoor units, including cured bokashi. I wanted to skip the pre-composting step. And the mixing. And (always!) the sweeping.

Bokashi is acidic, and worms like acid about as much as your average wicked witch likes water. Too, wet bokashi + dry or barely damp carbon = heat. Not necessary fatal-to-worms temperatures, but even without that, a sudden jump in bedding temp is not guaranteed to make your worms happy. (And, no, I still can’t tell a happy worm by sight, except that I figure if they’re in the towers and planters for me to see them, they must not be too unhappy. Or they’d leave.) Adding bokashi directly to any of the 1 to 2-gallon planters I use for wormery trays is not a good idea. Before I gave it up as too risky, I even had troubles when doing the pre-composting in a no-worms planter just beneath the planted layer in a tower wormery, when gravity pulled bokashi juice from that tray, through the empty one beneath, and into the top wormy planter. Imagine the high-pitched screams: “I’m mel-ting!” Thank you, no.

But Verne’s not as cautious about bokashi as I am on his behalf; some of his aggregate members have infiltrated pre-composting worm-food trays many, many days before I’d thought it safe. While I’d never seen him go after unamended bokashi, perhaps he might! And it would be so much more convenient to set the stuff someplace he could get to it whenever he wished, a space safe from Repulsive and those nasty sharp-nosed rat-tailed possums. If only there were some way to keep the too-strong liquid from dripping down on his little red heads… Yep, I stuck the bokashi layer beneath the worm tray. All the vermi-lit says that composting worms move UP toward food, but as I’ve noted before, Verne doesn’t read. He can find his way into a thirty gallon trash bin doing duty as a cold compost container; a simple reverse shouldn’t be much trouble! So I risked the health of a single tray and assembled a stack of planters: one leaf-filled planter instead of a reservoir, one filled with the well-cured but mediocre bokashi, one layer from an active wormery, and an “emergency hatch” layer on top: a few inches of moistened soil beneath a heavy clay saucer, in case contact with the bokashi altered the pH of the active layer too much and the worms needed to run away.

A week after assembly, there was only one worm beneath the saucer. A collection of wrigglers in the active tray. And some uncounted number in the bokashi layer, mostly younger (smaller) ones, healthy enough to wriggle away from light, and showing no reluctance to dive deeper into the bokashi.

But.

The mediocre bokashi’s smell had concentrated rather than dissipating as it would have in a composting or worm-food planting. One whiff, and I wasn’t about to pester Verne for a headcount. I didn’t even lift that tray to check the status of that leafy reservoir, just hurriedly dropped the worm planter back on top to keep the smell from spreading! Had it not been a mediocre ferment, the smell would have been less overpowering, but the issue remains: a full tray of bokashi, unamended by dried leaves, finished compost, or soil, may retain its odor for some time after assembly.

So this belongs in the same drawer as the clean-the-fridge bokashi bucket. Something to assemble and set aside in an area out of doors, not in direct sun, secure against pests and weather, and sufficiently out of the way that it can sit, undisturbed, for at least one month, and likely two or three.

As I said up top, this is not something I’m planning on doing routinely--I don’t really have a secure enough space, and it’s not all that much work to mix some dried leaves or porch sweepings into the cured bokashi--but this feed-from-below model may prove useful for me. Space is always a concern; if I could add food to the towers without a separate pre-composting area, that really would help! Too, though I have no shortage of dried leaves here at home, that may not always be the case. Nice to have options.

Even if I am going back to my standard one-to-one. At least the neighbors will be happy, as that does mean I have to sweep.

*Blogger's still not giving me an image option! Grr.

Friday, April 23, 2010

Oh, to be a homeowner!

Blogger doesn't seem to be happy, so I'll just tell local folks that the City Austin's got an interesting composter rebate program going--limited participation, conditions, go check it out. Happy composting!

http://www.cityofaustin.org/sws/green30_challenge.htm

Saturday, April 17, 2010

Fails from the Bucket: Planter-Finishing SIP


Yeah, okay, after the bucket. And only a small test, as I was pretty sure this wasn’t a brilliant idea. Sometimes, you have to try anyway. If it had worked, imagine the time I could save!

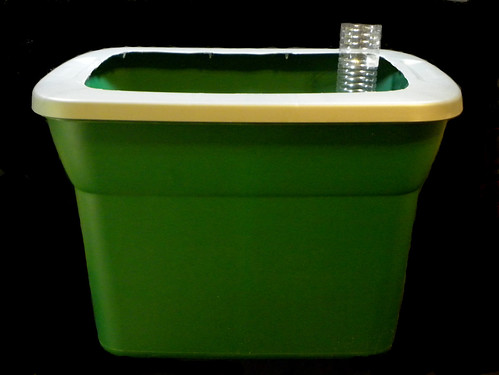
A little background for you lucky folks with in-ground gardens: an SIP, sub-irrigation planter, is a planter with no bottom drainage by design; instead, it has a water reservoir at the base, with some sort of wicking system to draw water from the reservoir to the planting medium. It encourages strong root growth, conserves water, discourages weeds, and can increase harvests dramatically (though some herbs and hot peppers will not develop full flavor grown in SIPs).

My personal preference is for clay pot irrigation, but SIPs run a close second, particularly the designs that can be tossed together in a few minutes from materials already on hand with no other tools but my trusty cordless drill. Beginning with an empty planter, it’s really no trouble at all, and repays the forethought all season long. Here in Austin, where drought is more the rule than the exception…

So where’s the fail? I tried a standard post-bucket bokashi technique in an SIP. Out of curiosity. Sandwiched a layer of cured bokashi between two thicker layers of soil based potting mix in the newly constructed miniature SIP. Didn’t water the soil in at all, but filled the reservoir completely.

This was not a good idea. The whole point to an SIP is that the wick delivers water to the soil, so there was an excess of moisture in the mix in only a couple of hours. Not mud, just too much moisture for the EM and soil-borne microbes of choice to do their thing, so some of Nature’s more water-tolerant digestors showed up to help out.

Yeah, that’s polite for insects.

This isn’t to say I won’t keep adding bokashi to my planters; I will. It just means that, in the case of SIPs, I’ll either be constructing them without any water at all (using the right wicking system, this should be possible with a moist mix kept covered for the finishing period), or I’ll use composted or otherwise finished bokashi rather than finishing it in situ. Which has always seemed like a more efficient process to me anyway—when putting it directly into a planter, you can only use one third the total volume of your container, but in a trenchless bucket set-up, you can use half, or even a bit more, if your soil (not potting mix) is particularly healthy. You just can’t use very wet soil, or get the soil wet too soon.

Ah, well; it’s a process, gardening.


Happy microbing,

DSF


image from Inside Urban Green, where simple instructions for building SIPs can be found.