Showing posts with label bokashi experiment. Show all posts

Saturday, July 30, 2011

Tales from the Bucket: Dirt Nap


Dirt Nap

No, that's not the reason I've been silent (fortunately), but the current bokashi-bucket tweak.

Some disciplined container gardeners "rest" mixes between use in order to prevent pathogen transfer, discourage insects, and limit the spread of pot-weeds. I'm not often that disciplined--typically, if I have a container full of potting mix, there are three plants on hand I could put in it! But this hasn't been a typical year.

There's a depth factor for sun-sterilization, and I haven't bothered with anything like proper procedure, but something like fifty days of 100+ heat and sun, following after yet another season of drought, has left a bunch of pots filled with dry mixes but largely devoid of life. Plant, animal, insect, or, just possibly, microbe.

Obviously, can't have that. Not at the house of buckets. -G- The usual procedure for using bokashi in container mixes is simply to layer mature bokashi between inches of soil-based mix, but that assumes a mix that's damp enough to work with. I'm not planning on watering dirt weeks before planting-time! We're under watering restrictions.

Understand, we're talking dry, dry former soil, some of it baked into rocklike chunks and the rest all dust and flyaway clumps. I did try digging a hole, scooping some bokashi in, and filling it back up; but the dirt was so resistant to absorption that it was still all powdery when the crepuscular scavengers came by for dinner... The only saving grace was that it was easy to clean up; just took a broom.

So now I'm doing the initial bucket-fermentation stage with that dry-as-ashes dirt.

Call this an advanced technique, because I certainly wouldn't recommend it to a beginner! There's a decent chance it will fail according to one of my basic criteria: presence of insects, due to eggs or estivating critters. Or even, if you have a deep enough pot that some moisture remained in the bottom, worms. Verne and company are only really welcome outdoors; I can tolerate a closed wormery indoors in some circumstances, but would rather not. And they don't tolerate the pH in a working bucket, so they have to be carefully repotted once hatched or revived.

There's also a more-than-slight chance of starting a hot-composting reaction in the container, not necessarily a problem but certainly something to watch. (I'm mostly thinking about the paper towels soaked in bacon grease, or the glistening fast-food bags, and wondering just how thick the soil layer has to be to exclude the oxygen a fire would need.)

And if you're fermenting things generally not considered compostable in a home setting--that is to say, meats--there's always the need to ensure a quick and thorough fermentation, and that can be a bit more difficult with changing volumes of organics and inorganics. In practice, that means you may have to more actively manage the planter-bucket than you would a more standard bokashi bucket set-up. Not too much work, mainly a matter of juggling additions to be sure you have a few inches of fermentables all at once, with AEM. Still, one more thing to pay attention to, as opposed to the standard "dump, cover, forget" easier-than-trashing method.

But on the positive side, this entire bucket-to-garden technique uses no water beyond the cup or so to mix up sufficient AEM or bokashi bran for a single bucket/planter. There's no draining required (usually). And at the end, if you've been sufficiently generous with your ratios, you have a bucket full of just-moist-enough, oddly pickle-scented soil-and-fertilizer mix ready to be inoculated with worms or dumped into next season's raised beds or containers on top of a layer of leaves and poor soil, and covered to rest again until planting-time.

Only this resting time, the microbes are all awake and chomping. The fall tomato bed's starting to look really nice, and the first bed I constructed with this stuff is growing nice, bushy basil on only two quarts of greywater per plant per week (olla pots, naturally).

Basic procedure:

If you've got a deep container full of dirt, may as well use that. Bag the base in case of seepage or bugs.

*Partially empty or fill container so it's about half filled with dessicated soil.
*Apply EM as in a standard bucket.
*Add fermentables and EM as usual, at least a few inches worth.
*Add one inch dry soil.
*Repeat until out of soil or space.
*Lest rest until a nice thick acetobacter mat connects the whole.

Note that the top layer of soil should be moist at an inch down after about a day, from absorption. If it is not at least damp, add a small bit of moisture. Very small, and not too soon.

Don't forget to keep this covered! It may not look like a standard bokashi bucket, but it's still fermenting in there. I covered one working soil-bucket simply with a plastic bag, figuring the soil would work to exclude oxygen. Came home to an apartment permeated with Eau de Pickle Factory Explosion.

Really a better idea to do this outside, but 1) the heat outside my door would dry the fermentables before the microbes could do their thing, and 2) I'm too lazy to carry my kitchen waster across the threshhold even once a day. Easier to keep the bucket next to the garbage and recycling. Covered. Lesson learned.


So far, I haven't used the resulting white-threaded enriched soil for direct-planting, but I'm planning to; I'll simply stop fermenting with three or four inches of space left in my planter, let the concoction rest, then top with an olla pot and transplant in moistened unfermented potting mix.


This isn't exactly the all-in-one bucket I'm still dreaming of, and seeing as it requires horrible lifeless soil I'd rather not be in a position to ever use this technique again, but...did I mention toil-free basil in August? Hope for the fall garden even when all is dry and sere? And not having to rinse out bokashi buckets when it's 105 is also a plus, I think.

Hey, look: the garden's alive! And so is the blog.

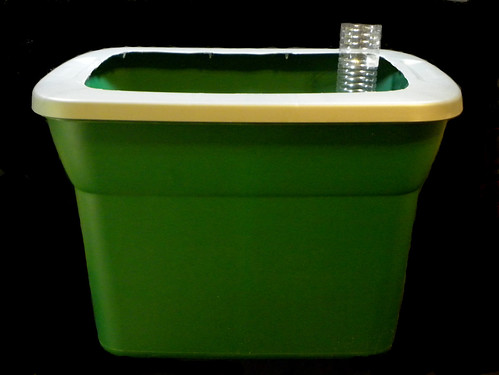
Image from an article titled RIP: Recycle in Peace (Yes, that is an urn-planter!)

Monday, May 2, 2011

...and the results are in!


Sorry for the lack of posting lately—oddly for me, I haven't had much to say! -G- Since I was low on pot-fillers and plant-foods, I went back to the processes I knew would work and shelved (most of) the experiments awhile, and “Day fourteen: bucket ready for stage two” doesn't make for interesting posts.

But it occurred to me as I was picking lavender for a fruit salad that I had written something about that plant's rooting medium soon after its potting, with no followup. So...

This is one of the plantings where I used bokashi and shredded office paper, with no additional microbial source and an extra-long curing period during cooler weather. I tossed some exhausted dirt in the bottom of the container, filled it most of the way with the paper-bokashi mix, then dug a small nest into the paper and filled that with decent potting soil, into which I planted a typical four-inch nursery start. About an inch of soil to top. No olla pot in this planter, mostly because I didn't have one ready but also because I wasn't sure the paper would hold one stable. (A later test confirmed that assumption, though it is possible to use the side of the planter as a partial support.)

Call this a very slightly qualified success I cannot currently replicate. It's a little messier than I prefer my container gardening, especially without crockery in the bottom of the planter—a step I gave up on for good when I realized that it might prevent worms from colonizing my plantings. But the muddy deposits around the base of the planter are attractive to wandering worms, many of whom then find their way into the planter, and a larger-than-normal drip tray will retain that nutrient-rich material until it can be tossed back on top or harvested for another planting.

As well as the mess, this method looks like it might require a mid-season addition of potting mix. This isn't an insurmountable problem, but I prefer to avoid mucking about with roots between repottings. The bokashi and paper seem to be decomposing both faster and more completely than I'd anticipated, and there isn't enough soil in the planter to support the plant alone. Next time, I'll add a bit of sand or some other non-nutritive material. Natural fabrics, maybe; they decompose more slowly than paper, and plants root well in them.

Now for the good parts:

No root-burn! Most of the bokashi mixes have to be cured after mixing with potting media, which is fine for more organized gardeners but a trial for me; this material was close enough to neutral pH to be safe for immediate use, and while there was likely a bit of heating, it wasn't enough to register on my low-tech tests, no more an issue than Texas sunlight if the planter was watered adequately for the plant. (A second test suggests that you really don't want to let it dry out even halfway within the first week, though I found no troubles thereafter. I'd try it again, but I'm out of “hoarded” bokashi. For now.)

No long-term odor. There was a faint but present unpleasantness upon emptying the hoarded bokashi, as there often is when emptying a bokashi bucket left to sit awhile—which is why I always do that outside—but it wasn't noticeable an hour after the planting was finished. A soil cover or some other barrier is definitely necessary lest the material attract pests, but with that one small remediation, this seems like it could be used in any outdoor setting.

No additional fertilizer needed. Bokashi's a nice sub-surface slow-release plant food; 'nuff said.

No trash. Convert kitchen waste and junk mail into produce? Sounds great to me. And this method used only “trash” and an EM source, plus a small quantity of soil for the potting, most of that re-used. Cheap and responsible, my favorite kind of technique.

The lavender was one of two plants I potted in this mix, the other being a blood-veined sorrel that's quite stunted in appearance just now. A casual observer might decide it was was overnourished and therefore feels no need to grow—look closely and you'd see signs of my too-frequent harvesting. What can I say? I grow things so I can eat them.

The garden plan having been scuttled by last fall's too-dramatic events, I joined a CSA this year to augment my produce production. Vegetables are packed in shredded paper for transport, so I thought I'd try the same slow-cure method...but it turns out that doesn't work in warmer weather here. No bokashi hoarding in Texas heat!

Maybe in an air-conditioned office?

Definitely worth further trials.

--Until the next,

DSF

[image source: http://dittodoesit.com/2011/02/academy-awards-envelopes-designer/]

Friday, March 25, 2011

Project Restart: Hoarding Bokashi


[image from http://www.vendingmachineservices.co.uk/]


No, wait, I mean storing. Holding at a particular point until ready to use. Really. I may be something of a miser when it comes to finished vermicast, but all the other composts, plant foods, and rooting media are there to be used--I'll just make more. (Verne et cie would finish more vermicast, too, but only if I refrained from stealing their vermicompost at earlier stages. Which is unlikely.)


This winter past was unusual even for me, and there came a point when I had a bucket of mature bokashi and no post-bucket plans. No planter towers or Repulsive-and-Verne double-decker to feed; no soil conversion units; not even a bag of dried leaves.


It was not, at that point, cold enough to freeze, or I would have appropriated a filled leaf-and-lawn bag from the curbside pick-up, scooped out enough dry matter to make room for the bokashi, and then set the assembly under the porch until spring. If it had been reliably warmer, I might have stolen some worms back from one of the foster-folks and set up a new tower o'Verne. But winter in Austin being what it is, neither seemed likely to succeed.


Bokashi isn't stable at the point we consider finished. Really, it isn't even finished, though the microbes have (we hope!) wholly colonized the bucketed materials, eaten most of the available sugars, broken down some of the cellulose, and so on. My usual practice is to add different microbes at that point--thermophilic or otherwise--but if you left the bokashi alone in its closed container, it would continue to ferment awhile. After some time, the EM would die off, starved or poisoned depending, and other microbes would emerge.


Remember, bokashi works on a principle of dominance; those other microbes have always been in there, just dormant or incredibly slowed. In the absence of thriving EM, other available microbes suited to the environment take over. Those newly productive microbes might be molds, if the bokashi is on the dry side and has any air coming in, or fungi, but in a standard wettish closed bucket, what you get are the dreaded stink-producing anaerobes. I've done that, and there was no way I was going to risk it again!


But...what if you could balance the environment enough to slow everything down without adding any new elements? The dominant set would still be dominant, right?


I know from past experiments that newspaper works as a carbon source, but does not carry any of the necessary soil-borne microbes to start my usual second-stage composting. As I strongly prefer wholly composted bokashi--using the gardener's definition of the term: a product homogenous in appearance and safe to use as a primary element in potting media, as top-dressing, etc.--I hadn't bothered to do much with paper since determining that. It's useful to balance moisture in a bucket if you've got the volume to spare, won't impede the fermentation unless there's not much moisture to begin with, breaks down well enough once the composting starts but will slow the composting if allowed to clump or used in whole sheets, and there's no real difference between adding it during or after the fermentation. Overall, far inferior to dried leaves as a future-garden item, but since it's free and widely available, I expect it gets used far more in other people's buckets, and since it doesn't carry insect eggs, it's a better choice for indoor tests. (Assuming you've used all your shredded phone books, anyway.)


It might, I thought, serve to wick away just enough moisture to slow fermentation. So I split that one bucket of otherwise homeless mature bokashi between two buckets of hand-shredded paper, sandwiching each non-homogenous glob of ferment in a thick black-and-white nest, weighted one and wrapped both in plastic to ensure no additional airflow.


And then I waited. For months. I would have ended this test at the first sign of failure, of course, but when no such sign came...well, I'm lazy, and I was curious, so I let it keep going rather longer than I had planned. Almost three months in all.


The result is still a non-homogenous glob in a black-and-white nest, the weight creating a damper and more compact upper layer than the other but generally the same. It has a faintly disagreeable odor beneath a still-perceptible vinegar tang, and the pH is so nearly neutral that my standard low-tech tests don't register the difference. The literature isn't as clear on this point as I'd like, but generally tends to imply that this material would be safe to use as a subsurface fertilizer even in contact with roots at this point. To date, I have found exactly nothing about its suitability as a primary component of rooting medium for short-season crops--assuming your chosen additions addressed the stability and airflow concerns--but I figured I'd risk a few Verne-bits and a transplant or two on a real-world trial. So I scattered some vermicompost and dried leaves in the bottom of two planters, dumped my stored bokashi-and-paper atop that, then added a basic potting soil and blood-veined sorrel in one and a worm-seeded mix in the other, with a lavender.


Neither has died yet as of this posting, nor has there been a mass exodus of wrigglers, but at not quite a week from planting it's maybe still too early to say whether or not this is a success*. At least it wasn't a failure as far as the storage goes; and it might be worth trialing a bucket or two of fermentables cut into the retailer-recommended tiny pieces, fermented as usual and then mixed with cross-cut paper and sealed up again, to see how long it takes the pH to normalize that way. The resulting product still won't be as versatile as compost, but smaller bits mean less of an ick factor, and if paper and bokashi alone, in the absence of air, can be used to create a slow-release fertilizer suitable for use with food crops, just imagine how much cheaper start-up gardens might be!

--to be continued in another post, as there are a whole lot of words here and I'm not yet finished babbling. -G-

TTFN,

DSF


*First sighting of Repulsive's winged form this weekend. Not, I am happy to report, in or around either of those test planters. But one never knows what he (she, in this instance, but Repulsive is always male to me)gets up to when I'm not watching.

Monday, February 28, 2011

Not a bright idea


Bokashi buckets are pretty much always wetter than the ideal--unless you're using a commercial juicer, maybe, or don't generate any waste beyond citrus peels. For the rest of us, the standard-model bucket with a false floor is a good idea. But it isn't always practical, so now and then I play with assorted moisture-regulation techniques.

Someone who shall remain nameless wondered if perhaps condensation of pure water could be encouraged and drained. What can I say, it seemed reasonable at the time; there was talk of a self-watering planter, you see...

Yes, bokashi buckets do generate condensation. Yes, that condensate is [much!] closer to neutral pH than bokashi juice. No, I will not be continuing this experiment.

Because, you see, something in the collection upset the microbial balance inside my test bucket. Instead of the usual this-volume-claimed-by-EM mass, I found pockets of proper bokashi interspersed with pockets where mold was the clear victor in the struggle for dominance. The overall character was of bokashi, so I tossed in a heroic dose of EM bokashi bran and crossed my fingers, but that licheny pale blue-green is not a color that belongs in the bucket. I'm not sure whether it was lack of moisture in those areas or perhaps a bit of intruding air that gave the mold spores their chance, but whatever it was, it has now been stopped, and I will not risk it again.

There are easier ways to water plants. And to keep the bokashi bucket's bottom from stagnating, too.

I do wonder about bio-char...

Saturday, February 19, 2011

Greener Bokashi


...that's “green” as in eco-, not mold, folks!

As such things go, bokashi's already pretty green. At-home bucket fermentation followed by composting, trenching, or use as animal feed diverts organics from landfill and reclaims nutrients that might otherwise be lost. The process uses no electricity and very little people-power, creates no waste beyond a bit of carbon dioxide if properly managed, and requires only a minimal investment in resources.

Minimal here being a relative term, of course. EM bokashi bran is a retail product, which must be manufactured (sort of), packaged (in packaging that must be manufactured), shipped, stored, and purchased. EM-1 and EM-Plus liquid inoculants likewise, though they require less packaging, shipping, etc. Some retailers use reclaimed bottles, others offer compostable plastic packaging for the EM bokashi bran, and my latest mail-order purchase came with cornstarch packing peanuts, so they're working on lessening the total environmental cost.

But every bokashi bucket I have ever seen for sale is plastic.

Some of them have EM mixed in, and those I'd really like to try some day, but for the most part, bokashi buckets are plastic because that's what cheapest, and there's just not that much money to spare in bokashi yet. Even so, the retail bokashi buckets aren't what I'd call cheap, just less expensive than hand-made porcelain with EM in the material.

(Which would be incredible. Any potters out there willing to give it a try?)

Among my circle of acquaintance are none of the uber-dedicated no-plastics folks, but several us of are trying to reduce the amount of plastic in our lives. We're giving up Tupperware for canning jars; have more fabric shopping bags than shirts (almost -G-), are dipping our toes into mesh bags for produce and have learned how to label tare weights on our reusable bulk-ingredient containers.

Bringing more plastic into our homes doesn't feel right any more. Personally, I make an exception for gardening since plastic containers are cheap or free and I really couldn't afford to grow as much of my food as I do without them. And bokashi is an integral part of my gardening these days, so it gets the same pass. But not all my friends are yet converted to the joys of bokashi—

—does that sound as cult-leaderish to everyone else as it does to me? Yikes!—

Anyway, I can't possibly ask my plastic-aware friends to give plastic buckets pride of place in their increasingly plastic-free homes. It's one thing to ask the gardeners if they'd be willing to foster a plastic bucket wearing a pillowcase hood out behind their garage, entirely another to insist they keep a cat litter bucket on their kitchen counter. With or without an industrial-sized spigot at the bottom.

So I've been playing with ceramic kitchen canisters. The white ones in the photo came from a local thrift store, and the set of three cost me $6.48. No spigots, so this isn't ideal for someone who wants a regular supply of liquid plant food/drain maintainer. But if you're not into bokashi juice... The clear plastic one was my trial, $1.08 from the dollar store, purchased so that I could make an informed recommendation about absorbent materials. (More than went in this batch!) Canisters can be purchased to match pretty much any décor, and they're much more discreet than even the commercial bokashi buckets, much less my home-cobbled versions. The gaskets prevent odor escape and insect entry, and as long as you're able to open them once a week during the two-week curing stage, don't seem to present any risk of re-enacting the Great Canning Disaster of '06 ™ . These don't offer much total capacity, but should be more than sufficient for the particular household; larger crocks are correspondingly more expensive, but a quick online search turned up several with prices comparable to the retail bokashi kits.

I have once or twice seen ceramic kombucha jars/vinegar jars/wide-mouthed ceramic beverage dispensers with non-metal spigots, and if I could afford a custom piece, I'd order one of those with a non-metal grate an inch above the bottom, plus an airtight lid in place of the filter-ring and cork. Though, actually, cork would work if the fit were sufficiently tight, you'd just have to be a little more careful about keeping the mouth clean.

Longer post than I intended. Takeaway message: bokashi doesn't have to be fermented in plastic containers. Ceramics work just fine. Strong glass can be used, with caution—I've taken to using a bubbler for AEM, and don't see any reason you couldn't use one for the bokashi as well. Metal won't work in the long run, since the acid will cause it to rust, but can be used for a few fermentations if that's what you've got. (I used a coffee can for a fermentation unit once, and have used metal sieves for false floors continuously for months before they rusted away. Presumably, metal sealed against oxidation would work even longer.) If you want to add bokashi to your life, it can be done even if you're avoiding plastics.

Ask your friendly neighborhood Cult of the Microbes representative today!

DSF
...who's obviously been drinking the Kool Aid EM-X water...

Thursday, September 9, 2010

Bokashi gel?


I don’t much have houseplants (tiny apartment and all that), but I do have office plants. Full-spectrum light on a timer keeps them photosynthesizing, but that’s only part of the equation; they need to be fed, too.


I’d rather fertilize them once a year and have done with it, but that’s really difficult in a desktop container. Once a season I could maybe manage with compost, but compost made outdoors is likely to have… shall we say, inhabitants that aren’t really suited for the workplace. You can freeze-dry or pasteurize compost, which will kill any macro-digesters, but also the microbes, and after all the time I spend encouraging those micro-critters to grow, I think I’d feel too guilty. Or maybe I’m just lazy. (I don’t even sterilize compost for seedlings.) More likely, it’s the memory of the stench the one time I tried drying compost in a low oven.


Blecch!


Whatever the reason, I’m not likely to be using my freezer for CompostCubes™ any time soon. I do sometimes solar-cook a thin layer of finished compost for use in containers, but my indoor potting mixes tend to be pretty light on the slow-release nutrients.


So I water the potted plants with diluted bokashi juice when I remember to bring some in. (My day job is highly resistant to composting/recycling and very oriented toward anti-microbials; bokashi doesn’t have a chance on-site.) Bokashi juice has no shelf-life--none!--but must be diluted and used immediately upon collecting. Diluted, in a tightly capped bottle, it’s okay overnight, but that’s about the limit. Refrigerated? I’ve never had the courage to find out! Which means that I have to refrain from watering the office plants when I notice they need watering, so that I can go home and mix up the plant food.


Not always feasible. If the plants need watering on a Friday, they’re getting watered.


Haven’t found a way around that yet. But I may have found a way to get bokashi juice into the office plants at repotting or even between pottings, that should make subsequent bokashi-juice applications less frequently required and more effective. Maybe. Not free, local, recycled/repurposed, nor completely natural, so not my perfect ideal, but it might mean the difference between stressed work plants and happy ones:


Polyacrylamide.


Sold under a host of brand names, this polymer is designed to “Absorb And Release Water In Soil” according to the packaging of the Soil Moist I picked up at the garden center this weekend. So it should absorb and release the dilute bokashi juice. Hardly an original idea—there's a product sold to nurseries called Incredagel that's pre-mixed polymer with plant food and water, and the brand extensions for the one I bought include a range of N-P-K options--but if it works, it’s a welcome addition to the lazy gardener’s repertory.


Of course, none of my plants are thirsty right this moment—it’s been raining—but they will be. And I’ll be ready. –G-


DSF

Sunday, September 5, 2010

Backyard porch science: DSF's FAIM-ous Brew?


image from 2funadguyz, who will happily sell you a full-size poster. Probably best to put in your home rather than your wormery--just in case Verne really can read. (Though I'm pretty sure he can't!)

Call this shortcut recipe FAIM, for False--or Faux, if you're in that sort of mood--AIM. There's nothing scientific about it, though I'm hoping others will be a bit more rigorous in their testing [yes, that's a hint]. Short version: kombucha + vermicast + molasses and water as if making AEM, let ferment to completion once, then again to ideal pH, then used.

Longer, rambling version follows. You have been warned.


--Ahem--


If anyone wanted to issue me a white coat, it'd be the sort with the extra-long sleeves that fasten in back. I am no sort of scientist—among other things, I never could hack the math—but now and then I do try to dignify the stranger of my behaviors by calling them experiments.

This one isn't finished, but it's nearly as far as I can take it, and I can't be sure my success to date means that this process will work for anyone else. So I thought I'd write it up, see if any other mad fermenters might be interested in giving it a try. (Also, I'm none too confident the folks with the big butterfly nets will let me bring all my buckets along. -G-)

Should probably start with a screen and a half of disclaimers, but I don't feel like it. This is not EM, nor should it be treated the same way. I don't yet know if it's as effective—again, I don't know if it'll work at all for anyone with a different situation than mine—but I am certain it's not shelf-stable, and as I'm not working under lab conditions or anything close, I don't really know what microbes beyond those I'm after might be in here, so it's not recommended where you're really concerned about pathogens. It's just something to play with, okay?

Indigenous Micro-Organisms (IMO), also known as Beneficial Indigenous Microbes (BIM) can be cultured from forest, field, and pond or even your backyard, assuming you have more than just manicured lawn. I have done this, using the process described at AgNet, and re-cultured the result for use in a bucket, too; but this is not that.

This is the easiest recipe I could concoct that might possibly stand in for retail EM-1 in my buckets.

I sometimes run a kombucha jar; other times, I buy a locally made kombucha by the glass or bottle. Kombucha, for those of you who don't know, is a fermented tea drink that tastes rather like someone made soda using cider vinegar and sweetener (better than that sounds, and quite refreshing). But the important part for this post is that kombucha is made by feeding tea and sugar to a SCOBY, a Symbiotic Culture Of Bacteria and Yeast. For bacteria, read lactobacilli.

As in, two thirds of the triad that makes up EM: yeasts, lactobacilli, and PNSB (rhodobacters).

I have tried using lacto-only or lacto/yeast inoculants in my bokashi bucket, and while other people have reported success with those, it doesn't work for me except in strictly vegan buckets, and my buckets cannot be vegan, since I'm not.

So I needed a source for those PNSB. The rhodobacters I'm after propogate where soil, water, and sunlight meet. Pond mud of certain depths. Rained-on dried leaves left to lie on fertile soil. Bromeliad cups. Some garden soils. Trouble is, it's really hard to tell if you've got them without doing the whole jar thing, unless you luck onto some purple mud.

They are, of course, in retail EM. Perhaps they're in vermicompost made from EM bokashi? Seemed likely enough to be worth a try.

I mixed two tablespoons of fresh kombucha, one tablespoon of molasses, and one tablespoon of finished vermicast (not -compost, but the worms-have-moved-on, absolutely finished stuff). Filled the liter bottle with water, and left it, tightly capped, in direct sunlight.

Bled off the gases when the bottle bulged, but otherwise left it alone for about two weeks. When the smell had gone from molasses to nearly pure alcohol and the bulging stage was done, I did it again, using one tablespoon of the new brew and one of molasses in a fresh bottle of water. There was much less alcohol scent this time, and the final result smelled like EM-1, so I treated it that way, mixing it with molasses and water yet again to use in a bucket (and in my leaf-and-UCG worm food), and to make a baby batch of non-EM bokashi bran.

First bucket test is finished, and successful—but it might almost have been rigged to succeed, since that bucket was fed tea bags (kombucha microbes are used to tea!), pineapple skins and apple cores (yeast and lactobacilli with fruit sugars, nearly guaranteed to ferment), and no meat or dairy (I didn't cook much that week). Second bucket underway, non-vegetarian this time, and it seems to be doing well so far. But 1) it's early yet, and 2) I don't know if vermicast or compost from a region not dosed with retail EM for more than a year would do as well.

So I'm just putting this out there, hoping there are some similarly curious folks who'll give it a try. Bokashi experience not necessarily required, though a bucket or reasonable facsimile would seem to be necessary...

DSF

Monday, August 30, 2010

Eye of Newt?


image from Cartoonstock, and I want it on a T-shirt!

Been re-testing my IMO recipes lately—that's Indigenous Mico-Organisms, also known as Beneficial Indigenous Microbes or BIM, and searched for most often on this blog by folks searching for a wholly non-retail solution.

In other words, EM you don't have to buy every so often. Or ever.

Not all IMO is EM, but by definition, all EM is IMO; the formulation of retail EM differs by region or country. If you live in an area with glorious, gorgeous, healthy “plant a seed and stand back” soil, you probably have all the IMO you need for everyday purposes. Maybe a little extra dose of rhodobacter(s) if you wanted to process manures, or for indoor fermentation, but otherwise, at least for outdoor composting & gardening, you're set.

I do not live in such an area, and even if my part of Austin were as lush as virgin, unpolluted rainforest, my soil comes in bags from the store and spends its useful life in plastic planters, aka buckets, wholly divorced from the soilweb. So I need microbes. EM bokashi bran suits my situation well, and buying a bottle of EM-1 every year, plus molasses and wheat bran (and scrounging/buying assorted other possible carriers) is still cheaper than buying decent quality bagged compost from the garden center. I've even been known to spring for the packaged EM bokashi bran*, though it really doesn't take much longer to mix a baby batch of bran than to log on to an e-tailer site and place an order.

So if I'm happy with the retail model, why do I play with IMO? The same reason I'm still playing with this blog-project—there aren't enough answers out there yet! Bokashi is still relatively new, and it's the retailers who are driving such limited education as exists. Some of those retailers...well.

I've had several very positive interactions with bokashi-product-related retailers. I've also run across some who would have kept me from ever trying bokashi had I been unlucky enough to encounter them first. (Naming no names, I shall say only that “if you don't have a house, bokashi is not for you” is not a helpful message, and “composting equals polluting” isn't exactly the right approach, either.)

But worse than retailer-roulette is the idea of no retailers at all. My local Whole Foods used to carry EM-1 in the floral department; no longer. Austin has a local bokashi producer now, but the company's summer hiatus can be a problem—and what about all those places without a local source? Also, yes, okay, there's the fact that I could buy more seeds or starts with that EM $$.

So sometimes I play with IMO recipes. [I promise, those posts are coming.] Checking on one my tests at some impossibly early hour of the morning when the sun wasn't even up yet, I caught myself muttering to remind myself of what I was doing, and even to my ears it sounded a whole lot like some fairy tale witch's shopping list.

Piloncillo, kombucha, vermicompost, coir, lactobacillus serum, acetobacter, SCOBY and PNSB--these aren't words normal people toss around before the first cup of coffee!

But it's years too late to worry about what that longago president used to refer to as normalcy. I'll be happy with verdant--and yummy. And a short-term foliar application of my AIM** just successfully resurrected a drought-crisped potted herb, so verdant and yummy is very much the order of the day.

Happy brewing!

DSF

*someone remind me to buy a second bag of the bran that got recalled, so I can finally post those results. Kthnx

**light mist, all over the plant's crisy-toasty leaves (hey, to all appearances they were dead anyhow), let sit about fifteen minutes and followed with a slightly heavier mist of water. And a camera wouldn't have helped this time, since it would never have occurred to me to take a picture of a dead herb, but I might have to stage a recreation, just for the before-and-after WOW!

Thursday, August 19, 2010

Tales from the Bucket: Rip Van Bokashi


Some days, the less I have to deal with bucket-contents, the better; other days, it's no big deal. Must not have been feeling squeamish that particular Saturday afternoon—I decided to try mini-bags of bokashi with different dry matters to see if they all worked. My favorite dried leaves were my control here, but what about shredded paper with a sprinkling of vermicompost? Or those wood shavings sold as small-animal bedding?

Went with a half and half ratio, mostly for convenience with the tiny little bags I was using (so that I can put them in more places!). But space is always a concern, as are the raccoons and all their ilk, so I ended up stacking all fifteen of my filled-and-tied #2 bags into the same lidded bucket. This is not good scientific practice, but I'm not a scientist. -G- I did put the leafy bags at the bottom, so that gravity couldn't help move their microbes into the other bags, but otherwise, I figured that the test for success would come after planting anyway.

Which rather requires my removing the bags from their bucket...

What can I say? It wasn't really planting season. Sowed few seeds by way of prep for the fall madness, sprouted the odd microgreen, did a bit of rooting from cuttings, but otherwise, I'm more into side-dressing and watering with food than the whole sub-surface slow-release thing right now. So I've got composting planters going for my immediate use, plus soil-topped trenchless buckets for later, plus Verne in his towers and bunking below Repulsive, and I just forgot about the bags awhile.

Until now, when it's time to start planning those fall beds.

The bucket wasn't rocking, nor were there any toothmarks or litters of BSFL casings. Positive signs all! Within: a bunch of white-haired Rip van Winkle bags, sagging with age and bearded with acetobacter growth. The bundles on top are intact enough to move, the middle row and below more disintegrated, and I haven't gotten all the way down yet, but I expect they're in slightly soggy pieces that might need to be half-scooped as much as lifted by their strings. But no worry; there's no off-odors, no insects, no bucket-strain, and they're completely viable—half-composted and half-finished, there's still enough carbon to create a hot-composting reaction, but little enough that it won't even stress transplants assuming the requisite inch or two of soil between. Enough plant-accessible nutrients that starved bean leaves turn green again (one of my favorite low-tech tests!). Enough microbes to replenish the soil web, or to stand in for one, and enough undigested nutrients to sustain the microbes and the plants awhile.

All of which can be had simply by planter-finishing the bokashi, without bothering about the bags. But the bags allow me to use carbon materials that planter-finishing doesn't, for those times I'd rather not bother with composting—or for those settings in which even small-batch composting might not be possible. Plantable bags can reduce the total volume of soil needed in a container or bed, which helps when you have to buy your soil, and they can be used, with some care, in a soil-free container mix, where planter-finishing may not be possible*. And bags are portable! While I suppose I could take a bucket of ferment off-site, I really don't like the idea. Bokashi is unaesthetic at best. Small bokashi bags can be tucked discreetly into each deeper-than-usual planting hole, and they require no special handling.

Nor, apparently, much in the way of special storage. Moisture-conserving and pest-proof seems about it. A versatile, scalable, at least short-term-storable solution that can be made and kept in the same small container. Am I dreaming?

...coffee cup's empty, so I guess not. But I'm still thrilled.

Happy bucketing,

DSF


*Generally not recommended, anyway. Soil-free mixes are too light, but you can add a weight for that; the other issue is lack of complementary microbes, but mature compost or other sources are available.

Saturday, August 7, 2010

The Cabinet Garden


Garden cabinet image from Luxury Housing Trends, which has managed to put ideas into my head though not (yet) any new holes in my wallet

Some friends offered me a bit of space in which to garden, with very clear guidelines: their space, but my project; do not ask them to do anything with it; tomatoes. I started small, using a repurposed old wooden kitchen cabinet with the doors off to frame a side-by-side-by-side test where failure would be nothing worse than dead plants--no off-odors, no insects, nothing weird. Used mostly scrounged materials, plus bokashi and composts made in Bucketville (not enough of those, as I was trying for equal volumes and ran short of one). And because their place isn't exactly next door, I set it up to require no more than weekly attention.

Which to me means raised bed with slow-release nutrients mixed in + olla pots + covers. One quart olla per tomato plant seems to be the practical minimum, and when the days are routinely 100+, twice a week watering is a really good idea, but until the triple-digits hit I'd been averaging ten days between waterings and the plants were still producing fruits. Not, mind, as many as I'd have liked, but I've never yet had enough tomatoes, and considering the cheap soil base and inadequate organics volumes, I'd call it promising enough to be worth extending the test.

As, apparently, do my friends, who have given me permission to put in a few other plants. Including some fall tomatoes, naturally, with which I shall be planting bokashi bags made for the purpose, with ratios of 4:1 and 8:1. The 8:1 test produced earlier and more tomatoes than the compost or vermicompost with or without worms, you see; I'd like to know how much wiggle-room there is in that recipe, and whether different ratios produce results different enough to be worth noting, but mostly, I just want more tomatoes, so this time, every plant gets an olla and a bag.

...now if only I had a few more cabinets...

Monday, July 19, 2010

Don’t Try This At Home


—no, wait, I’m not your mother! Do whatever you like. But this may present a slight hazard in some situations…

Some little while ago, I tried a reclaimed bit of peat-based potting mix as an absorbent material in the bottom of a mini bokashi bucket, yet another version of the no-drain model some folks seem to prefer. Worked very well with drier materials, though it was pretty easy to overwhelm and correcting moisture levels isn’t nearly as simple without a drain. But the bokashi it produced was a dense, spongy mass held together with thick mats of mycelia, and it broke down into a usable potting medium remarkably quickly, so I had to try it again. Full-sized bucket this time, with three inches of new coir in place of the soil-less mix I didn’t have. (The stuff that comes in bricks for worm bedding, not the long-fibered kind from which planter baskets are made.)

At first, I thought it was my imagination, but it wasn’t: the coir plus EM bokashi bran plus a pot’s fresh UCG started a thermophilic composting reaction in my kitchen bucket. That first heating passed, presumably through lack of oxygen, but it restarted with each new addition of food (and air). Without a recording thermometer, I can’t be certain, but I’d guess it never went above 160 and didn’t sustain that much heat for more than a couple of hours at a time. Not much visible breaking down, but signs of fermentation are present, so I guess the heat isn’t hurting anything. And it’s even a food-grade bucket this time, so I won’t worry too much about plastic off-gassing or melting. It’s not like I store my working buckets on top of oily rags or anything. Still…

After all the years I tried hot-composting in spaces too small for the ideal three-bin set-up, with barely enough success to keep me from giving up entirely, it’s a tad bit unnerving to have things heating where I don’t really want them to.

On the other hand, this might actually be an all-in-one indoor compost--with no draining, no bugs, no worms, no off-odors, and no need to empty anything until it’s done. What’s a little fire risk compared to that?

...she asks, suddenly hoping the landfolks aren’t reading this. -G-


DSF

[no image credit, because I've lost the link. Sigh. File says "international pictogram no flame-bucket]


UPDATE:

Harvested that bucket a bit after posting this. Next time, if there is a next time, I'll have to add a thick coir layer at about the halfway point, since the material in the middle of this bucket was too wet and trending toward failure, though not quite there. But the stuff at the top was bokashi leaning toward self-composting, and the stuff at the bottom was compost with a slightly higher than normal pH. I layered it with dried leaves, giggling at the speed of heating, and then...well, this is me. I forgot to turn it! But Verne neared warp-speed in his haste to move in, and it's largely degraded past identifying contents already.

Thursday, May 27, 2010

Tales from the Bucket: The Full Circle Bucket


Having figured out how to compost, vermicompost, and soil-finish bokashi appropriately for my setting, why am I still playing around with different techniques? Well, I’m curious, but more than that—this may not always be my setting! And there’s never a guarantee any living-space will conform to retailers expectations. So I’m trying to find methods that will work for other non-standard situations.

This particular bucket test is an unqualified success, but I wouldn’t use it unless my situation required it: by my current standards, it's slow. Three to six months depending on materials and conditions, much slower than my preferred techniques. On the positive side, it’s contained enough that it could be done in a garage as well as the balcony I’ve envisioned, or even indoors given some care with material selection.

What is it? A hybrid composting/finishing done in the bokashi bucket. I have, from time to time, a (temporary!) sufficiency of buckets, and in one of my more squeamish moments, decided to dump some dried leaves into a curing bucket instead of decanting the ferment. Turns out, that wasn’t such a bad idea, though not a complete technique—the bokashi fermentation can take over the leaves, which is great if you wanted acidified leaf matter but doesn’t turn the mixed garbage pickle into any sort of soil analogue.

Poking holes into the pickle-mass and tipping in a bit of finished vermicompost improves the chances of harvesting humus. So does mixing the leaves with the bokashi—in which case, you can probably save the vermicompost for something else. Putting a weight on top of that mixed leaf-and-bokashi makes success almost inevitable, and if you use soil as all or part of that weight, the end result is a familiar, no-explanations-needed bucket of potting medium. The reservoir does need to be emptied a few times early on in the process, after which the tap can remain open and the bucket ignored awhile. Stirring will speed time to completion, but so long as sufficient microbes were added, it’s not actually necessary.

Can’t speak to minimums here; my tests have used one part compost or living soil to four parts bokashi and four parts dried leaves/shredded paper.

What if you don’t have dried leaves? Use some other dry material and a microbe source. I’ve been using shredded phone book pages for the second-stage tests, since they degrade faster than newspaper (and besides, what else do you do with them?), and the same one-to-one ratio seems to work, though the end product is a little heavier. For microbes, use finished compost, vermicompost, or good garden soil.

And if you have unfinished vermicompost that still has worms in it, you can add that about a week after the leaves and bokashi get mixed together, which will greatly speed the time to completion, and get you a healthy new crop of worms as well, so long as the bucket’s kept out of direct sunlight and there’s some actual soil in there—preferably an inch-thick layer on top, above and beyond whatever may be in the vermicompost.

I can’t imagine many people having enough bokashi buckets to make this their primary post-ferment technique, but the closed-container process may be helpful for some settings. Like, say, folks who have no outdoor space!

Theoretically (which is to say, I haven't tried this), you could design your SIP in such fashion as to do the ferment, curing, finishing, and planting all in the same container, just by mixing in various items (EM bokashi bran, then leaves and perhaps soil, then a bunch of coir). All in the same bucket. Grow food crops, and after harvest...

Yeah, okay, you get it. Excuse me, I must have some gardening to do!

DSF

Tuesday, May 18, 2010

After the Bucket: Brown Bag Bokashi #2


--image from PaperMart.com, in case anyone should need to buy a gross of the things--

This year, some friends have loaned me garden space. Still don't have any holes in the ground, but I do have some lovely raised beds! Experiments therein must be relatively likely to succeed, and absolutely guaranteed not to fail spectacularly: dead plants would be a regrettable but an acceptable outcome; dumpster-stench and insect incursions, on the other hand...

So brown bag bokashi #2 was born. Unlike #1, there's no dirt placed in the bag; also unlike the first, this method uses a moisture-retaining cover. The cover speeds the process a great deal; didn't notice any heating, but I rather suspect that's observational failure (don't have a recording thermometer, what can I say). This is nowhere near sufficiently vetted to risk prized roses or rare herbs, but for basic garden veg, it's being rolled out to bucketville's satellites as fast as I can manage. So far, it looks like each package of lightweight, nourishing rooting medium/plant food/soil amendment can take the place of an equal volume of potting mix, so long as there's at least two inches of soil for the start to root into, plus an inch of something--cheap dirt, fill, shredded newspaper, bark mixed with gravel--at the bottom. And it's a whole lot cheaper than even cheap dirt for me! Friends, freecycle, and my local grocery get me the bags; my dollar-store roll of twine will last a year; and the bokashi I have already.


Ingredients: Eight parts random sweepings (the first one was mostly oak pollen, given my area, with the usual bits of dirt and dried leaves I count on to add all those extra microbes) + one part cured bokashi, in a paper grocery bag.

Preparation: Dump the damp bokashi and dry sweepings into the paper grocery bag, roll the top down, and tie it up with hemp or some other natural-material (compostable/decomposable) twine. Stick the assembled package into a plastic grocery bag, the handles tied to make a moisture-conserving, mostly protective casing that is not wholly airtight.

Rest: about a week. (If you're feeling nervous, run a quick pH test on the wettest part of the bag.)

Use: Dump the paper package, now soggy and faintly scented of vinegar, into a planter prepared with drainage and about an inch of really cheap dirt. Fill in the remaining space with a decent container mix, including at least two inches for the plant to root into, and plant olla pots and starts as desired.

Verdict: success! The squash start I used for my first test didn't curl up and die, drop its leaves, develop spots or off-colors, or show any of the other signs of stress. It's a touch smaller than the optimized control but not at all stunted, and began to blossom a few days before its larger cousin, though not so soon as to cause concern. Altogether a compact, healthy specimen. Repeat tests have not been underway for all that long, but early results are comparable.

As with all my paper and cardboard techniques, this may not be the greenest of all possible options, but it's suitable for some situations. In this case, it allows a scalable, portable, soil-free harnessing of bokashi for those folks who, like me, may have no recourse but to purchase soil, or who simply prefer to garden without it. Assuming the bokashi is thoroughly cured before bagging, there's no reason at all one couldn't use a coir-based potting mix around the bag instead of soil, even in an indoor planting.


DSF

Someone please remind me to update this after the growing season, so I can report on long-term results!

Wednesday, May 12, 2010

Is there such a thing as too sucessful?

Verniponics #2* is initially relatively labor-intensive, doesn't use nearly enough bokashi for most small-space gardeners--who may end up with surpluses rather sooner than later--and, judging by my first test, promises incredible results.

Just one small problem: my test plants were starts left over from the spring planting, but the verniponics ones matured faster. So fast they haven't any pollinating partners, so they can't yet fruit!

Poor things. I'm tempted to harvest the squash blossoms so they won't go to waste, but haven't wanted to disturb my test. Besides, they're kind of cheerful, all yellow against the green leaves.

*the technique is "vermiponics" but since I call all the entowered and free-ranging composting worms Verne...

Detailed post about the tests coming soon. Ish.

Monday, May 3, 2010

Tower Test: The Which Way is Up? Wormery


Can Verne Read a Compass?*

Success or failure? Depends on your needs, I guess. Can you add bokashi directly to a smaller worm unit, without pre-composting, using this technique? Seems so, though more testing’s probably a good idea. Will your worms die or run away? Not based on current evidence, though perhaps Verne is special. Will you get vermicompost out of it? Yes, in time. Am I planning on adding it to my rotation? Not on your gamma seal! Though I may try something midway between this and my usual worm-feeding practice, one of these days…

I’m recovering from a bokashi shortage, so when the debatable item I decided to add anyway turned out to be unsuited for a household bucket, I just tossed in an extra scoop of EM bokashi bran and set the container aside to cure a little longer than standard. When I opened the bucket, there was evidence of fermentation (vinegar scent and visible acetobacters), but not nearly enough to make me happy. I really should have added more EM bokashi bran and stuck it back in its corner awhile, but I’m impatient as well as lazy, and having found the ambition to empty that bucket, I didn’t want to waste it. The ambition, I mean. Or the bokashi, come to think of it. –G–

How lazy am I? I’m so lazy that the idea of mixing cured bokashi and dried leaves in a one to one ratio and setting the mix aside, covered, sometimes sounds like too much work. Why should I have to play personal chef for Verne? Other people get fine results adding food directly to a wormery; in larger outdoor units, including cured bokashi. I wanted to skip the pre-composting step. And the mixing. And (always!) the sweeping.

Bokashi is acidic, and worms like acid about as much as your average wicked witch likes water. Too, wet bokashi + dry or barely damp carbon = heat. Not necessary fatal-to-worms temperatures, but even without that, a sudden jump in bedding temp is not guaranteed to make your worms happy. (And, no, I still can’t tell a happy worm by sight, except that I figure if they’re in the towers and planters for me to see them, they must not be too unhappy. Or they’d leave.) Adding bokashi directly to any of the 1 to 2-gallon planters I use for wormery trays is not a good idea. Before I gave it up as too risky, I even had troubles when doing the pre-composting in a no-worms planter just beneath the planted layer in a tower wormery, when gravity pulled bokashi juice from that tray, through the empty one beneath, and into the top wormy planter. Imagine the high-pitched screams: “I’m mel-ting!” Thank you, no.

But Verne’s not as cautious about bokashi as I am on his behalf; some of his aggregate members have infiltrated pre-composting worm-food trays many, many days before I’d thought it safe. While I’d never seen him go after unamended bokashi, perhaps he might! And it would be so much more convenient to set the stuff someplace he could get to it whenever he wished, a space safe from Repulsive and those nasty sharp-nosed rat-tailed possums. If only there were some way to keep the too-strong liquid from dripping down on his little red heads… Yep, I stuck the bokashi layer beneath the worm tray. All the vermi-lit says that composting worms move UP toward food, but as I’ve noted before, Verne doesn’t read. He can find his way into a thirty gallon trash bin doing duty as a cold compost container; a simple reverse shouldn’t be much trouble! So I risked the health of a single tray and assembled a stack of planters: one leaf-filled planter instead of a reservoir, one filled with the well-cured but mediocre bokashi, one layer from an active wormery, and an “emergency hatch” layer on top: a few inches of moistened soil beneath a heavy clay saucer, in case contact with the bokashi altered the pH of the active layer too much and the worms needed to run away.

A week after assembly, there was only one worm beneath the saucer. A collection of wrigglers in the active tray. And some uncounted number in the bokashi layer, mostly younger (smaller) ones, healthy enough to wriggle away from light, and showing no reluctance to dive deeper into the bokashi.

But.

The mediocre bokashi’s smell had concentrated rather than dissipating as it would have in a composting or worm-food planting. One whiff, and I wasn’t about to pester Verne for a headcount. I didn’t even lift that tray to check the status of that leafy reservoir, just hurriedly dropped the worm planter back on top to keep the smell from spreading! Had it not been a mediocre ferment, the smell would have been less overpowering, but the issue remains: a full tray of bokashi, unamended by dried leaves, finished compost, or soil, may retain its odor for some time after assembly.

So this belongs in the same drawer as the clean-the-fridge bokashi bucket. Something to assemble and set aside in an area out of doors, not in direct sun, secure against pests and weather, and sufficiently out of the way that it can sit, undisturbed, for at least one month, and likely two or three.

As I said up top, this is not something I’m planning on doing routinely--I don’t really have a secure enough space, and it’s not all that much work to mix some dried leaves or porch sweepings into the cured bokashi--but this feed-from-below model may prove useful for me. Space is always a concern; if I could add food to the towers without a separate pre-composting area, that really would help! Too, though I have no shortage of dried leaves here at home, that may not always be the case. Nice to have options.

Even if I am going back to my standard one-to-one. At least the neighbors will be happy, as that does mean I have to sweep.

*Blogger's still not giving me an image option! Grr.

Saturday, April 17, 2010

Fails from the Bucket: Planter-Finishing SIP


Yeah, okay, after the bucket. And only a small test, as I was pretty sure this wasn’t a brilliant idea. Sometimes, you have to try anyway. If it had worked, imagine the time I could save!

A little background for you lucky folks with in-ground gardens: an SIP, sub-irrigation planter, is a planter with no bottom drainage by design; instead, it has a water reservoir at the base, with some sort of wicking system to draw water from the reservoir to the planting medium. It encourages strong root growth, conserves water, discourages weeds, and can increase harvests dramatically (though some herbs and hot peppers will not develop full flavor grown in SIPs).

My personal preference is for clay pot irrigation, but SIPs run a close second, particularly the designs that can be tossed together in a few minutes from materials already on hand with no other tools but my trusty cordless drill. Beginning with an empty planter, it’s really no trouble at all, and repays the forethought all season long. Here in Austin, where drought is more the rule than the exception…

So where’s the fail? I tried a standard post-bucket bokashi technique in an SIP. Out of curiosity. Sandwiched a layer of cured bokashi between two thicker layers of soil based potting mix in the newly constructed miniature SIP. Didn’t water the soil in at all, but filled the reservoir completely.

This was not a good idea. The whole point to an SIP is that the wick delivers water to the soil, so there was an excess of moisture in the mix in only a couple of hours. Not mud, just too much moisture for the EM and soil-borne microbes of choice to do their thing, so some of Nature’s more water-tolerant digestors showed up to help out.

Yeah, that’s polite for insects.

This isn’t to say I won’t keep adding bokashi to my planters; I will. It just means that, in the case of SIPs, I’ll either be constructing them without any water at all (using the right wicking system, this should be possible with a moist mix kept covered for the finishing period), or I’ll use composted or otherwise finished bokashi rather than finishing it in situ. Which has always seemed like a more efficient process to me anyway—when putting it directly into a planter, you can only use one third the total volume of your container, but in a trenchless bucket set-up, you can use half, or even a bit more, if your soil (not potting mix) is particularly healthy. You just can’t use very wet soil, or get the soil wet too soon.

Ah, well; it’s a process, gardening.


Happy microbing,

DSF


image from Inside Urban Green, where simple instructions for building SIPs can be found.

Friday, March 19, 2010

great paper, but what sort of a name for a bucket is "ferm"?


Bokashi has far better acceptance rates in New Zealand than here, and it's beginning to move beyond the home! This Wasteminz paper has some interesting bits; as I was thinking about bokashi juice the day I found it, I was particularly caught by

...the juice is able to be utilised for direct
fertilisation of food crops without concerns of spreading common food pathogens.


and

The juice is highly concentrated with organic acids and a pH of around 4. It has a high
nitrogen, phosphorus and potassium nutrient content.

Wednesday, March 17, 2010

There’s a hole in my bucket wallet


Blew the garden budget again, though not by so much as you might suppose; aside from a pack of tomato seedlings I couldn’t resist, all this year’s new stuff has been or will be started from seed, much of it bought locally. Or produced and collected here on-site, like the shepherd’s purse, hyacinth vine, and amaranth. New purchases included a few different sorts of tomatoes—not that I expect them all to thrive, but so I can be sure of having any, and to try the different leaves—a couple of edible curiosities (eggplants shaped like miniature pumpkins? I couldn’t resist!), and a bunch of things the standard American grocery-shopper has never heard of, plus one or two sometimes considered weeds.

Sadly, I don’t think this is the year I’ll be growing enough produce to skip the greengrocers entirely (small spaces=smallish yields, though bokashi’s helping), so I’ve chosen as usual to focus on things I can’t get there or that I can’t afford to get there.

A few durable goods went into the virtual shopping cart, including a pressure sprayer to make bokashi juice application easier. Plus, I bought a few more bags of dirt—given the quality, I don’t think it merits the label soil—though not for immediate use. I am planning to refill the planter tower and let the feral worm colony play awhile, and to set up a test in temporary vermicomposting if I can talk a particular friend into loaning me the space. Also picked up, from the same retailer and brand as the dirt, some “humus” (those quotes denoting doubt) for a few different tests.

Can’t quite bring myself to admit the total here; more than I meant to spend, but less than the season cost of a single share in a CSA in this area. And unlike with the CSA, there’s no risk I’ll end up with a box full of things I don’t eat.

It could have been much worse. High-quality chem-free compost typically makes up a fair percentage of my total cost; so far this year, I’ve bought not so much as a single quart. Between bokashi and Verne (and George), there’s been no need—though that may change once the raised beds are in. Too, I usually end up buying eighty or so quarts of potting soil every spring, to replace the worst of the potted stuff and top off the permanent planters, and until this year have always bought the best I can afford, since I know how important it is. But thanks to last fall’s cheap-as-dirt test, that hasn’t been necessary either.

So wherefore the post-shopping-spree regret? Well, there were a lot of seeds. And though the local drought is officially over, that’s more likely a temporary condition than not, so I’m determined to fit out all my containers with some form of irrigation, preferably primary though I’ll take supplementary if that’s all I can get. Which in many cases equals additional cost, for clay pots to plant with the transplants, or hoses to connect to an external reservoir, or more nested-bucket sets and wicks and hollow pipes and things to make SIPs.

On the other side of the balance sheet, Verne has more than proved himself worth the one-time investment. I don’t think I’ll ever bother with an indoor wormery again, and neither are worms my choice for a primary landfill-diversion scenario, but outdoors, he’s doing his part to maintain soil health in the towers and planters, keeping me from having to replace soil as often (or at all? Too soon to say), and since he’s enthusiastic about his business, there’s no need for me to buy any vermicompost or vermicompost tea this season, either. Or, obviously, worms.

The bokashi’s worth the cost, too. Naturally –G–. Though EM-1 and molasses (and bran, for the standard recipe) are repeated costs, it’s cheaper to buy them than finished composts, fertilizers, and “instant” plant foods. Not to mention the non-monetary benefits.

One of these seasons, I’ll stick to my budget. Really. Maybe if I just start with a higher number…? Oh, that sounds like a bad idea!

DSF

[image from Botanical Interests, which is the right company, though mine were purchased from a local retailer]

Wednesday, February 24, 2010

Tales from the Bucket Bag: This Bag Will Self-Destruct In...


So, that’d be a No on the compostable plastics for by-the-bag bokashi finishing. Or at least, a Not Suited for my particular situation. Other people may have different needs, so here’s the brief:

The compostable bags most accessible around here (all the same brand pictured above) do not respond well to getting wet--so you can’t store them where they may get rained on, and even dew is a concern. Integrity retained less than three weeks if exposed to weather, regardless of contents. For me, that’s not really long enough. And of course, if the bokashi comes into contact with the bag...well, even the retailers say they’re not recommended for use with high-nitrogen, high-moisture compostables:

We strongly recommend that wet grass clippings be left on the lawn, where the clippings will quickly biodegrade and add nutrient value to your lawn. Placing wet grass clippings in either a paper bag or a BioBag can stimulate bag decomposition within three or four days.


I’m not so sure about the fragility of heavy paper leaf and lawn bags, but these writers are if anything being conservative with their estimates when it comes to their own product. In some case, the bags just melt away into nothing; rather cool, but not of any particular use.

But if the goal isn’t to have a discrete (and discreet) bokashi-and-leaf unit, these can be incorporated into other landfill-alternative scenarios. Bentley’s had nice results feeding filled bags to his worms, and while BSFL don’t seem inclined to chew through plastic no matter its source-material, once it breaks down enough to allow access, grubs will quickly dispose of the whole thing.

DSF

Monday, February 22, 2010

It's In the Bag


Saturday morning's garden chore was a good deal messier than I'd expected--in part from lack of practice and weather conditions, but also lack of forethought. Next time will be better, and there will certainly be a next time. This was notable largely for being my first garden bag.

Since posting my intent to try this, I've acquired two small testing spaces to plant them in, one I'll be administering, and one that will adopted by someone else after I've started it. Haven't decided yet whether I'll be trying the same mix and technique in both or not, but it was time to decant a curing bucket and I had all the necessary supplies, so I figured I might as well mix up a bag and worry about the details later.

Problem the first: declaring a top. The paper leaf and lawn bags are designed to stand on their narrow bottom for ease of filling, but to use as a garden, you would logically set it on its side. If I wanted a thick soil layer in the top of the bag once it was placed, I'd have to take care how the bag was filled, stored, and transported. After a few minutes of fiddling, I decided it wasn’t going to happen that day; for this bag, I’d do limited soil mixed in with the leaves and bokashi, and add more soil at planting-time. Which meant there was no need to declare a top immediately. (Phew!)

Problem the second: "dried" leaves. Our drought has officially been declared at an end--temporarily, if you ask me, but that's irrelevant. What matters is that, while it wasn't actually raining Saturday, the sky'd been doing what my grandparents would call "spritzing" off and on the past few days. Some of my leaves were damp enough to make kitchen gloves a better option than the ones made for the garden. Not sure how much excess moisture that added, but paper's breathable enough that it won't go anaerobic; my major concern was that the soggy, relatively heavy, acidic leaf-mats, together with the wettish bokashi, might damage the bag’s integrity too much for me to able to neatly move it later. Guess we'll see.

Problem the third: vermiguilt 2010. A garden bag needs soil; I decided this particular bag needed to start with about a gallon of what some gardeners call "living soil," soil with microbes and perhaps some macro-digesters, plus organic foods for same in all stages of decomposition, and the odd inorganic for bulk and drainage. Procuring this was simple: The planter stack is now shorter by one layer, its contents gone into the bag. Worms and all. While more caring and reasonable vermi-people might be willing to separate out the worms from the food/bedding/humus/soil/whatever, I am not. In the first place, I'm lazy. In the second, garlic-scented worms? Okay, so they're not so repellent as BSFL, I still have no desire to handle the things. And in the third, it's not like they're scarce around here, not these days. Verne's done so very much colonizing I recently accused him of having gone feral. (Was he ever domesticated? Sorry, not on point.) He wriggles is way into any welcoming environment, and there's at least a chance the smarter ones might manage to survive the bag, if they're careful, maybe. Then again, maybe not. Fresh-cured bokashi is acidic, plus there's an almost inevitable heating reaction when mixing cured bokashi and dried leaves. Not sure about wet dried leaves, but if moisture content's the only retarding factor, the reaction should occur once sufficient evaporation has taken place. The bag's not tight-packed, so the reaction will fizzle--nowhere near enough dirt in there to add significantly to the pressure--but will it end in time to keep the worms from cooking? No idea, hence the guilt. But whether or not this particular set of Verne-aggregates thrives, I'm confident more will want to move in once the contents have cooked awhile.

Which brings me to problem the fourth: storage. Ideally, a garden bag might be assembled in place, wedged into a bed-box and left to cure. But that's not yet possible for me, as the raised-bed dimensions have not been marked out in either testing space, nor the edging materials acquired. Leaf and lawn bags are too identifiable to leave them in plain sight, since helpful neighbors might cart them down to street-level to be hauled away, or other greedy gardeners take them to add to their own compost piles. I had thought to just stick this bag beneath the porch, but that’s perhaps not the best option with our imminent inclement weather--better it be under a tarp and on something that will shed water, I think. And, um, maybe a wee bit insulated for the worms’ and microbes’ health? The curse of the groundhog is upon us here in Austin, you know...

Might not have been the best time to start this bag. But, hey, I'll learn something from the experience! Even negative results can be helpful, and about the worst that'll happen here is that I'll have to rebag the bag.

DSF

--image from the brilliantly named GardenSnob