Showing posts with label tales from the bucket. Show all posts

Monday, July 26, 2010

Tales From the Bucket: Hands Off That Worm(ery)


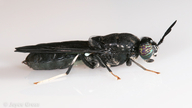
(image from IMDB, came up in a search for "worm dude". Don't ask.)


The bucket wormery was harvested mid-November or thereabouts, at which point I refilled the bucket half and half with cured bokashi and porch sweepings (that's “dried leaves” to most folks, though sweeping off a deck picks up different stuff than raking a lawn). It occurred to me just after adding the bokashi that there were almost certainly still a few small or stubborn worms clinging to the sides and seams of the bucket—I'd overturned it to collect the vermicompost, but hadn't bothered to rinse it out or anything.

Oh, well. Seeing as I hadn't killed any worms in a while, I tossed another dozen into the mix and decided to call it a test. Small population, lots of food guaranteed to heat but a good mix for wormfood aside from that, no modifications.

None.

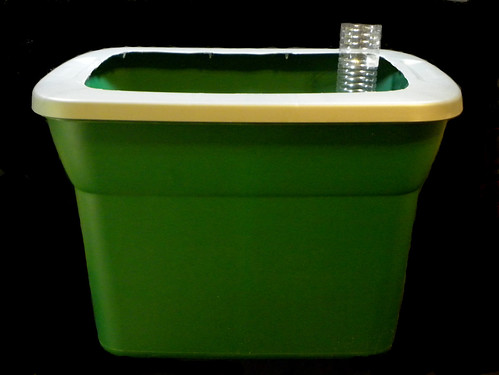
This bucket is the basic homebrew jr. wormery, nested kitty litter buckets with a spigot for drainage and holes in the upper rim and lid. But I have no tolerance for fruitflies, so my jr. got a cotton pillowcase snood fairly early on in its career, and I've never seen any reason to reclaim it. Once the bucket was full, I scrunched the pillowcase on, making sure it covered all the vent-holes, then shoved the whole thing underneath my outdoor seedling table. Where it remained. No insulation even during our hard freeze, no added water, no stirring, no dusting of eggshells, and no peeking.

Until spring. Around the time the BSFL were waking from hibernation, I decided to check on that bucket. Looked really pretty, lots of dark brown threaded with wriggling red, but I wasn't prepared to harvest that day, so I just tossed them some UCG and a few crushed eggshells to tide them over and went on my way.

Took another two months for me to get around to that harvest, so I'm glad I gave them that snack, but I think they might have been all right anyway. I pulled a respectable few cups of worms out during the harvest, along with eight beautiful liters of pure vermicompost all rich and dark and so very different from the less mature, soil-amended stuff I harvest more regularly (or at least more frequently) from the tower wormeries.

Not the most controlled experiment ever, but definitely worth doing again! For large planters, I prefer the soil-amended vermicompost, but for seedling mixes and soil-free applications having pure vermicompost is pretty much required. Also, it's a whole lot better suited to making compost tea*.

The planter towers are more immediately useful—I grow things in the tops—but there's something to be said for the no-tend model. No BSFL, no squash bug larvae, no fruitflies, no ants. Told myself that next time I'd be kinder to the worms, mix the leaves and bokashi in a worm-free unit to let it cook, but I didn't. Just as soon as I'd finished chortling over the total harvest, I tossed some leaves into the still-unrinsed bucket. And then some bokashi. And a dozen worms.

Hey, why mess with what works?

In a few generations, I might think about mixing some worms in from another colony. Other than that, I think this is part of the rotation. To a lot of vermicomposters, of course, this is heresy—planning to neglect the worms!—but I'm still working on the two-touch container garden (plant and harvest with no tending between). Always assuming I don't manage to cook this set before they produced some cocoons, I think this one's ready for cloning to my satellite locations.

Good thing my friends all know I'm obsessed. "Hi! How'd you like to foster a wormery? Junior's no trouble at all, just leave him tucked up in his blankie. I'll be back in a few months."


DSF

*or AIM, but that's a whole post on its own!

Thursday, May 27, 2010

Tales from the Bucket: The Full Circle Bucket


Having figured out how to compost, vermicompost, and soil-finish bokashi appropriately for my setting, why am I still playing around with different techniques? Well, I’m curious, but more than that—this may not always be my setting! And there’s never a guarantee any living-space will conform to retailers expectations. So I’m trying to find methods that will work for other non-standard situations.

This particular bucket test is an unqualified success, but I wouldn’t use it unless my situation required it: by my current standards, it's slow. Three to six months depending on materials and conditions, much slower than my preferred techniques. On the positive side, it’s contained enough that it could be done in a garage as well as the balcony I’ve envisioned, or even indoors given some care with material selection.

What is it? A hybrid composting/finishing done in the bokashi bucket. I have, from time to time, a (temporary!) sufficiency of buckets, and in one of my more squeamish moments, decided to dump some dried leaves into a curing bucket instead of decanting the ferment. Turns out, that wasn’t such a bad idea, though not a complete technique—the bokashi fermentation can take over the leaves, which is great if you wanted acidified leaf matter but doesn’t turn the mixed garbage pickle into any sort of soil analogue.

Poking holes into the pickle-mass and tipping in a bit of finished vermicompost improves the chances of harvesting humus. So does mixing the leaves with the bokashi—in which case, you can probably save the vermicompost for something else. Putting a weight on top of that mixed leaf-and-bokashi makes success almost inevitable, and if you use soil as all or part of that weight, the end result is a familiar, no-explanations-needed bucket of potting medium. The reservoir does need to be emptied a few times early on in the process, after which the tap can remain open and the bucket ignored awhile. Stirring will speed time to completion, but so long as sufficient microbes were added, it’s not actually necessary.

Can’t speak to minimums here; my tests have used one part compost or living soil to four parts bokashi and four parts dried leaves/shredded paper.

What if you don’t have dried leaves? Use some other dry material and a microbe source. I’ve been using shredded phone book pages for the second-stage tests, since they degrade faster than newspaper (and besides, what else do you do with them?), and the same one-to-one ratio seems to work, though the end product is a little heavier. For microbes, use finished compost, vermicompost, or good garden soil.

And if you have unfinished vermicompost that still has worms in it, you can add that about a week after the leaves and bokashi get mixed together, which will greatly speed the time to completion, and get you a healthy new crop of worms as well, so long as the bucket’s kept out of direct sunlight and there’s some actual soil in there—preferably an inch-thick layer on top, above and beyond whatever may be in the vermicompost.

I can’t imagine many people having enough bokashi buckets to make this their primary post-ferment technique, but the closed-container process may be helpful for some settings. Like, say, folks who have no outdoor space!

Theoretically (which is to say, I haven't tried this), you could design your SIP in such fashion as to do the ferment, curing, finishing, and planting all in the same container, just by mixing in various items (EM bokashi bran, then leaves and perhaps soil, then a bunch of coir). All in the same bucket. Grow food crops, and after harvest...

Yeah, okay, you get it. Excuse me, I must have some gardening to do!

DSF

Tuesday, May 18, 2010

After the Bucket: Brown Bag Bokashi #2


--image from PaperMart.com, in case anyone should need to buy a gross of the things--

This year, some friends have loaned me garden space. Still don't have any holes in the ground, but I do have some lovely raised beds! Experiments therein must be relatively likely to succeed, and absolutely guaranteed not to fail spectacularly: dead plants would be a regrettable but an acceptable outcome; dumpster-stench and insect incursions, on the other hand...

So brown bag bokashi #2 was born. Unlike #1, there's no dirt placed in the bag; also unlike the first, this method uses a moisture-retaining cover. The cover speeds the process a great deal; didn't notice any heating, but I rather suspect that's observational failure (don't have a recording thermometer, what can I say). This is nowhere near sufficiently vetted to risk prized roses or rare herbs, but for basic garden veg, it's being rolled out to bucketville's satellites as fast as I can manage. So far, it looks like each package of lightweight, nourishing rooting medium/plant food/soil amendment can take the place of an equal volume of potting mix, so long as there's at least two inches of soil for the start to root into, plus an inch of something--cheap dirt, fill, shredded newspaper, bark mixed with gravel--at the bottom. And it's a whole lot cheaper than even cheap dirt for me! Friends, freecycle, and my local grocery get me the bags; my dollar-store roll of twine will last a year; and the bokashi I have already.


Ingredients: Eight parts random sweepings (the first one was mostly oak pollen, given my area, with the usual bits of dirt and dried leaves I count on to add all those extra microbes) + one part cured bokashi, in a paper grocery bag.

Preparation: Dump the damp bokashi and dry sweepings into the paper grocery bag, roll the top down, and tie it up with hemp or some other natural-material (compostable/decomposable) twine. Stick the assembled package into a plastic grocery bag, the handles tied to make a moisture-conserving, mostly protective casing that is not wholly airtight.

Rest: about a week. (If you're feeling nervous, run a quick pH test on the wettest part of the bag.)

Use: Dump the paper package, now soggy and faintly scented of vinegar, into a planter prepared with drainage and about an inch of really cheap dirt. Fill in the remaining space with a decent container mix, including at least two inches for the plant to root into, and plant olla pots and starts as desired.

Verdict: success! The squash start I used for my first test didn't curl up and die, drop its leaves, develop spots or off-colors, or show any of the other signs of stress. It's a touch smaller than the optimized control but not at all stunted, and began to blossom a few days before its larger cousin, though not so soon as to cause concern. Altogether a compact, healthy specimen. Repeat tests have not been underway for all that long, but early results are comparable.

As with all my paper and cardboard techniques, this may not be the greenest of all possible options, but it's suitable for some situations. In this case, it allows a scalable, portable, soil-free harnessing of bokashi for those folks who, like me, may have no recourse but to purchase soil, or who simply prefer to garden without it. Assuming the bokashi is thoroughly cured before bagging, there's no reason at all one couldn't use a coir-based potting mix around the bag instead of soil, even in an indoor planting.


DSF

Someone please remind me to update this after the growing season, so I can report on long-term results!

Saturday, April 17, 2010

Fails from the Bucket: Planter-Finishing SIP


Yeah, okay, after the bucket. And only a small test, as I was pretty sure this wasn’t a brilliant idea. Sometimes, you have to try anyway. If it had worked, imagine the time I could save!

A little background for you lucky folks with in-ground gardens: an SIP, sub-irrigation planter, is a planter with no bottom drainage by design; instead, it has a water reservoir at the base, with some sort of wicking system to draw water from the reservoir to the planting medium. It encourages strong root growth, conserves water, discourages weeds, and can increase harvests dramatically (though some herbs and hot peppers will not develop full flavor grown in SIPs).

My personal preference is for clay pot irrigation, but SIPs run a close second, particularly the designs that can be tossed together in a few minutes from materials already on hand with no other tools but my trusty cordless drill. Beginning with an empty planter, it’s really no trouble at all, and repays the forethought all season long. Here in Austin, where drought is more the rule than the exception…

So where’s the fail? I tried a standard post-bucket bokashi technique in an SIP. Out of curiosity. Sandwiched a layer of cured bokashi between two thicker layers of soil based potting mix in the newly constructed miniature SIP. Didn’t water the soil in at all, but filled the reservoir completely.

This was not a good idea. The whole point to an SIP is that the wick delivers water to the soil, so there was an excess of moisture in the mix in only a couple of hours. Not mud, just too much moisture for the EM and soil-borne microbes of choice to do their thing, so some of Nature’s more water-tolerant digestors showed up to help out.

Yeah, that’s polite for insects.

This isn’t to say I won’t keep adding bokashi to my planters; I will. It just means that, in the case of SIPs, I’ll either be constructing them without any water at all (using the right wicking system, this should be possible with a moist mix kept covered for the finishing period), or I’ll use composted or otherwise finished bokashi rather than finishing it in situ. Which has always seemed like a more efficient process to me anyway—when putting it directly into a planter, you can only use one third the total volume of your container, but in a trenchless bucket set-up, you can use half, or even a bit more, if your soil (not potting mix) is particularly healthy. You just can’t use very wet soil, or get the soil wet too soon.

Ah, well; it’s a process, gardening.


Happy microbing,

DSF


image from Inside Urban Green, where simple instructions for building SIPs can be found.

Monday, January 18, 2010

After the Bucket: the Bag


Could be worse: at least it's not novelty saltshakers. But I am currently collecting dried leaves. Not, I hasten to say, for pressing! This is not a new hobby, nor am I planning on stockpiling the things for some eventual later use. Not even trying to gather every bag generated within an X-block radius during time-span Y.

I'm collecting leaves by the bag. Different leaves from the oak/pecan/elm/mulberry mix I sweep too infrequently from my patio; different bags than the paper leaf-and-lawn ones approved by the city. See, I'm trying to make sure some of my particular post-bucket techniques are not specific to my particular EC. And wondering whether some leaf mixes or bag types might produce better results. Eventually, I suppose, I'll have to break down and buy a few plastic bags of various sorts (black v. white v. clear; compostable/degradable v. industrial strength), but I figured I'd start with what my neighbors were actually using.

The clear plastic bags have a few benefits and a couple of disadvantages, so far:

+ If properly sealed with adequate space for expansion, plastic bags do serve to keep out pests, unlike the paper leaf and lawn bags which must be protected against scavengers.

- Plastic bags prevent volunteer macro-digesters from joining the fun. (Sow bugs, composting worms, earthworms, etc.)

- If inadequate space for expansion is provided, plastic bags can split open and spread material rather farther than one might expect, even before the scavengers get into the act. (Splitting is an issue with planter-finishing, as well. If sealing, remember to leave some slack!)

+ Properly sealed plastic bags hold moisture, so assuming a properly moistened mix went into the bag, no additional water need be added. Also, temperature variance within the bag increases condensation and re-absorption, which seems to speed the composting process.

- If too much moisture is present, the microbes cannot work to full efficiency, and the mix may go anaerobic--in the negative sense. As in, rot and stink.

+ Plastic bags withstand wet weather better than paper, and can be easily moved during the process or once it is complete.

- Some plastics may not degrade, and dirty plastic garbage-sized bags are difficult to recycle.

And one that may be either an advantage or a disadvantage, depending on the climate, situation, and desired end results:

Plastics can absorb and retain heat, and reflect or focus light.

I don't know, yet, how that will affect this particular post-bucket technique. Will a black plastic bag work as well as a black plastic planter? Might it work too well, and melt? Would the contents of a clear plastic bag placed in full sun solarize rather than compost? Etc. It's winter here, despite the day's garden-perfect forecast But I expect to be playing with bags for some time yet, especially though not solely in combination with the disposable buckets. At some point, I may even manage to try the long-delayed "office bokashi" test series with a commercial soil inoculant and shredded paper in place of dried leaves!

...novelty salt shakers might be simpler. But not nearly so useful. -G-

DSF

Tuesday, August 4, 2009

Tales from the bucket: the aquarium bucket


Actually, it's neither an aquarium nor a bucket, but half a globe terrarium I co-opted for a frugal experiment in low-tech aquaponics. My winter hydroponics experiments didn't go far enough--next time, I'm setting up a timer for the lights!-- but the lettuce grown on miniature rafts amused me. Easier than sprouts, even: mix the nutrient solution, add the sprouted seeds in their nests, wait, harvest. Repeat.

As for the lights...well, outside, there's no need to remember about switches and bulbs or anything. Of course, in Austin, still water is an invitation to disease-carrying and otherwise pestiferous mosquitos. Enter the goldfish, which will eat their eggs and/or larvae, and any gravid female flyer foolish enough to linger. And, hey! No need for nutrient solution, as the fish will take care of that.

Haven't found the precisely perfect balance of EM (for water conditioning) and vegetation for the unaerated four-gallon miniature pond, but the fish is alive despite my casual feeding and water-replenishing, and the only outdoor Texas summer lettuce I've ever grown was yummy, both heads of it. -G- I'm really surprised the fish is still alive, unboiled and undevoured after more than a month; had it lived long enough for me to harvest a single leaf of lettuce, I'd have called the test a nominal success, so my cautious two-head harvest certainly counts, and I'm now working on a more ambitious mixed-vegetation crop. Total cost: $0.60 for the fish, really. Everything else I either had or would have bought anyway. Not bad for two heads of chemical-free fresh locally grown lettuce! Still less if I can harvest a bit of Vietnamese coriander and maybe some other leafy greens...

The reduction in mosquito trouble may be my imagination, but even imaginary itch-relief is better than nothing. So the fish remains. Not a pet, just an earth-friendly pest control technique and fertilizer factory. There's no chance it'll be joined by any finny friends, as I simply haven't the space, and it probably won't last the winter if it gets to that point, but until then, or until the household feline or a neighborhood raider finds it, the microherd has yet another macro member.

And I have yet another bucket.

Help?

Friday, June 19, 2009

Tales from the Bucket: Stirred but not shaken


After dividing up a bucket of cured bokashi into planters for worm-food, I had a bit left over; homeless bokashi. And it wasn't long before that I'd first read the post about direct-to-bucket composting, so an impromptu test commenced: I tossed a couple of inches of dirt on top of the remaining cured bokashi and stuck the lid on.

Then opened it a couple of days longer and stirred. And again a few days after that.

This stirring in no way disturbed the BSFL that appeared as if by magic to devour the ferment despite its earthen blanket. While a heavy soil layer is supposed to control BSFL populations, it does so by preventing sufficient crawl-off for further generations. The ever-hungry youth don't seem bothered at all, and are apparently happy enough to give off whatever chemical signature encourages egg-layers to seek entrance.

While this bucket had been full of curing bokashi, I'd kept a weight on the lid expressly to prevent such entrance, but since the original post suggested leaving the bucket open as needed, I didn't weight this one. Should I repeat this test, I think I will--as it is, while the matter is certainly disappearing and the soil is visibly refreshed, I can't say if there's any actual composting going on at all. Eating and digesting, check.

Appropriately enough for bokashi, this particular bucket started life as a container for pickles. If I needed another BSFL colony, I think I'd name him Martin. -G-


DSF

Tuesday, June 9, 2009

Tales from the Bucket: Eureka!


The last batch isn’t compost yet. Not mature nor fully homogenous, I mean. But it’s at the stage some composter-retailers refer to as “mulch”. Not bad for just over two weeks! And it’s clearly going to finish. So I can say, finally:

It works.

“It” is what I started this blog-project to find: a way to--without soil--compost small volumes of bokashi. This particular batch is a mix of cured bokashi and dried leaves, without a single bit of soil save whatever was swept in with the patio cleaning.* And it’s not the first batch. In different volumes and different though similar containers, I have successively, successfully, composted dried leaves and bokashi. Like the guy in the tub said. I have found it.

At least, I have found a process that works for me. In Texas, in near-summer heat. For those not so blessed, I have no idea.

Beyond an approximately equal volume of cured bokashi and dried leaves, plus some source of soil microbes (e.g. A handful of mature compost or good garden soil), this needs:

1. A black plastic container with

2. Bottom drainage

3. A weight and cover

4. Placement in full sun

5. Regular stirring

That’s all that’s necessary. The sun-heated black plastic helps to mimic the conditions of a traditional large pile, with the weight standing in for the missing volume**; the cover keeps out undesirables of whatever size or form; and the stirring introduces the oxygen aerobic microbes need.

So very simple. I should have figured it out long since! But I kept sticking my test containers under the porch, out of the way--and in deep shade. Or behind planters, to keep them out of sight, which also meant out of the sun. And though I did try several different containers, none were black plastic, as I don’t have much of that.

Took me a while, but I got it at last. Yes, it is possible to compost bokashi without a full-size composter or in-ground trench, with soil or without. And as an added benefit, it appears this small-batch composting uses less water--I’ve added no water at all to any of the one-gallon sets, and rarely to the six. How cool is that? Water-conserving composting!

It’s still not the perfect urban solution, at least not for all urbs. Not an indoor solution at all (vermicomposting bokashi may be, if you get past the heating). Not a solution for the high-rise dweller who sees no leaves from season to season. Nor for the snow-coast dweller who takes on faith all our claims of the sun’s heat.

But it works for me! Dried leaves are an extremely renewable resource around here, available year-round and absolutely free, so I’ll be limited in my compost production only by available sunny space and available cured bokashi.

Wow. I found the answer--or an answer, anyway--that I set out to find. Does this mean I’m finished? But I did find some more questions along the way...

I am keeping Trey, as vermicomposting conveys additional benefits. And, too, I kind of like him. Outdoors. Might even keep the whole set, but I expect Vernopolis shall soon be joined by large black plastic planters stacked one atop the next, and the neighbors will have new evidence of my insanity as I cackle over my pure leafy bokashi compost. “It’s gold! Gold, I tell’s ya!”

Maybe they’ll just think I’m drunk. You know, all that fermenting.

Compost!

Cackling already,

DSF

*Hey, I’ve seen earthworms up there, not to mention snails and geckos. Trust me, there are soil microbes around.

**I think. Have I mentioned that I’m not a scientist -G-


image from: http://www.math.nyu.edu/~crorres/Archimedes/Crown/Vitruvius.html

Thursday, January 22, 2009

Tales from the Bucket: Perishable plant food


Don’t have the time to read my rambling? Short version: once you’ve exposed bokashi juice to fresh air, it’s time to drain and use. Bokashi juice must be used immediately; do not, under any circumstances, peek into the reservoir and decide there’s “not enough to bother with”—dilute for use as plant food, or just pour it, full strength, down the drain, but get it out of the bucket now, because it will spoil. And stink.

The retailers don’t make a big deal of saying this, because they don’t want to scare you off. And, really, how likely is it that anyone would just take a peek and nest the buckets back together?

...Ahem...

On the most recent occasion, it wasn’t curiosity but clumsiness that let air into the reservoir (small apartment+ large nested-bucket system +cat underfoot, and I grabbed the top handle instead of the bottom one). Same result: smelly bokashi juice spreading stink into a perfectly healthy fermenting bucket.

Despite the stench, I think this may be a good thing. My mother always taught me that if it wouldn’t spoil, it wasn’t food; stands to reason the same applies to plant food as food for people. And lucky for me, I know the cause of and cure for that transient off-odor—once the juice is drained and the reservoir rinsed, the rhodobacters will take care of the rest. Pretty quickly, though not (sadly) instantly.

Happy bucketing!

DSF

Sunday, November 23, 2008

Tales from the Bucket: Time!


The folks over at Wriggly Wigglers asked how long it takes people to achieve compost from cured bokashi. Before, I would have said about a month. Now...yeah, about a month in warm weather, bit more in cool.

I do have to mention that there is some insect activity here, for the most part of the unseen and untroubling variety, but that’s to be expected in any “cold” compost situation. There is no odor aside from the faint forest-after-rain scent that good soil exudes, the giant possum lumbers right past the buckets on its (his? her?) way to wherever, and the gnats the bucket sometimes develop after being rained on will go away as soon as the top layer is disturbed. Snails and geckos may be more of a problem, depending on your area and tolerance for same.

If you’ve read more than a single post here, you already know that I live in an apartment and have no ground in which to sink a bottomless bucket for the conversion of bokashi into compost. So I’ve been experimenting with bringing the soil to the bokashi, rather than the other way around. It’s not necessarily an ideal solution for me—my supplies of soil are limited, and I have things growing in most of it—but it works.

This takes equal parts cured bokashi and soil, and I tend to use soil that isn’t at its peak but will still support plant growth (because my better soil has plants in it). The reading I did before first trying this was...confusing, shall we say, with some writers insisting on a minimum of ten gallons of soil per bucket of bokashi—if you assume that’s a five-gallon bucket, then two to one—and others using numbers familiar to me from traditional aerobic composing, though I’d never before seen them in relation to bokashi fermentation: “At least a cubic metre of soil” That’s something like twenty gallons. For one bucket of bokashi!

Not only do I not have that much soil, I haven’t got that kind of space. (Yes, that’s only the size of a large trash can. Still.) The reason for that figure in trad composting is to generate and sustain the desired thermophilic reaction—so the pile will heat up, destroying weed seeds, diseases, and other undesirables.

Hot compost isn’t feasible in small volumes without some technological intervention. Tumblers and activators, say. But my first bokashi buckets were vegetarian, none of them contained any weed seeds or diseased matter, and I don’t have any objection to cold compost for the most part. So I decided to risk it and tried two-and-a-half gallons each of cured bokashi and soil. It took about a month that first time, with summer heat, though unfortunately I don’t have an exact number for that one or the two that followed it. The photo above is what I tipped out of my Wriggly-spurred time-test bucket, begun one month ago today. It’s not quite mature yet, and some of the leafy bits introduced with the old soil are still identifiable, but the bokashi’d kitchen waste has all been converted into plant-pleasing compost, conveniently mixed with the soil already. Call it a month in warm weather, five or six weeks in cooler.

To Make Compost in a Bucket

1. Select your bucket.

Not, mind, a bokashi bucket! This method uses a large planter. Many of mine are five-gallon buckets with holes drilled in the bottom and sometimes lower sides, but any large planter should work, as would a smallish barrel or what-have-you.

This time, I didn’t add any drainage materials to the bottom; sometimes I do. Not sure if that affects the time (I’ll try to remember to test that someday). Drain holes are required!


2. Acquire a volume of soil equal to the amount of cured bokashi.

Cured here being defined as

a. at least seven days after the last addition of fresh waste, and
b. no longer producing more than a few drops of bokashi juice daily.

3. Put an inch of soil in the planter.

If you have mixed-quality soil, the worst of it goes here. Fill dirt is fine; a soilless potting mix is not.

4. Add bokashi and soil, mixed or layered an inch at a time, until within four inches of the top of the planter.

This is what will compost, so you’re looking for healthy soil microbes. If you have better-quality, fresh-from-the-garden soil, it goes here, not in the bottom. Compost breaks down faster the smaller the pieces, so smushing/chopping large pickled bits might not be a bad idea. Adding a bit of mature compost, unsterilized, should produce an even richer mix, and could substitute for most (if not quite all) of the dirt here though not in the outer layers, although I can’t yet confirm this from personal experience. (Another test!) It should also be possible to use less soil for this middle section and still produce compost, so long as soil microbes are adequately distributed, but again, no personal experience hereabouts for that. Equal parts, I can attest to.

5. Top with three inches of soil*.

6. Cover loosely, but do not seal, and

7. Set the bucket someplace out of doors, out of direct sunlight, and out of the way for at least one month (more in cooler climes). Near an existing, healthy garden would be ideal, but on a wood patio or shaded cement parking space works.

This produces an amount of compost-amended soil not quite equal in volume to the original ingredients, though the reduction isn’t dramatic. But though this is a great way to refresh tired soil, it’s not ideal for me, requiring as it does that I divert relatively large quantities of soil from my immediate gardening. So I’m still playing.

Back to the buckets!

DSF

*Two inches of soil and two of dried leaves would probably work, but I haven’t tested that yet. Two inches of leaves or soil alone does not create enough of an odor barrier to keep the raccoons and possums from sniffing it out.

[Edited Dec 01 to correct typo and clarify a phrase.]