Showing posts with label compost. Show all posts

Saturday, June 11, 2011


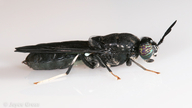
image from Animal Diversity Web

This year's hands-free tomato garden was supposed to be rather more ambitious than last year's, but I got discouraged. Early in the spring, I built three small (4'x2') raised beds, filled them with dried leaves and soil and a little wet organic matter, dosed with AEM, covered, and let rest. Two of the three worked well, so I did get to plant some tomatoes--but the third was invaded by fire ants.

The cover wasn't well secured, and I hadn't bothered with weights, so it was my own fault; next time I'll know better. But that was no help for this time! Couldn't re-cover it, with the ants only too willing to defend their home, not that I was sure it would have helped. I don't do chemicals, flame is too risky for our persistently drought-ridden climes, and I didn't want to pour great quantities of water into the bed to try to chase the ants away, so I decided I'd disturb the ants every chance I got and just build another bed for the next tomato planting.

Stirred some odds and ends of half-decomposed material into the infested bed while I was disturbing the unwelcome resident ants, since I don't yet have a proper compost bin at that location. And a while back, my odds and ends included the last crumbles of cheap bagged soil that had sat around in a dampish corner.

A bag one of these Texas Blind Snakes had adopted for a home.

Scared me silly--but I'd already emptied the bag into the bed, and the worm-colored scaly snake had slithered beneath the leaf-mulch, so that was that. Stirring up the ants did not appeal at all that day, or for the next few weeks; didn't bother to water the bed, either, as that would have meant standing too close to it.

But I'm a gardener with only limited space, and the presence of a raised bed full of largely composted matter eventually proved too great a temptation. So I grabbed the longest-handled shovel to poke around...

And discovered what would not have been news to anyone who'd bothered to look up the Texas Blind Snake instead of just squeaking like a small child and running away. Turns out, this wormy-looking snake eats ant and termite larvae. Not a single fire ant came out to attack the shovel, no matter how vigorously I stirred the bed. The materials are not wholly composted, but it's far enough along for my purposes. With or without a worm-snake, though I hope not to see it when I'm planting.

Wearing gauntlets as well as gardening gloves, I think. -G- Not that the worm-impersonating snake would hurt me, but I'm squeamish.

Sunday, October 31, 2010

After the bucket: Good bug, bag bug?


Even on Hallowe'en, I'm not inclined to frighten anyone too badly, so no appropriate insect photo today. Besides, I like Dr. Seuss!

This fall season, I’ve been busy with non-gardening things—hence the dearth of posts—but the garden’s been ticking along with minimal care, as it’s designed to do. Bokashi is still the right solution for my situation, in large part because it, too, needs only occasional attention: If you’re not adding new organics, the household bucket can stay closed up and ignored for a couple of weeks (always assuming a deep enough reservoir or sufficient absorbent material). And as an added benefit, forgetting to take out the trash before you leave on a business trip no longer results in a stinky welcome home. -G-


Likewise, my post-bucket techniques are fairly hands-off, except for the small-batch hot compost, and that will simply convert to a slower process if you forget the hands-on part. But this week, I had a ton of garden work to do, to get ready for the advent of relatively cold weather. So I checked on some of my post-bucket setups--


--and wasn’t really surprised, though I was disappointed, to discover that only the one with the critters in it was ready. My tolerance for outdoor macro-digesters just isn’t all that high, though it’s far greater than for the indoor [zero] level. Some things, I cannot abide at all. Others I can reluctantly allow to live so long as they don’t directly bother me. Still others have me crying for the Flit!


Verne the composting worm is always welcome. (Hey, I shelled out good money for him. Several generations ago.) His cousin Clem, better known as the Indian Blue worm, is also welcome whenever he chooses to appear, though if he wanders off again, that’s okay, too; I know he’ll be back when there’s food to tempt him. George the earthworm is ever a surprise, but hardly an unwelcome one; I’ve read that earthworms don’t do well in compost bins, but apparently he’s as illiterate the rest, happily breeding in the mismatched yard waste compost cans and hatching out wherever that compost is applied.


It’s the other detritus-clearers that I have issues with. Sowbugs and so on may eat seeds and sometimes sprouts, so if they’re in the compost, I have to solarize or dry it before use. [This may not be as much of a concern for non-container gardeners, but that does me no good!] BSFL eat large quantities of the organic matter, which results in lesser volumes of finished compost for me to use. And piles of woody matter, even contained piles, attract insects the typical urban dweller really doesn’t want to see:


Cockroaches.

Also ants, mites, springtails, etc. But, really, compared to those skittering things, do the rest seem so bad? Even Repulsive might be less disturbing than roaches…


Nah.


My untowered vermidirt experiment worked just about like I’d expected it to: though I added no worms to my material, worms were present, as were BSFL, sowbugs, woodlice, and geckos with their spots stretched out from weight gain -G-. The very top layer beneath the weight was still visibly uncomposted; beneath that, an upper layer finished enough to use as mulch, and some eggshells and twigs remaining even in the lower, completed layer. Also a couple of snails clinging to the side next to the weight (not a waterproof cover, just something to keep the possums and coons out), two or three earwigs, and as many of those nasty six-legged things it pains me even to think about or type.


Oddly, one of the outdoor roach species doesn’t disturb me at all--I’ve only ever seen it outdoors, it doesn’t look much like the disgusting indoor ones, it’s extremely photophobic, and it’s common where old wood’s undisturbed, so I see it mostly running away from me when I’m cleaning up future garden space. By far the preferred view, but not welcome in a planter! Particularly considering that "away" means either deeper into the material or into another planter nearby (space constraints mean that many of my planters touch).

The other one is worse, so undeniably a cockroach that I’m likely to run screaming, or at least go find something else to do.


But the ten gallon planter with all that disgustingly thriving life held eight gallons of finished compost plus a bit of nutritive mulch, at a time when my plants need compost and mulching. This method can be used in any container and takes advantage of whatever species may be present. All it needs is a layer of soil and a weight on top, a container with solid sides and bottom drainage, and a place to rest out of the way. It can be stacked, but need not be. Placement is equally flexible: sun or shade, on soil or grass or even concrete so long as it’s within a foot or so of life. It’s a slow-compost process with hot-compost speeds, thanks to bokashi. Not as fast as managed hot compost with bokashi, but comparable to the usual figures for hot compost. Less than three months for this split harvest.


Imagine the ad pitch: Any size, any volume, any container, anywhere (outside). Slow-compost ease, hot-compost speed. Sounds great! But the fine print on this one might be too great a barrier for me. Roaches and grubs and earwigs, oh my!?


If it makes the plants happy...maybe. But I think I’m happier with my towers, even if they do take more infrastructure.


DSF

Thursday, September 16, 2010

What's worse than vacation pictures?


How about bad compost-ana shots? No, I don't mean failed compost--just bad photos. Since it seems I can't keep even a really good camera alive for more than two years, nor take a single good photo in that time, I went with the cheapest little keyfob camera I could find.

Hey, if I can't see Repulsive through the tiny little coke-glass viewfinder, maybe I won't wince. As much.


This is what my tower-made vermicompost typically looks like. Unfiltered, not wet, solid enough to cake but not heavy. No worms, as they've moved up to the next planter, but though I never see any cocoons, they must be there, since baby worms hatch in the bags if I package this stuff up.


This is vermi-mud. Those folks who water their wormeries are probably familiar with this; in my case, it's the result of heavy fall rains backing up a reservoir and then some. It's been drained and drying for nearly a week now...


This is what the BSFL folks have started to call "grub pudding." I tried to get a picture that shows the little craters and all the tiny grubs still sluggishly moving, but if I didn't succeed, I don't think I'll mourn long. That blur in the lower left corner is a grub squirming toward me! Yecch. (-G-)

Grub pudding may look a lot like soggy vermicompost, but they are not the same.

The pictured pudding is finished--the grubs still present will die if I don't do anything, as there isn't sufficient nourishment remaining for them to mature, and it's too warm and too wet in that container for them to go dormant. The grubs can't process this material any further. But that isn't to say this is a finished compost.

A general-purpose dictionary might; but in a gardener's lexicon, compost is safe to use in nearly all situations and beneficial ditto. Oh, there are exceptions, plants that need to be starved and so on, but say compost to the average gardener and the matching concept is of a homogeneous, stable, variably textured but typically humus-like material rich in plant-accessible nutrients, that can be applied as top- or side-dressing, used as mulch or mixed into the soil, with no safety concerns and few contraindications.

Grub pudding is not stable; adding it to plantings will usually result in nutrient sequestration, seldom (if ever!) a desired outcome. Nor is it likely to improve soil tilth, another of compost's benefits. Grub poo is too fine to hold air, though water it can do. Then there's the nourishment concern; ignoring the sequestration issue, there are some plant-accessible nutrients, but how many and of what sort can be difficult to determine. In large part, it depends on what you fed the grubs; also, on what non-food techniques you employ. And as if that's not discouraging enough, there may be undesirable bacteria in finished grub pudding, also depending on what you fed the grubs, and how large the colony*.


Speaking of feeding. This is worm-food waiting to be fed. UCG from a coffeeshop, dried leaves from a chem-free neighbor, and AIM. Poor photo even in context, I know, but the leaves are pale thanks to mycelial bloom, beginning to break down.


This is a bokashi bag that should have been planted about a month ago. Don't know how much you can tell from this picture, but the bag is still identifiably a bag, while the materials within are well on their way to homogeneous etc. And, unlike grub pudding, nutrient sequestration doesn't seem to be an issue--I'm guessing the bokashi juice supplies nourishment to the plant for that first span.


And finally, a recipe I'm going to have to try again: one part each bokashi, dried leaves, and coco coir, fed to worms. This isn't a finished vermicast product, but a lightweight potting mix with a lively microbial profile and incredible results in my just-barely-started seedling mix tests. Not quite ready to use, as there are still identifiable bits, but that's my determining factor. Takes about a month, comparable to hot-composting, but with at least some of the benefits of vermicompost, and not so rich it can't be used straight (which finished vermicompost cannot be, as a seeding medium). This batch looks about a week away from harvest-time.

And I just couldn't resist the image with one Verne-bit too stubborn to leave. Sun had largely set, anyway, so not much light to bother him, and I don't think worms are photo-phobic in the other sense.

There really was a reason for this post, but I forget. Maybe I need a vacation...

DSF


*I don't worry about undesirable microbes, since Repulsive receives generous doses of EM. Nor is that additional processing a problem. These days, my grubbery is the top of a tower, with a wormery planter just beneath; all I have to do is harvest now and then. It's not perfect--fewer adult BSF find the unit than are necessary for a really vigorous population. if the goal is just to dispose of food, it works, but I have an experiment I've been planning for winter, and I may resort to bait bags once before the weather turns, to ensure a large enough colony.

Thursday, August 19, 2010

Tales from the Bucket: Rip Van Bokashi


Some days, the less I have to deal with bucket-contents, the better; other days, it's no big deal. Must not have been feeling squeamish that particular Saturday afternoon—I decided to try mini-bags of bokashi with different dry matters to see if they all worked. My favorite dried leaves were my control here, but what about shredded paper with a sprinkling of vermicompost? Or those wood shavings sold as small-animal bedding?

Went with a half and half ratio, mostly for convenience with the tiny little bags I was using (so that I can put them in more places!). But space is always a concern, as are the raccoons and all their ilk, so I ended up stacking all fifteen of my filled-and-tied #2 bags into the same lidded bucket. This is not good scientific practice, but I'm not a scientist. -G- I did put the leafy bags at the bottom, so that gravity couldn't help move their microbes into the other bags, but otherwise, I figured that the test for success would come after planting anyway.

Which rather requires my removing the bags from their bucket...

What can I say? It wasn't really planting season. Sowed few seeds by way of prep for the fall madness, sprouted the odd microgreen, did a bit of rooting from cuttings, but otherwise, I'm more into side-dressing and watering with food than the whole sub-surface slow-release thing right now. So I've got composting planters going for my immediate use, plus soil-topped trenchless buckets for later, plus Verne in his towers and bunking below Repulsive, and I just forgot about the bags awhile.

Until now, when it's time to start planning those fall beds.

The bucket wasn't rocking, nor were there any toothmarks or litters of BSFL casings. Positive signs all! Within: a bunch of white-haired Rip van Winkle bags, sagging with age and bearded with acetobacter growth. The bundles on top are intact enough to move, the middle row and below more disintegrated, and I haven't gotten all the way down yet, but I expect they're in slightly soggy pieces that might need to be half-scooped as much as lifted by their strings. But no worry; there's no off-odors, no insects, no bucket-strain, and they're completely viable—half-composted and half-finished, there's still enough carbon to create a hot-composting reaction, but little enough that it won't even stress transplants assuming the requisite inch or two of soil between. Enough plant-accessible nutrients that starved bean leaves turn green again (one of my favorite low-tech tests!). Enough microbes to replenish the soil web, or to stand in for one, and enough undigested nutrients to sustain the microbes and the plants awhile.

All of which can be had simply by planter-finishing the bokashi, without bothering about the bags. But the bags allow me to use carbon materials that planter-finishing doesn't, for those times I'd rather not bother with composting—or for those settings in which even small-batch composting might not be possible. Plantable bags can reduce the total volume of soil needed in a container or bed, which helps when you have to buy your soil, and they can be used, with some care, in a soil-free container mix, where planter-finishing may not be possible*. And bags are portable! While I suppose I could take a bucket of ferment off-site, I really don't like the idea. Bokashi is unaesthetic at best. Small bokashi bags can be tucked discreetly into each deeper-than-usual planting hole, and they require no special handling.

Nor, apparently, much in the way of special storage. Moisture-conserving and pest-proof seems about it. A versatile, scalable, at least short-term-storable solution that can be made and kept in the same small container. Am I dreaming?

...coffee cup's empty, so I guess not. But I'm still thrilled.

Happy bucketing,

DSF


*Generally not recommended, anyway. Soil-free mixes are too light, but you can add a weight for that; the other issue is lack of complementary microbes, but mature compost or other sources are available.

Monday, August 9, 2010

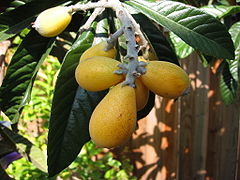
Loquats!


Loquats
!

One afternoon during loquat season, I sat out back with my prep scenario: decent music, cat for company, bag of just-picked loquats I'd hit with the hose by way of washing, big bowl of acidulated water, knife, and an empty planter for the culls and pith and stems and seeds. When I was finished, that planter was nearly full, mostly of seeds but with the odd bit of more easily compostable matter. Seemed kind of silly to carry the planter out to the apartment compost bin, and it would have overflowed a worm-tower tray, so I tossed some worms into the planter instead. Added an inch or so of soil to keep out bugs, and stuck it on top of the current pre-composting worm-food unit.

A few months later, I had a young thicket of loquats outgrowing their birthplace. A coworker mentioned a need for some saplings, so I harvested a handful for her, then more for another woman who saw me delivering the first set. That didn't go nearly enough toward thinning the planter, so I sat down the other day with a bunch of homemade container mix and seedling pots. An embarassment of riches—I ended up with three dozen individually potted loquat saplings, plus several clumps too intertwined to separate into singletons. Keeping them watered is something of a challenge! They take up much more room this way, and I don't have a single place suitable to put them all even temporarily. Some friends with land have offered to take many of them off my hands, as they don't like their privacy fence and would be happier with plants to obscure it. I just have to figure out how to keep them watered in situ. Lots of organic matter would help, but I'm running short again. Suppose I could buy some compost from the local organic garden center, but I was really trying not to do that. Of course, I didn't have three dozen trees in mind when I was figuring how much I'd need this year.

Note to self: the answer to that question is always "more." 'Nuff said.

Saturday, August 7, 2010

The Cabinet Garden


Garden cabinet image from Luxury Housing Trends, which has managed to put ideas into my head though not (yet) any new holes in my wallet

Some friends offered me a bit of space in which to garden, with very clear guidelines: their space, but my project; do not ask them to do anything with it; tomatoes. I started small, using a repurposed old wooden kitchen cabinet with the doors off to frame a side-by-side-by-side test where failure would be nothing worse than dead plants--no off-odors, no insects, nothing weird. Used mostly scrounged materials, plus bokashi and composts made in Bucketville (not enough of those, as I was trying for equal volumes and ran short of one). And because their place isn't exactly next door, I set it up to require no more than weekly attention.

Which to me means raised bed with slow-release nutrients mixed in + olla pots + covers. One quart olla per tomato plant seems to be the practical minimum, and when the days are routinely 100+, twice a week watering is a really good idea, but until the triple-digits hit I'd been averaging ten days between waterings and the plants were still producing fruits. Not, mind, as many as I'd have liked, but I've never yet had enough tomatoes, and considering the cheap soil base and inadequate organics volumes, I'd call it promising enough to be worth extending the test.

As, apparently, do my friends, who have given me permission to put in a few other plants. Including some fall tomatoes, naturally, with which I shall be planting bokashi bags made for the purpose, with ratios of 4:1 and 8:1. The 8:1 test produced earlier and more tomatoes than the compost or vermicompost with or without worms, you see; I'd like to know how much wiggle-room there is in that recipe, and whether different ratios produce results different enough to be worth noting, but mostly, I just want more tomatoes, so this time, every plant gets an olla and a bag.

...now if only I had a few more cabinets...

Monday, July 19, 2010

Don’t Try This At Home


—no, wait, I’m not your mother! Do whatever you like. But this may present a slight hazard in some situations…

Some little while ago, I tried a reclaimed bit of peat-based potting mix as an absorbent material in the bottom of a mini bokashi bucket, yet another version of the no-drain model some folks seem to prefer. Worked very well with drier materials, though it was pretty easy to overwhelm and correcting moisture levels isn’t nearly as simple without a drain. But the bokashi it produced was a dense, spongy mass held together with thick mats of mycelia, and it broke down into a usable potting medium remarkably quickly, so I had to try it again. Full-sized bucket this time, with three inches of new coir in place of the soil-less mix I didn’t have. (The stuff that comes in bricks for worm bedding, not the long-fibered kind from which planter baskets are made.)

At first, I thought it was my imagination, but it wasn’t: the coir plus EM bokashi bran plus a pot’s fresh UCG started a thermophilic composting reaction in my kitchen bucket. That first heating passed, presumably through lack of oxygen, but it restarted with each new addition of food (and air). Without a recording thermometer, I can’t be certain, but I’d guess it never went above 160 and didn’t sustain that much heat for more than a couple of hours at a time. Not much visible breaking down, but signs of fermentation are present, so I guess the heat isn’t hurting anything. And it’s even a food-grade bucket this time, so I won’t worry too much about plastic off-gassing or melting. It’s not like I store my working buckets on top of oily rags or anything. Still…

After all the years I tried hot-composting in spaces too small for the ideal three-bin set-up, with barely enough success to keep me from giving up entirely, it’s a tad bit unnerving to have things heating where I don’t really want them to.

On the other hand, this might actually be an all-in-one indoor compost--with no draining, no bugs, no worms, no off-odors, and no need to empty anything until it’s done. What’s a little fire risk compared to that?

...she asks, suddenly hoping the landfolks aren’t reading this. -G-


DSF

[no image credit, because I've lost the link. Sigh. File says "international pictogram no flame-bucket]


UPDATE:

Harvested that bucket a bit after posting this. Next time, if there is a next time, I'll have to add a thick coir layer at about the halfway point, since the material in the middle of this bucket was too wet and trending toward failure, though not quite there. But the stuff at the top was bokashi leaning toward self-composting, and the stuff at the bottom was compost with a slightly higher than normal pH. I layered it with dried leaves, giggling at the speed of heating, and then...well, this is me. I forgot to turn it! But Verne neared warp-speed in his haste to move in, and it's largely degraded past identifying contents already.

Friday, April 23, 2010

Oh, to be a homeowner!

Blogger doesn't seem to be happy, so I'll just tell local folks that the City Austin's got an interesting composter rebate program going--limited participation, conditions, go check it out. Happy composting!

http://www.cityofaustin.org/sws/green30_challenge.htm

Wednesday, March 17, 2010

There’s a hole in my bucket wallet


Blew the garden budget again, though not by so much as you might suppose; aside from a pack of tomato seedlings I couldn’t resist, all this year’s new stuff has been or will be started from seed, much of it bought locally. Or produced and collected here on-site, like the shepherd’s purse, hyacinth vine, and amaranth. New purchases included a few different sorts of tomatoes—not that I expect them all to thrive, but so I can be sure of having any, and to try the different leaves—a couple of edible curiosities (eggplants shaped like miniature pumpkins? I couldn’t resist!), and a bunch of things the standard American grocery-shopper has never heard of, plus one or two sometimes considered weeds.

Sadly, I don’t think this is the year I’ll be growing enough produce to skip the greengrocers entirely (small spaces=smallish yields, though bokashi’s helping), so I’ve chosen as usual to focus on things I can’t get there or that I can’t afford to get there.

A few durable goods went into the virtual shopping cart, including a pressure sprayer to make bokashi juice application easier. Plus, I bought a few more bags of dirt—given the quality, I don’t think it merits the label soil—though not for immediate use. I am planning to refill the planter tower and let the feral worm colony play awhile, and to set up a test in temporary vermicomposting if I can talk a particular friend into loaning me the space. Also picked up, from the same retailer and brand as the dirt, some “humus” (those quotes denoting doubt) for a few different tests.

Can’t quite bring myself to admit the total here; more than I meant to spend, but less than the season cost of a single share in a CSA in this area. And unlike with the CSA, there’s no risk I’ll end up with a box full of things I don’t eat.

It could have been much worse. High-quality chem-free compost typically makes up a fair percentage of my total cost; so far this year, I’ve bought not so much as a single quart. Between bokashi and Verne (and George), there’s been no need—though that may change once the raised beds are in. Too, I usually end up buying eighty or so quarts of potting soil every spring, to replace the worst of the potted stuff and top off the permanent planters, and until this year have always bought the best I can afford, since I know how important it is. But thanks to last fall’s cheap-as-dirt test, that hasn’t been necessary either.

So wherefore the post-shopping-spree regret? Well, there were a lot of seeds. And though the local drought is officially over, that’s more likely a temporary condition than not, so I’m determined to fit out all my containers with some form of irrigation, preferably primary though I’ll take supplementary if that’s all I can get. Which in many cases equals additional cost, for clay pots to plant with the transplants, or hoses to connect to an external reservoir, or more nested-bucket sets and wicks and hollow pipes and things to make SIPs.

On the other side of the balance sheet, Verne has more than proved himself worth the one-time investment. I don’t think I’ll ever bother with an indoor wormery again, and neither are worms my choice for a primary landfill-diversion scenario, but outdoors, he’s doing his part to maintain soil health in the towers and planters, keeping me from having to replace soil as often (or at all? Too soon to say), and since he’s enthusiastic about his business, there’s no need for me to buy any vermicompost or vermicompost tea this season, either. Or, obviously, worms.

The bokashi’s worth the cost, too. Naturally –G–. Though EM-1 and molasses (and bran, for the standard recipe) are repeated costs, it’s cheaper to buy them than finished composts, fertilizers, and “instant” plant foods. Not to mention the non-monetary benefits.

One of these seasons, I’ll stick to my budget. Really. Maybe if I just start with a higher number…? Oh, that sounds like a bad idea!

DSF

[image from Botanical Interests, which is the right company, though mine were purchased from a local retailer]

Sunday, March 7, 2010

Pardon me, can you spare some trash?


It's a temporary situation, but still extremely odd: I have a garbage shortage! Haven't been hauling my workplace organics home, as I'm just not that dedicated to the cause, so bokashi is from household stuff only. Add in a couple of meals out, plus a single-use press cup for those mornings when I'm running late (which would be all of them -G-) that means the grounds go with me, and the in-house organic's down to half a gallon or so per week. And then add in the fruit flies, I think from some too-cheap-to-pass-by citrus, and the situation becomes dire indeed.

The infested organics went into a salvage bucket--a planter, really, for the necessary bottom drainage, with a thick layer of soil, then lots of extra EM bokashi "bran" and the all-too-living bokashi, topped with three inches of soil and a weight, and stuck under the deck to rest for at least the next couple of months. Probably longer than necessary to get rid of the short-lived flying pests, but I'd rather not take chances.

Half a gallon of bokashi isn't enough to feed the en-towered iterations of Verne, let alone begin to replace the amendments I've been using in the spring gardening, and there are new garden spaces this year, so I'll need more still. Barring raiding the neighbors bins (eww!), whatever am I to do?

1) Change the menu for Verne's next meal. UCG and dried leaves, spritzed with AEM, should keep the wriggle happy--and it doesn't have to be at my standard 1:1 ratio, either. The reason I've been feeding bokashi to worms is to convert the fermented "waste" to something more useful given my particular needs, but that's not the only way to acquire that useful substance!

2) Substitute weeds for kitchen waste. Yes, that's what I did with the failed 100 degree bucket, but with temperatures not yet in the 70s, failure is unlikely. If I want a bucket of wettish fermented vegetable matter, cleavers past their use-by date and random thistles should do for a base.

3) Use the cured bokashi as a compost accelerator. That is, mix a larger volume of dried leaves and fresh garden waste, or some other combination of greens and browns, in the approved giant pile or bin, and stir in my few scant cups of ferment to kick-start the heating reaction. It's a little soon in the year to try the black plastic planter routine, but I do have all the supplies, and again, the 1:1 ratio I use for bokashi and dried leaves is a convenient guide, not a rule--if the goal is compost, perhaps 10:10:1 green/brown/fermented might do as well. Or 8:15:1, even.

4) Hit the coffeeshops. UCG is a lovely "green," despite its undeniably brown color, and is as well the only non-carbon source I've yet found to use as a carrier for microbes. Too, coffeeshops are used to gardeners asking for their UCG, so it's a little less odd than asking the neighborhood cafe if they wouldn't mind setting aside their food waste for me. Though, really, if this goes on...


DSF

[empty yellow bucket image from Doc's Frugal World, since the link seems to have vanished from the earlier post.]

Wednesday, February 24, 2010

Tales from the Bucket Bag: This Bag Will Self-Destruct In...


So, that’d be a No on the compostable plastics for by-the-bag bokashi finishing. Or at least, a Not Suited for my particular situation. Other people may have different needs, so here’s the brief:

The compostable bags most accessible around here (all the same brand pictured above) do not respond well to getting wet--so you can’t store them where they may get rained on, and even dew is a concern. Integrity retained less than three weeks if exposed to weather, regardless of contents. For me, that’s not really long enough. And of course, if the bokashi comes into contact with the bag...well, even the retailers say they’re not recommended for use with high-nitrogen, high-moisture compostables:

We strongly recommend that wet grass clippings be left on the lawn, where the clippings will quickly biodegrade and add nutrient value to your lawn. Placing wet grass clippings in either a paper bag or a BioBag can stimulate bag decomposition within three or four days.


I’m not so sure about the fragility of heavy paper leaf and lawn bags, but these writers are if anything being conservative with their estimates when it comes to their own product. In some case, the bags just melt away into nothing; rather cool, but not of any particular use.

But if the goal isn’t to have a discrete (and discreet) bokashi-and-leaf unit, these can be incorporated into other landfill-alternative scenarios. Bentley’s had nice results feeding filled bags to his worms, and while BSFL don’t seem inclined to chew through plastic no matter its source-material, once it breaks down enough to allow access, grubs will quickly dispose of the whole thing.

DSF

Monday, February 22, 2010

It's In the Bag


Saturday morning's garden chore was a good deal messier than I'd expected--in part from lack of practice and weather conditions, but also lack of forethought. Next time will be better, and there will certainly be a next time. This was notable largely for being my first garden bag.

Since posting my intent to try this, I've acquired two small testing spaces to plant them in, one I'll be administering, and one that will adopted by someone else after I've started it. Haven't decided yet whether I'll be trying the same mix and technique in both or not, but it was time to decant a curing bucket and I had all the necessary supplies, so I figured I might as well mix up a bag and worry about the details later.

Problem the first: declaring a top. The paper leaf and lawn bags are designed to stand on their narrow bottom for ease of filling, but to use as a garden, you would logically set it on its side. If I wanted a thick soil layer in the top of the bag once it was placed, I'd have to take care how the bag was filled, stored, and transported. After a few minutes of fiddling, I decided it wasn’t going to happen that day; for this bag, I’d do limited soil mixed in with the leaves and bokashi, and add more soil at planting-time. Which meant there was no need to declare a top immediately. (Phew!)

Problem the second: "dried" leaves. Our drought has officially been declared at an end--temporarily, if you ask me, but that's irrelevant. What matters is that, while it wasn't actually raining Saturday, the sky'd been doing what my grandparents would call "spritzing" off and on the past few days. Some of my leaves were damp enough to make kitchen gloves a better option than the ones made for the garden. Not sure how much excess moisture that added, but paper's breathable enough that it won't go anaerobic; my major concern was that the soggy, relatively heavy, acidic leaf-mats, together with the wettish bokashi, might damage the bag’s integrity too much for me to able to neatly move it later. Guess we'll see.

Problem the third: vermiguilt 2010. A garden bag needs soil; I decided this particular bag needed to start with about a gallon of what some gardeners call "living soil," soil with microbes and perhaps some macro-digesters, plus organic foods for same in all stages of decomposition, and the odd inorganic for bulk and drainage. Procuring this was simple: The planter stack is now shorter by one layer, its contents gone into the bag. Worms and all. While more caring and reasonable vermi-people might be willing to separate out the worms from the food/bedding/humus/soil/whatever, I am not. In the first place, I'm lazy. In the second, garlic-scented worms? Okay, so they're not so repellent as BSFL, I still have no desire to handle the things. And in the third, it's not like they're scarce around here, not these days. Verne's done so very much colonizing I recently accused him of having gone feral. (Was he ever domesticated? Sorry, not on point.) He wriggles is way into any welcoming environment, and there's at least a chance the smarter ones might manage to survive the bag, if they're careful, maybe. Then again, maybe not. Fresh-cured bokashi is acidic, plus there's an almost inevitable heating reaction when mixing cured bokashi and dried leaves. Not sure about wet dried leaves, but if moisture content's the only retarding factor, the reaction should occur once sufficient evaporation has taken place. The bag's not tight-packed, so the reaction will fizzle--nowhere near enough dirt in there to add significantly to the pressure--but will it end in time to keep the worms from cooking? No idea, hence the guilt. But whether or not this particular set of Verne-aggregates thrives, I'm confident more will want to move in once the contents have cooked awhile.

Which brings me to problem the fourth: storage. Ideally, a garden bag might be assembled in place, wedged into a bed-box and left to cure. But that's not yet possible for me, as the raised-bed dimensions have not been marked out in either testing space, nor the edging materials acquired. Leaf and lawn bags are too identifiable to leave them in plain sight, since helpful neighbors might cart them down to street-level to be hauled away, or other greedy gardeners take them to add to their own compost piles. I had thought to just stick this bag beneath the porch, but that’s perhaps not the best option with our imminent inclement weather--better it be under a tarp and on something that will shed water, I think. And, um, maybe a wee bit insulated for the worms’ and microbes’ health? The curse of the groundhog is upon us here in Austin, you know...

Might not have been the best time to start this bag. But, hey, I'll learn something from the experience! Even negative results can be helpful, and about the worst that'll happen here is that I'll have to rebag the bag.

DSF

--image from the brilliantly named GardenSnob

Monday, January 18, 2010

After the Bucket: the Bag


Could be worse: at least it's not novelty saltshakers. But I am currently collecting dried leaves. Not, I hasten to say, for pressing! This is not a new hobby, nor am I planning on stockpiling the things for some eventual later use. Not even trying to gather every bag generated within an X-block radius during time-span Y.

I'm collecting leaves by the bag. Different leaves from the oak/pecan/elm/mulberry mix I sweep too infrequently from my patio; different bags than the paper leaf-and-lawn ones approved by the city. See, I'm trying to make sure some of my particular post-bucket techniques are not specific to my particular EC. And wondering whether some leaf mixes or bag types might produce better results. Eventually, I suppose, I'll have to break down and buy a few plastic bags of various sorts (black v. white v. clear; compostable/degradable v. industrial strength), but I figured I'd start with what my neighbors were actually using.

The clear plastic bags have a few benefits and a couple of disadvantages, so far:

+ If properly sealed with adequate space for expansion, plastic bags do serve to keep out pests, unlike the paper leaf and lawn bags which must be protected against scavengers.

- Plastic bags prevent volunteer macro-digesters from joining the fun. (Sow bugs, composting worms, earthworms, etc.)

- If inadequate space for expansion is provided, plastic bags can split open and spread material rather farther than one might expect, even before the scavengers get into the act. (Splitting is an issue with planter-finishing, as well. If sealing, remember to leave some slack!)

+ Properly sealed plastic bags hold moisture, so assuming a properly moistened mix went into the bag, no additional water need be added. Also, temperature variance within the bag increases condensation and re-absorption, which seems to speed the composting process.

- If too much moisture is present, the microbes cannot work to full efficiency, and the mix may go anaerobic--in the negative sense. As in, rot and stink.

+ Plastic bags withstand wet weather better than paper, and can be easily moved during the process or once it is complete.

- Some plastics may not degrade, and dirty plastic garbage-sized bags are difficult to recycle.

And one that may be either an advantage or a disadvantage, depending on the climate, situation, and desired end results:

Plastics can absorb and retain heat, and reflect or focus light.

I don't know, yet, how that will affect this particular post-bucket technique. Will a black plastic bag work as well as a black plastic planter? Might it work too well, and melt? Would the contents of a clear plastic bag placed in full sun solarize rather than compost? Etc. It's winter here, despite the day's garden-perfect forecast But I expect to be playing with bags for some time yet, especially though not solely in combination with the disposable buckets. At some point, I may even manage to try the long-delayed "office bokashi" test series with a commercial soil inoculant and shredded paper in place of dried leaves!

...novelty salt shakers might be simpler. But not nearly so useful. -G-

DSF

Friday, August 21, 2009

Can you smell that?


It’s time, I think, to talk about not sailing ships and sealing wax but scents. Aromas, smells, stenches, whatever. Time to talk about odor.

The bokashi retailers persist in saying that bokashi doesn’t smell. What they mean is that it doesn’t stink, and/or that odor does not escape the container. Dried EM bokashi bran has a very faint odor, not at all unpleasant unless you find vinegar, molasses, and bran disagreeable. Fresh, it smells like uncooked bran muffins with a hint of kombucha or cider vinegar. Again, not unpleasant unless you’re one of those people who don’t like the smell of vinegar. Other carriers will have different smells, but dried, they’re all discreet enough, and fresh, the smell can be a bit strange, but generally clean and non-clinging, nothing to bother anyone.

A healthy bokashi bucket smells more strongly of vinegar, often with undertones of the foods in the bucket--that scent is not perceptible outside the bucket, assuming the bucket is airtight and drained often, and it should not be overpowering when the bucket is open if you’ve drained the reservoir frequently and refrained from adding spoiled (slimy, moldy) foods to the mix.

If you’re adding something strongly scented, like smoked meats or shellfish, expect to smell that each time you open the bucket for the next three or four days. If that’s a real problem, you can ferment that item separately, or store any newly generated compostables for a couple of days to let the bucket fermentation progress. Adding much more EM bokashi bran than the retailers recommend helps, too; I often completely cover odorous additions with bran.

Bokashi juice, that microbe-rich leachate, smells like vinegar, but not at all the sort you’d be willing to put on a salad. The character depends on what you’ve put in the bucket and how long ago, as well as how long ago you last drained the reservoir; I aim for twice a week (though I don’t often manage it), as I find that at that interval the scent is more cider vinegar and less old-gym-sock pickle. Diluted as recommended, the scent is not perceptible even when using in an enclosed space, but every care should be taken to avoid spilling the full-strength juice.

An undrained bucket smells like a dumpster after a week in the Texas summer sun. Adding absorbent materials to the bottom of a bucket may help in the short-term, but once the bottom’s too wet for EM, the bucket will quickly begin to stink.

Cured bokashi smells fermented. There should be no competing scent once the bucket is finished. Turning out a cured bucket for finishing is best done outside, or at least in a well-ventilated space, as the odor does linger awhile. The soil-based finishing methods suppress odor quite well so long as they aren’t too wet, and an enclosed composter will largely contain smells; other methods may allow some odor to escape, so are best done outdoors and away from doors and windows.

Like bokashi retailers, composter retailers persist in saying that compost doesn’t smell. Like the bokashi retailers, what they mean is that, properly done, it doesn’t stink. Or, depending on the containment unit, that no smell escapes. Ditto the vermicomposter retailers. None of them are scentless. To me, a healthy wormery smells like a forest in autumn after rain, not at all an unpleasant scent, but a bucket wormery too small to handle all my household-generated organics (barring those not eligible for standard-practice residential vermicomposting) made my whole small apartment smell like that damp forest. Thanks, but no. An enclosed wormery, like an airtight bucket, emits no odor save when open, so were the opening done in a well-ventilated area, that would be a possibility, but keeping a standard-model in my kitchen is not something I’d be willing to try again.

Compost or vermicompost in progress smells like its components. Around here, that’s usually dried leaves and cured bokashi. Not unpleasant, but not something you’d wear for perfume or use for an indoor air freshener. Covers or enclosures keep that odor from becoming a problem, though if you were to get right next to a unit and breathe deeply, you might be able to perceive it. And in an unventilated space, it would eventually become strong enough to notice. Of course, aerobic composting and vermicomposting both work better with proper ventilation anyway. Wormeries especially need airflow lest they go anaerobic, in which case they stop smelling like loam-and-leaves and start to stink like unemptied trash cans.

Finished bokashi compost smells like compost. There is no food or vinegar odor still present. The same for vermicompost. Bokashi used as sub-surface fertilizer will be quickly used except for the more durable materials (bone, eggshell, etc.), and have no individual scent by the end of a growing season.

(A)EM smells like molasses and vinegar, sweeter or sharper depending on its pH or age. Sprayed full-strength or in strong dilution onto surfaces, the smell remains perceptible for some time after drying. Which can make for an odd mix with other household cleansers!

Failed bokashi smells like unemptied garbage. Drowned compost often the same, or like backed-up sewers. [Yecch!] Dead vermicompost, too, is an assault to the nose, often including some element of eau du corpse. In other words, failure stinks!

---But no one needs me to tell them that.


DSF

Friday, June 19, 2009

Tales from the Bucket: Stirred but not shaken


After dividing up a bucket of cured bokashi into planters for worm-food, I had a bit left over; homeless bokashi. And it wasn't long before that I'd first read the post about direct-to-bucket composting, so an impromptu test commenced: I tossed a couple of inches of dirt on top of the remaining cured bokashi and stuck the lid on.

Then opened it a couple of days longer and stirred. And again a few days after that.

This stirring in no way disturbed the BSFL that appeared as if by magic to devour the ferment despite its earthen blanket. While a heavy soil layer is supposed to control BSFL populations, it does so by preventing sufficient crawl-off for further generations. The ever-hungry youth don't seem bothered at all, and are apparently happy enough to give off whatever chemical signature encourages egg-layers to seek entrance.

While this bucket had been full of curing bokashi, I'd kept a weight on the lid expressly to prevent such entrance, but since the original post suggested leaving the bucket open as needed, I didn't weight this one. Should I repeat this test, I think I will--as it is, while the matter is certainly disappearing and the soil is visibly refreshed, I can't say if there's any actual composting going on at all. Eating and digesting, check.

Appropriately enough for bokashi, this particular bucket started life as a container for pickles. If I needed another BSFL colony, I think I'd name him Martin. -G-


DSF

Tuesday, June 9, 2009

Tales from the Bucket: Eureka!


The last batch isn’t compost yet. Not mature nor fully homogenous, I mean. But it’s at the stage some composter-retailers refer to as “mulch”. Not bad for just over two weeks! And it’s clearly going to finish. So I can say, finally:

It works.

“It” is what I started this blog-project to find: a way to--without soil--compost small volumes of bokashi. This particular batch is a mix of cured bokashi and dried leaves, without a single bit of soil save whatever was swept in with the patio cleaning.* And it’s not the first batch. In different volumes and different though similar containers, I have successively, successfully, composted dried leaves and bokashi. Like the guy in the tub said. I have found it.

At least, I have found a process that works for me. In Texas, in near-summer heat. For those not so blessed, I have no idea.

Beyond an approximately equal volume of cured bokashi and dried leaves, plus some source of soil microbes (e.g. A handful of mature compost or good garden soil), this needs:

1. A black plastic container with

2. Bottom drainage

3. A weight and cover

4. Placement in full sun

5. Regular stirring

That’s all that’s necessary. The sun-heated black plastic helps to mimic the conditions of a traditional large pile, with the weight standing in for the missing volume**; the cover keeps out undesirables of whatever size or form; and the stirring introduces the oxygen aerobic microbes need.

So very simple. I should have figured it out long since! But I kept sticking my test containers under the porch, out of the way--and in deep shade. Or behind planters, to keep them out of sight, which also meant out of the sun. And though I did try several different containers, none were black plastic, as I don’t have much of that.

Took me a while, but I got it at last. Yes, it is possible to compost bokashi without a full-size composter or in-ground trench, with soil or without. And as an added benefit, it appears this small-batch composting uses less water--I’ve added no water at all to any of the one-gallon sets, and rarely to the six. How cool is that? Water-conserving composting!

It’s still not the perfect urban solution, at least not for all urbs. Not an indoor solution at all (vermicomposting bokashi may be, if you get past the heating). Not a solution for the high-rise dweller who sees no leaves from season to season. Nor for the snow-coast dweller who takes on faith all our claims of the sun’s heat.

But it works for me! Dried leaves are an extremely renewable resource around here, available year-round and absolutely free, so I’ll be limited in my compost production only by available sunny space and available cured bokashi.

Wow. I found the answer--or an answer, anyway--that I set out to find. Does this mean I’m finished? But I did find some more questions along the way...

I am keeping Trey, as vermicomposting conveys additional benefits. And, too, I kind of like him. Outdoors. Might even keep the whole set, but I expect Vernopolis shall soon be joined by large black plastic planters stacked one atop the next, and the neighbors will have new evidence of my insanity as I cackle over my pure leafy bokashi compost. “It’s gold! Gold, I tell’s ya!”

Maybe they’ll just think I’m drunk. You know, all that fermenting.

Compost!

Cackling already,

DSF

*Hey, I’ve seen earthworms up there, not to mention snails and geckos. Trust me, there are soil microbes around.

**I think. Have I mentioned that I’m not a scientist -G-


image from: http://www.math.nyu.edu/~crorres/Archimedes/Crown/Vitruvius.html

Sunday, June 7, 2009

Direct-to-Bucket Soil-Based Composting?


Another entry into the balcony compost sweepstakes. (Sorry, no monetary prize, just all the compost you can produce. -G-)

I haven’t tried this yet. Between the site name and the mention of BSFs, I’m assuming the writer lives and practices this odd form of composting someplace warm. And it might well be feasible someplace sufficiently warm and dry, though I imagine there’s a fair risk of spoilage even with frequent turning. Vegetarian-only, naturally.

I have tried to compost bokashi in soil without bottom drainage, and the result was not appealing, but I didn’t try weekly turning. Hmm...

Tuesday, April 21, 2009

Worms eat my bokashi!


Trey’s still doing well. This outdoor planter-topped flowthrough wormery is the first of my experiments in feeding worms cured bokashi, though others (including Bentley, naturally) have done it successfully. I knew from reading about those other folks that material heating would be a concern--and it’s one I haven’t yet solved for indoor use! But outside, so far, allowing the heating process to take place in a shelf below the soil layer and above the one where worms are currently eating seems to be working.

In fact, Trey’s going through the bokashi faster than I’d expected. This is a very good thing, as I’m always looking for more finished material, and particularly for some way to convert cured bokashi into matter I can use for top-dressing container plants. Unfortunately, Trey is too small a unit to handle additions of more than about a gallon of well-cured bokashi at a time (plus dried leaves); no finished calculations yet on bucket-to-worm bin volumes, but...I’ve got to get that second tower wormery assembled this week.

The new tower will be taller; I need more layers than Trey has, and a taller tower will get more sun on top--the urban-gardener thing again, I’m trying to use spaces that get only such sun as can angle between buildings. Shaded lower layers should help with the heat issue, too. The weather-folk say it may hit 90 degrees today, thus beginning our ramp-up to summer; heat is a concern even without thermophilic reactions.

After our recent and much-needed rain, Trey developed an outbreak of gnats, but they’re already fading with the heat; the Spanish moss I’m using for mulch and wadding is more discouragement than prevention, and not even that when wet. Which is fine for an outdoor wormery, but not at all acceptable inside! So an indoor tower will have to be constructed with no least gaps at all between layers. That’s fine; I’d prefer a unit that didn’t allow the worms too many chances to go wandering.

(Just now, there’s a lightweight drawstring bag over Verne, to allow airflow through the ventilation holes while, hopefully, containing any kamikaze worm. Not that I’ve got any of those--Verne seems willing enough to remain beneath the newspaper cover layer--but in case. I really don’t like having to trust worms’ free will to keep the worms inside the bin. Not in my kitchen!)

Next on the agenda for Verne et familae? A few different “recipes.” I know how much food a wormery can be expected to handle at optimum: half the worm-weight per day. But Trey’s food is made up of cured bokashi and dried leaves, which means that the food is composting to some degree even without the aid of the worms. What’s the ideal ratio of leaves to bokashi for happy worms? Will shredded household paper get bokashi past the heating stage as successfully, break down as quickly, sustain the worms? Would old bills and fast-food wrappers plus bokashi heat and cool without producing the dreaded off odors? And what about those worm-verboten items?

Yes, it has come to this: I’m a personal chef for worms. Not too surprising, I suppose, after months of feeding buckets, and somehow, I can’t bring myself to be upset by it; all the gorgeous produce I’ve been harvesting must be mellowing my mood. And the promise of more...

DSF

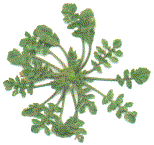
Trey is topped with a little-cultivated plant called Shepherd’s Purse, as in the photo above

Sunday, March 22, 2009

The Hundred Dollar Bucket


Well, it's not the Sixty-Four Dollar Tomato, but The Bokashi Experiment has now cost me $100 out of pocket. At least it has if you count the wormeries. (Yes, that's plural now.) Took me about six months, and I'm not really sure how to calculate the return on my investment--from a purely monetary standpoint? Environmental impact? Presumed nutritional benefits, maybe?

Hey, I learned a new way to bore folks at cocktail parties! Though I don't think I'd have spent $100 on that.

I can at least estimate the quantities of compost produced and put a price on that, but how should I count plant-food applied to the landscaping, when I neither measured it nor substituted it for some retail product? Certainly it improved the area's appearance, but what value do I put on improved soil and non-food plant quality (in land I inhabit and tend but do not own)? For that matter, what about possible improvements to crops? Since I don't analyze the nutrients in my lettuce, there's no real way to quantify the difference between the heads I harvested in past years and this, though I have been growing more lately, since it's been doing well...

Bokashi in its various forms certainly hasn't saved me any money this spring: the garden's going so well, I couldn't resist the chance to expand. So I bought more plants, more pots, mulch, and even a bit of retail compost, after using all the composts and improved soils I had on hand. Had I not had all that lovely bokashi'd material, I'd have remained within my usual spring budget, instead of exceeding it by nearly 100%! I suppose it's possible the garden will produce so much I'll have no need to buy produce all summer, but that's never happened yet.

But, while the gardening budget is inarguably broken, the bokashi experiment's outlay is a little more questionable--not much of that money was really spent on bokashi per se. As far as EM goes, I'm still working on that original purchase. That $100 mark includes one liter bottle of EM-1, 25 lbs of wheat bran, and a bottle of molasses, which is what I started with. There have been multiple small purchases of hardware: spigots and potato mashers to make bokashi bucket kits, sieves and screens and mesh to line buckets for Repulsive and Verne. And worms, that I'm testing for a possible wholly indoor complete composting solution, plus a low-maintenance high-reward planter-topped flowthrough wormery. Everything else--buckets, plastic wrap, plant pots, bottles, bags, etc.--has been recycled, scrounged, repurposed, borrowed or improvised, without cash outlay.

Have I made $100 worth of compost? Probably not yet. And as this apartment doesn't have a separate trash-hauling fee, I certainly haven't saved $100 in pay-as-you-throw charges! The landfolks' chickens didn't eat $100 worth of BSFL, either, before Repulsive's temporary end...

I don't regret a single penny so far; I've certainly had more than $100 worth of entertainment from this! More compost and better soil means I do more, and more productive, gardening--good exercise, stress-relief, and healthy food. Who can put a price on that?

Oh, and no trash-stink if I forget to take out the bag? Definitely worth something!

Tuesday, March 10, 2009

The Balcony Bosque


I’ve had good luck composting cured bokashi in my small bit of unshared outdoor space, but it occurred to me that my space isn’t exactly standard-issue--even in Austin, not everyone chooses to build a balcony around a tree rather than cut it down. (Though it does seem to be more common here than elsewhere.) And the tree’s not the only bit of nature to be found just outside my door; for most of the year I have geckos and anole, the occasional uninvited snail trying to infest my planters, squirrels using the fence as a pathway, and the much-cursed possums and raccoons at night. And birds, of course, though I try to discourage them lest the household feline decide to sharpen her hunting skills.

Yes, it’s an elevated porch, but not exactly the barren swept-concrete patio some urban dwellers consider themselves lucky to have!

And judging by the compost time-trial that seems never to have been posted here, that difference matters.

For anyone who’s interested, here’s the recap:

Some time back, I tried my standard trenchless compost method in various containers, and determined that holes on the bottom are more important than any other container variable. Loosely covered is better than either sealed-top or completely uncovered, at least in my area, but any will work assuming there are holes in the bottom. Low and wide is better than tall and narrow. Metal, wood, hard plastic, ceramic, and heavy paper or cardboard all work (light paper breaks down too quickly, and then you get pests; heavy paper with no holes works to some degree, sometimes, but the conversion happens much faster once the bottom tears). Crockery at the bottom or lack of same doesn’t seem to matter much. But a container with no holes at the bottom will attract flies and/or other pests via any top-opening, will grow stinky if enclosed, and will convert to compost very slowly if at all.

Holes in the bottom will allow some gravity-pulled liquid to escape, which is good, but I decided the major advantage might well be to allow something from the ground to enter. Say, macro-digesters without wings?

When I thought to check, I found a few sow-bugs in an unfinished bucket (along with a suspiciously fat gecko -G-), and decided that might well be part of it. Soil-borne bacteria are another possibility--though that sounds odd considering the balcony is off the ground, it’s not too far off, and with a tree growing through the middle of it, dried leaves are common enough. And dried leaves that have been rained on have fairly high concentrations of rhodobacters etc. Not to mention whatever unseen contributions the wildlife may leave.

So I did another test: two trenchless buckets, one in contact with soil, the other on a bit of concrete walkway. (Got to love a landlord who lets you do such things! But it was the very end of the walkway, a part no one really uses but me.) The one on the ground converted faster than I’d expected--I should have done a three-bucket test, with the third on the balcony, but only had enough cured bokashi for two, sorry. The one on concrete...

Well, it there was no odor, thanks to the heavy soil-layer on top and bottom, but the raccoons found it eventually just the same. Cleaning up after them, I didn’t find as much uncomposted matter as I’d feared, though there were some sticky clumps I didn’t care to examine too closely. What I did find were flies in various stages. Earwigs. One scuttling beetle. And, when I moved the bucket, three earthworms that had bravely made their way across the concrete.

I assume that, had I left the container there, Nature’s clean-up crew would have taken care of it for me. But, earthworms notwithstanding, I decided it was time to declare that test at an end. Time to compost in contact with soil, in cool temperatures: five weeks. On the balcony with its varied lifeforms: about seven in that same temperature range. And on concrete? It was the end of week nine when the coons decided to help out. (I wonder what kept them! Thinking about it, they arrived after a relatively heavy rain...)

The obvious follow-up test probably would be trenchless compost buckets on upper-story outdoor spaces, some sterile and others as bosky as my balcony. But that will have to wait until I find someone willing to have a bucket full of dirt and ferment on their porch or balcony for an unspecified period of time.


In the meantime, I think I shall go build a leaf-pile on the balcony before the forecast precipitation. Maybe I can lure some earthworms up there!

DSF

(image from Small Planet Photography, for no reason except that I like it)